Find me on Instagram


The new blog is live - please update your links!
After a number of years of not being able to update the current blog platform, I have moved to a new format. Considering the years worth of work involved, migrating the old content into the new format is no small or easy task. For now, the old blog stays put as is but I am moving the old content, as well as removing a lot of irrelevant or outdated posts.
While I clean up the older posts, the new blog has launched here. Please visit either otterine.com or return to the old blog (where you are right now) for future visits.
Anytime you want to visit this old blog, there is a link in the top menu of the new blog to lead you back here. Anytime you want to visit the new blog, just visit otterine.com directly or click the link next to the logo at the top of the side bar.
I expect some growing pains with broken links here and there as I move old content to the new blog (this will be in my spare time, so glacial pace). Thank you for the support over the years!
Popular tutorials
UPDATE 2024 -- this post is under construction so many links are broken right now. Please check back later.
Here is a recap post of the more popular tutorials I've done. I thought this might make it easier to find than searching each time, though this is definitely not a complete list of all the tips and tricks on my blog. Unfortunately, many suppliers from my older posts are either no longer in business or the links have gone dead.
--------------------
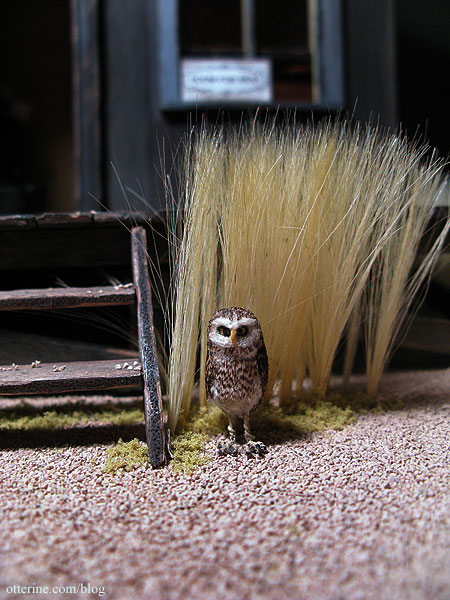
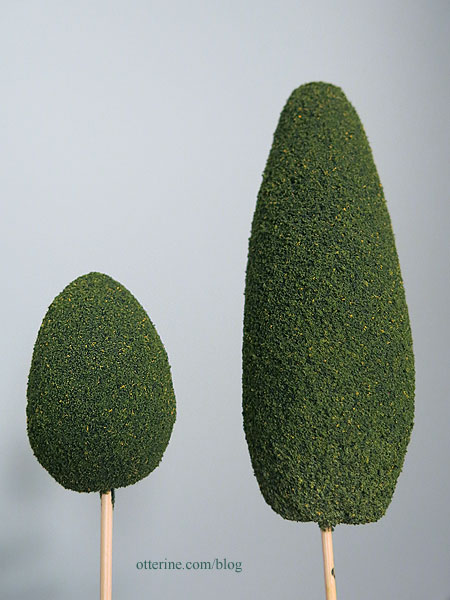
Homemade shrubbery - tutorial available in my etsy shop
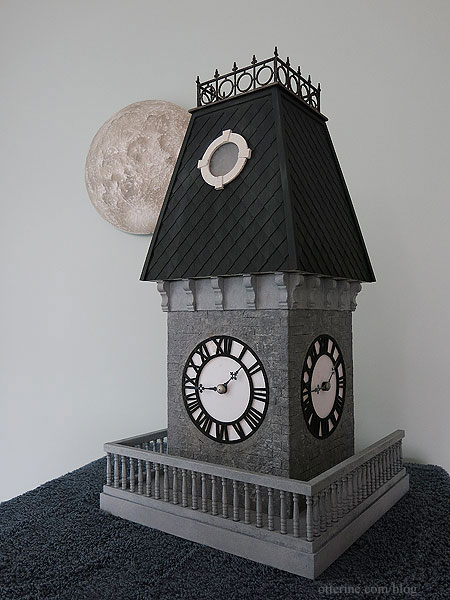
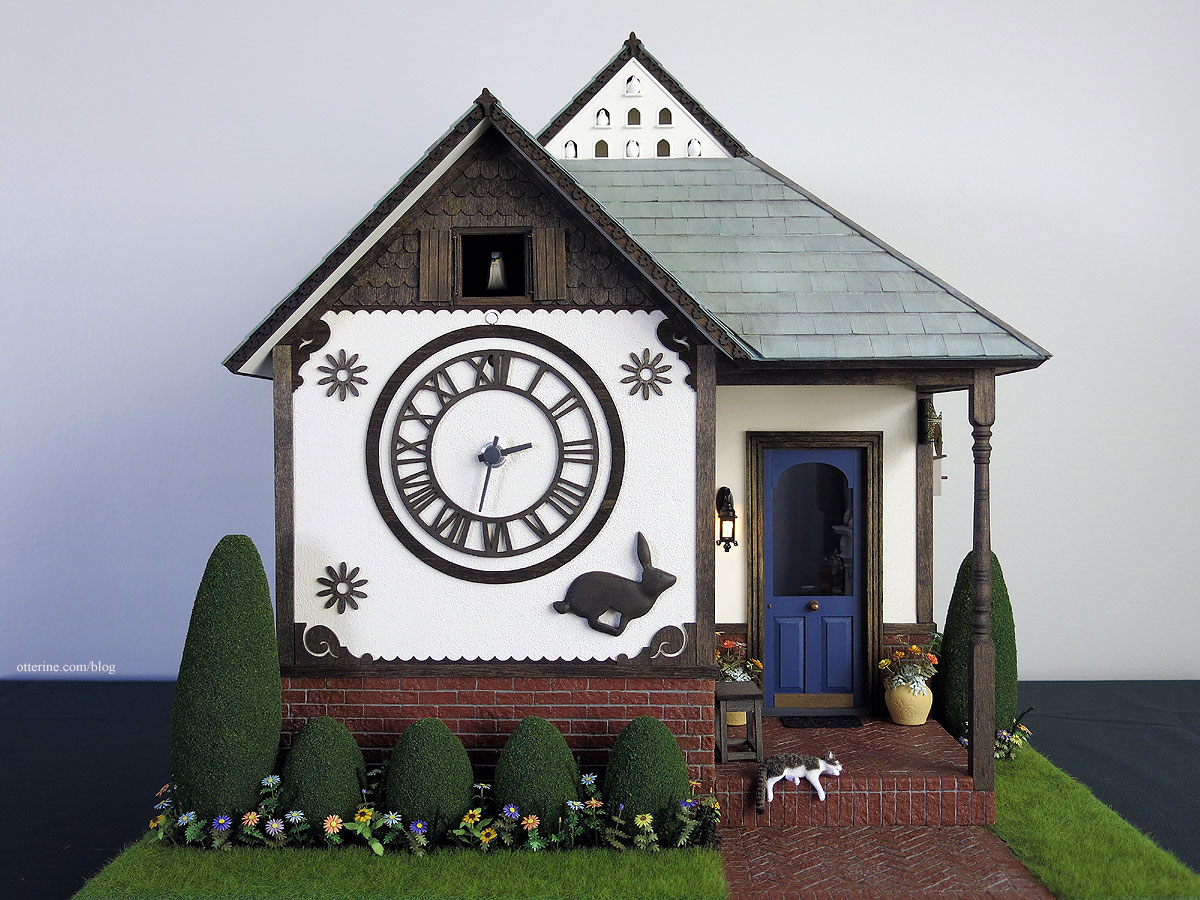
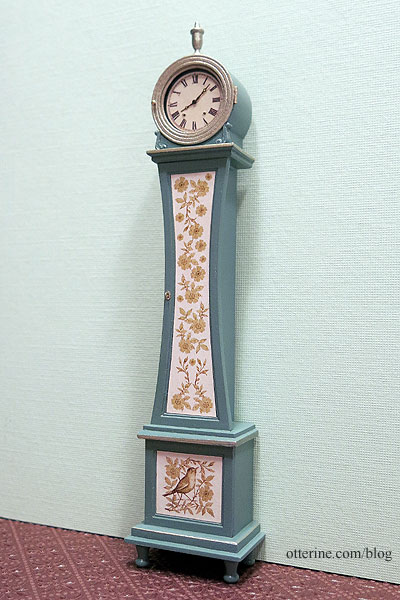
Miss Lydia Pickett Cottage Clock in 1:12 scale (the process ends here, but you can click back through the links at the beginning of each post to see the full process)
Setting hinges - Watson Mill
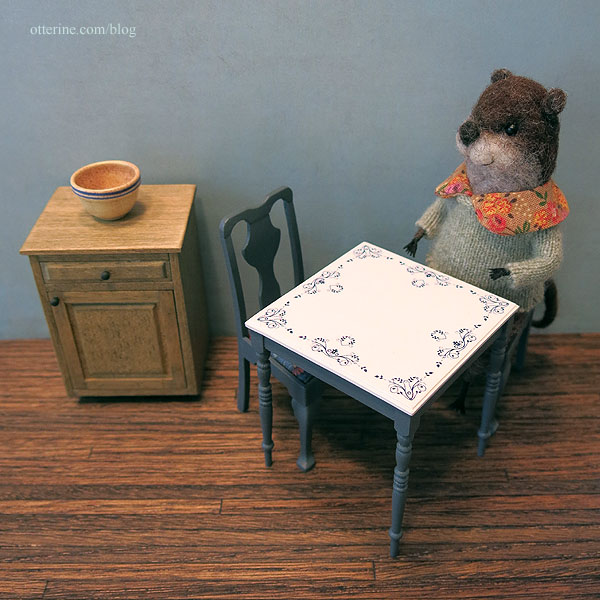
Enamel tabletop - Watson Mill
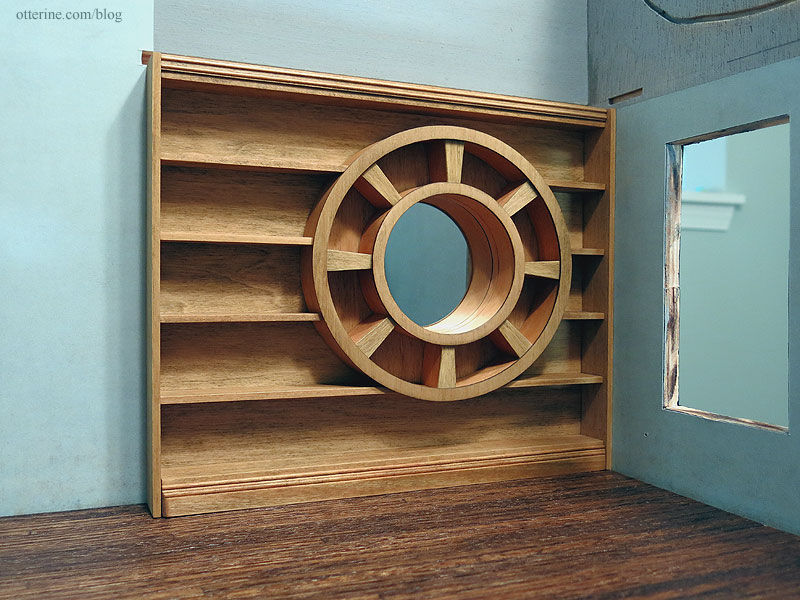
Circle library - Watson Mill (the process ends here, but you can click back through the links at the beginning of each post to see the full process)
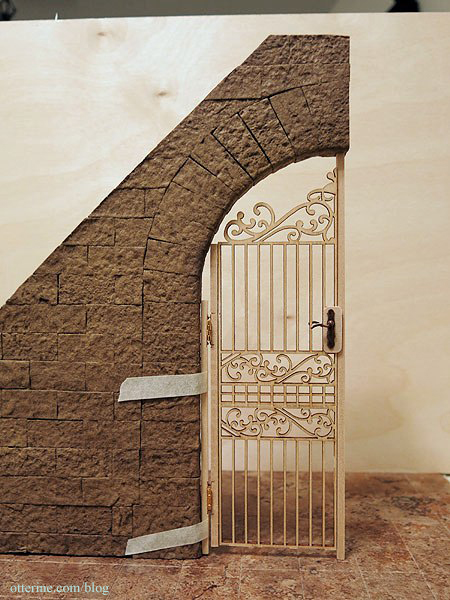
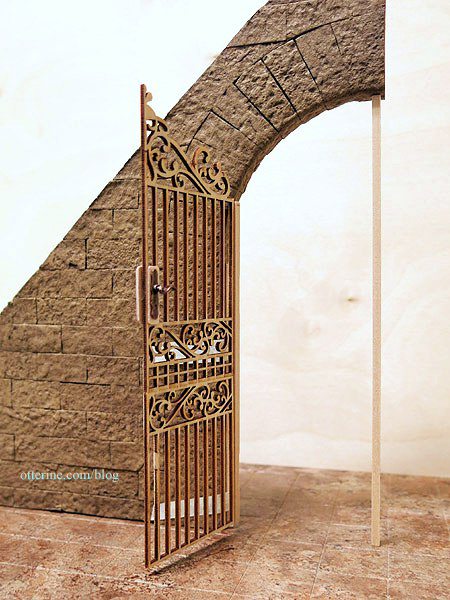
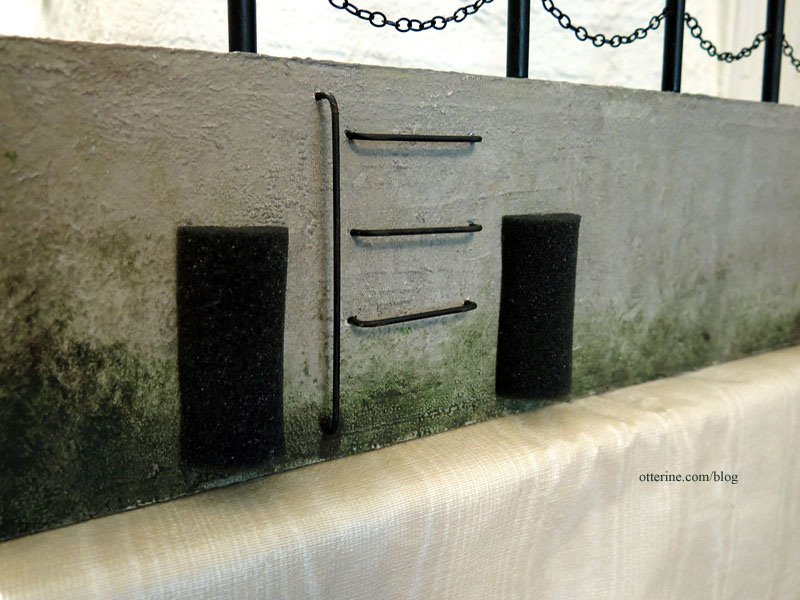
Security gate - The Brownstone (work in progress)
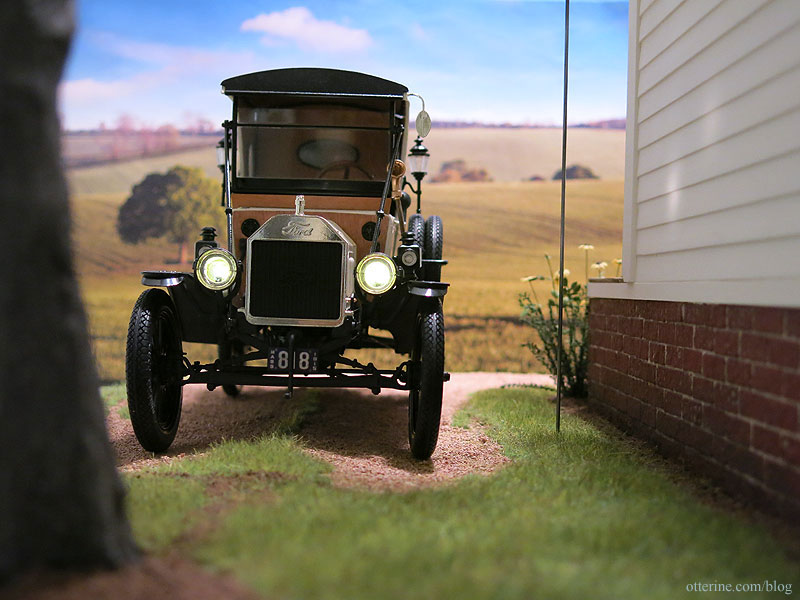
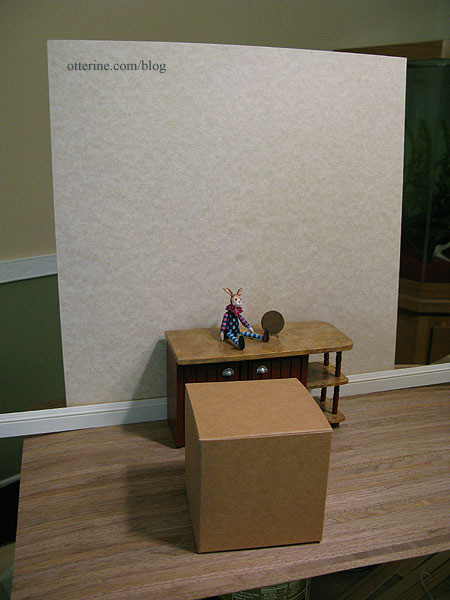
Photographing minis without a room box
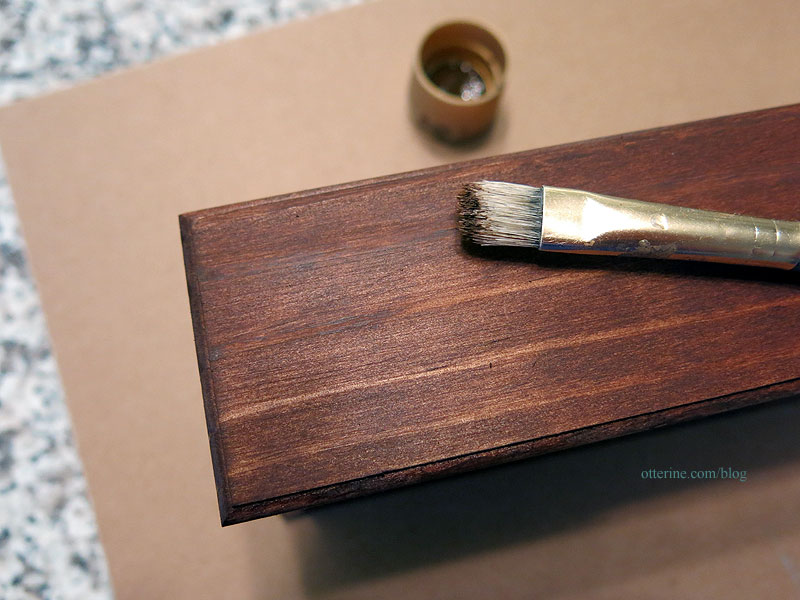
Staining and painting unfinished/bare wood furnishings - covering glue marks and uneven grain
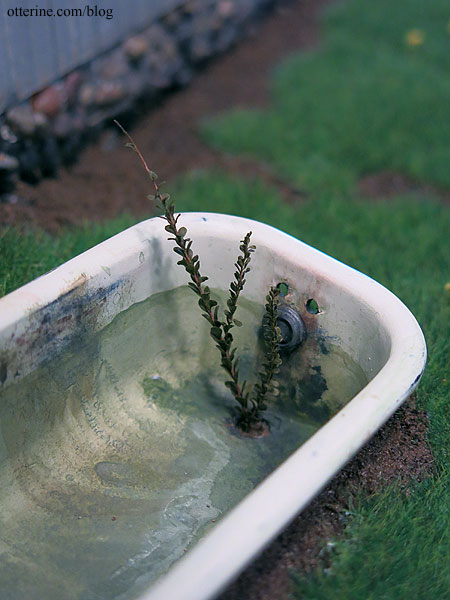
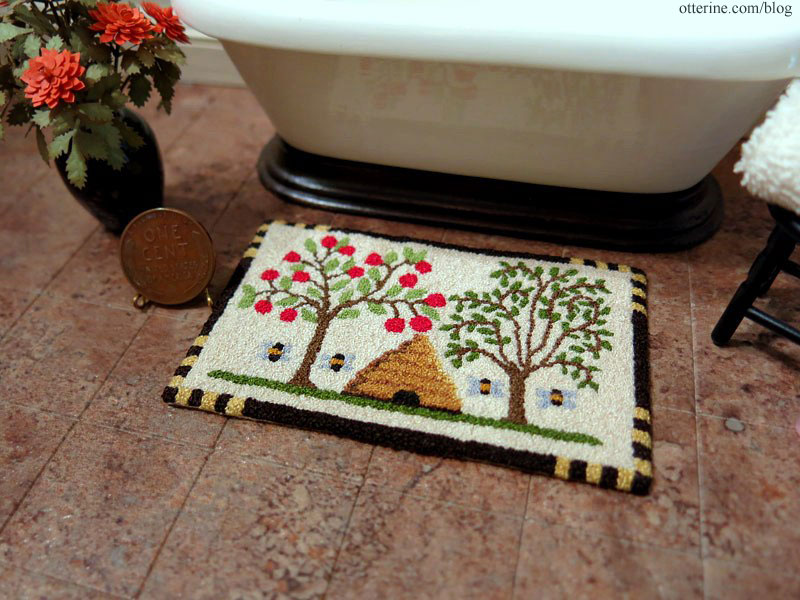
Abandoned bathtub - Milo Valley Farm (the process ends here, but you can click back through the links at the beginning of each post to see the full process)
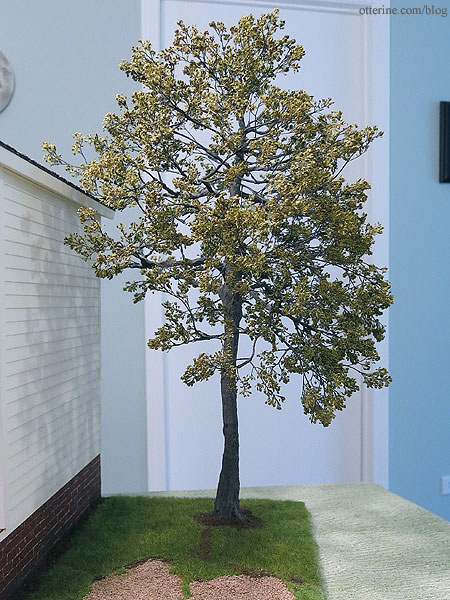
Realistic tree (the process ends here, but you can click back through the links at the beginning of each post to see the full process)
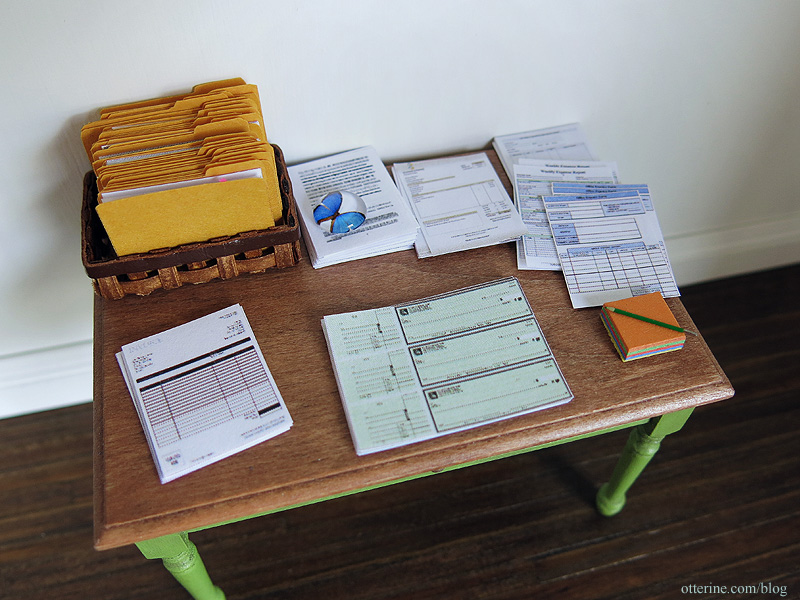
Mini paperwork, checks and invoices
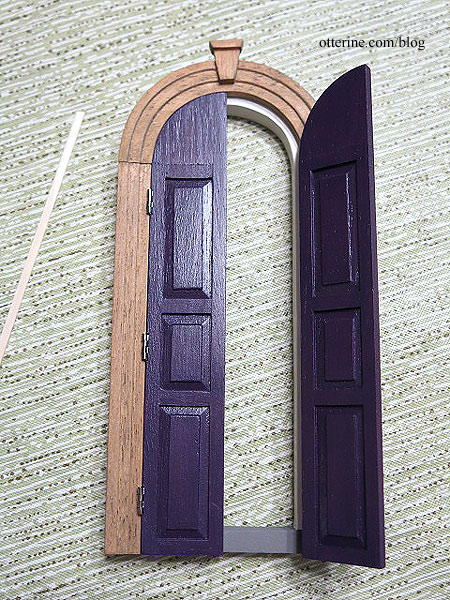
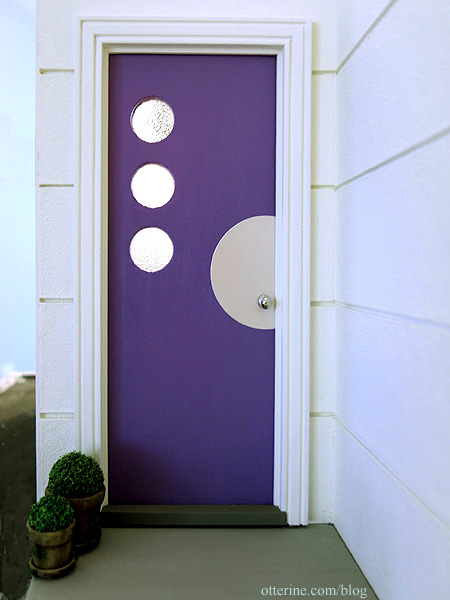
Making a custom door - Otter Cove (the process ends here, but you can click back through the links at the beginning of each post to see the full process)
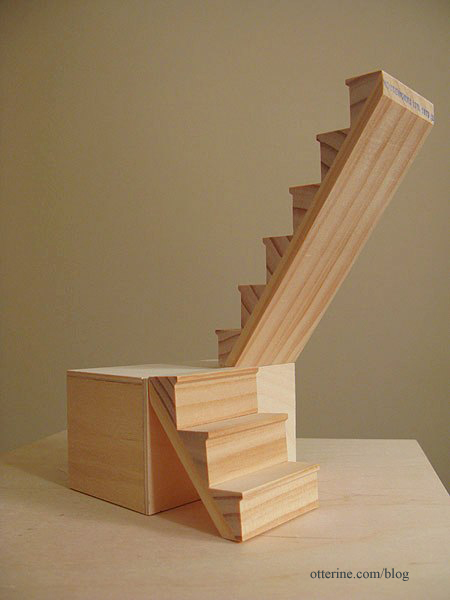
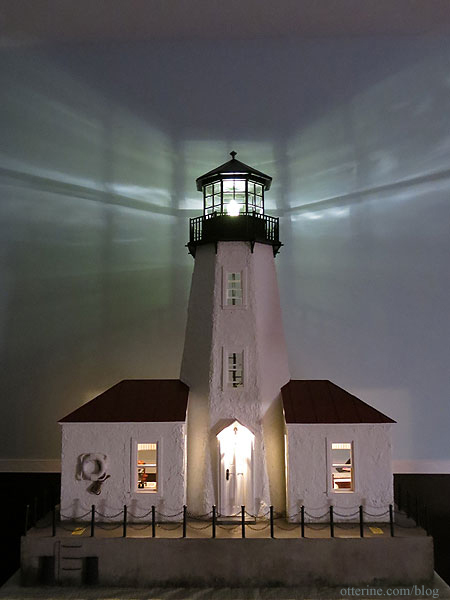
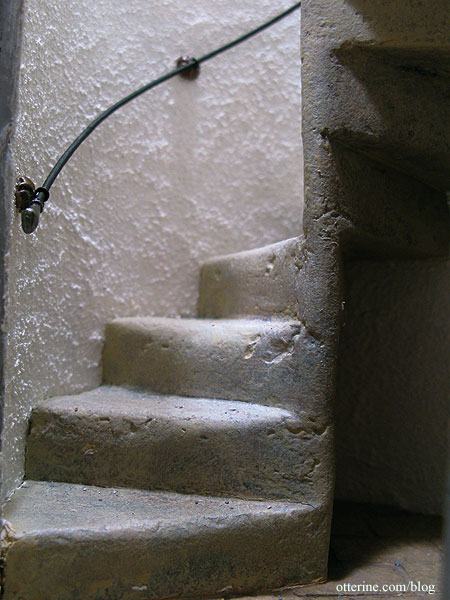
Spiral staircase - Walnut Bay Light
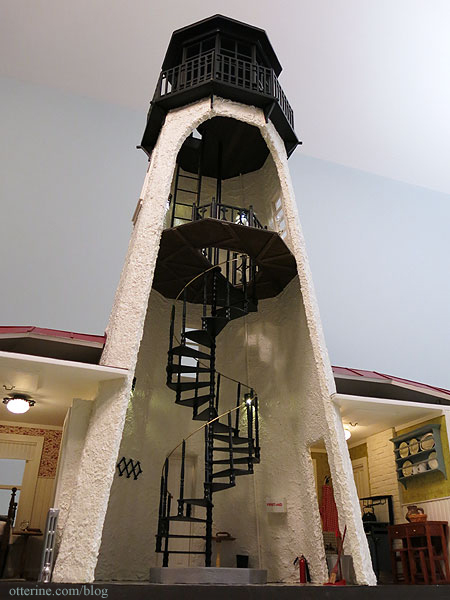
Turning wood into concrete - Walnut Bay Light
Hummingbird shower - The Artist's Studio (the process ends here, but you can click back through the links at the beginning of each post to see the full process)

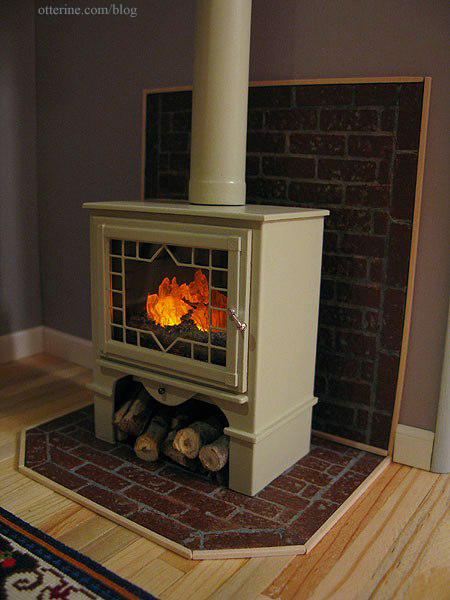
Wood stove - The Artist's Studio (the process ends here, but you can click back through the links at the beginning of each post to see the full process)
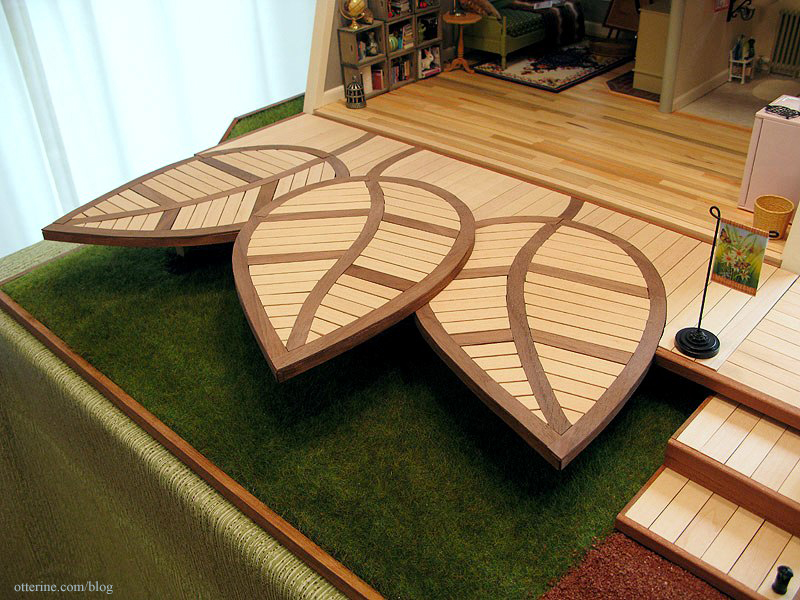
The leaf deck - The Artist's Studio (the process ends here, but you can click back through the links at the beginning of each post to see the full process)

Cutting plywood without power tools

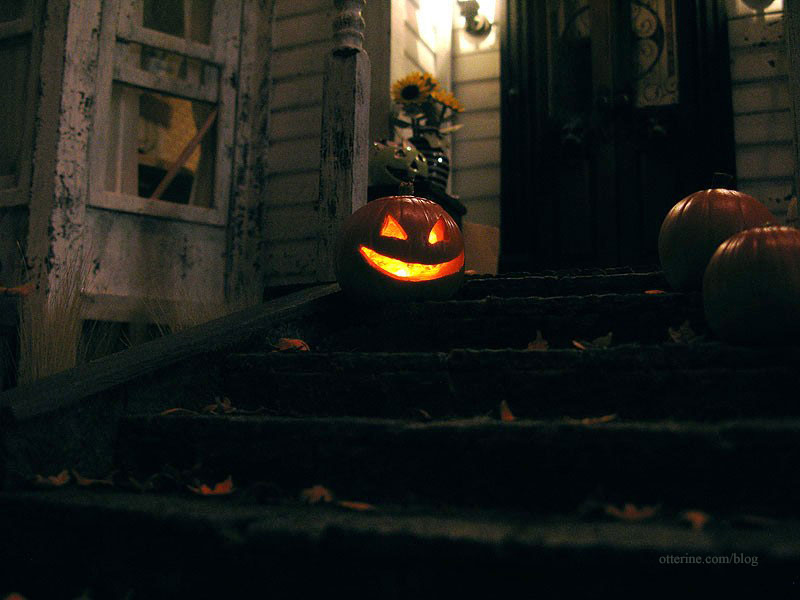
Flickering jack-o'-lantern - Haunted Heritage
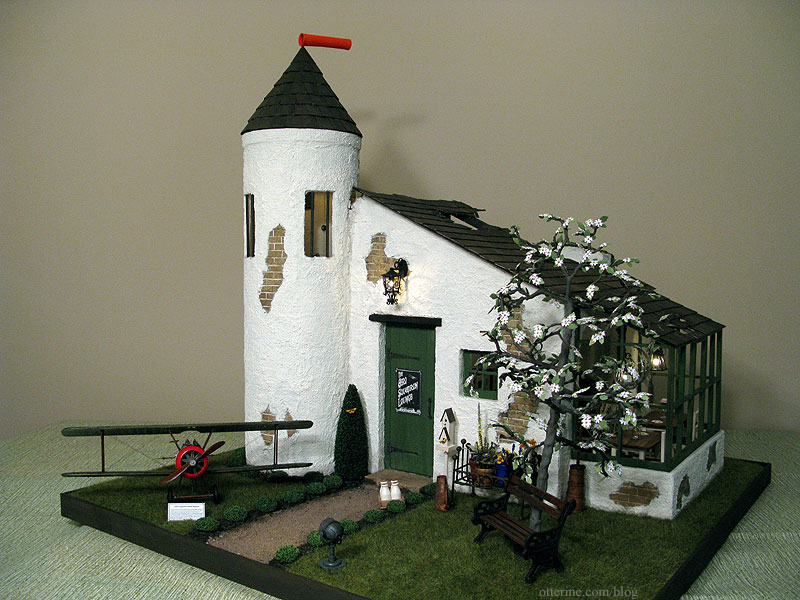
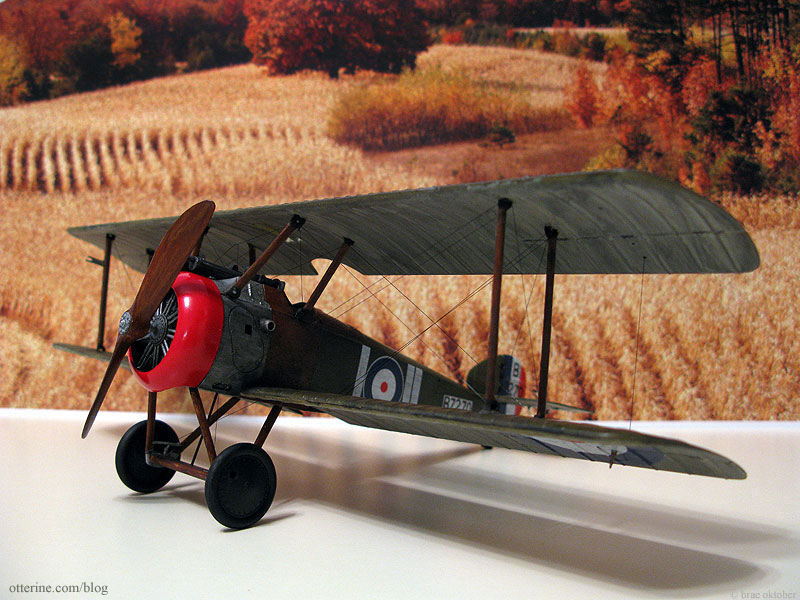
Stone spiral stairs - Aero Squadron Lounge
Cutting egg carton bricks with links on finishing
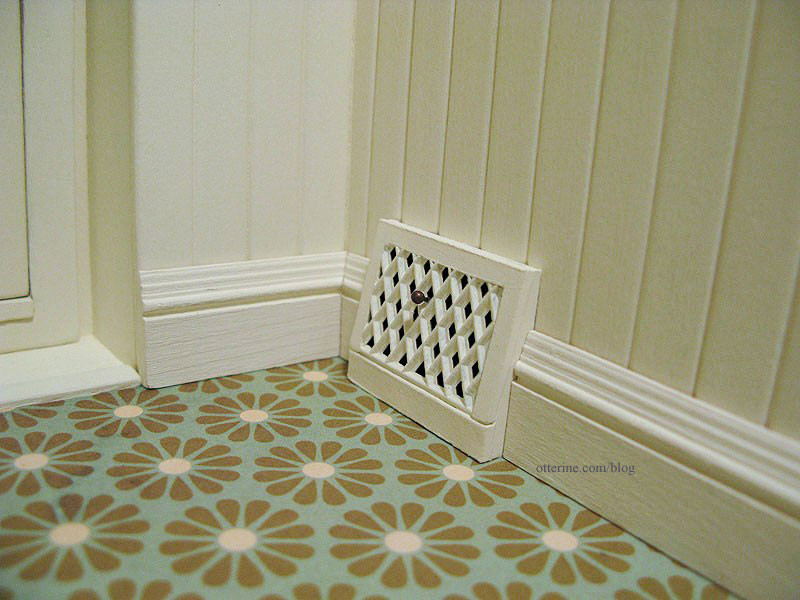
Heat registers - Haunted Heritage (adapted from a Kris Compas tutorial)
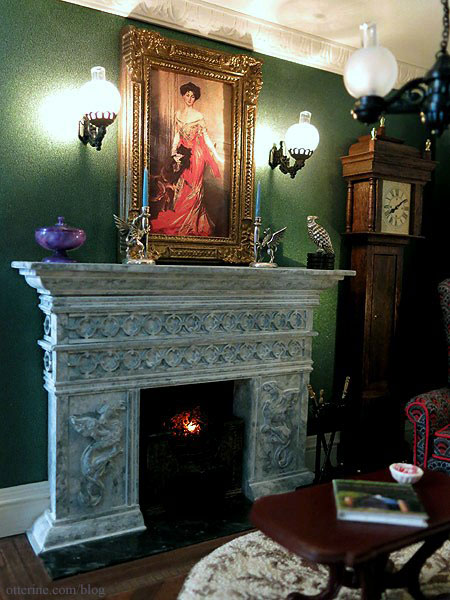
Stone fireplace - The Haunted Heritage (the process ends here, but you can click back through the links at the beginning of each post to see the full process)

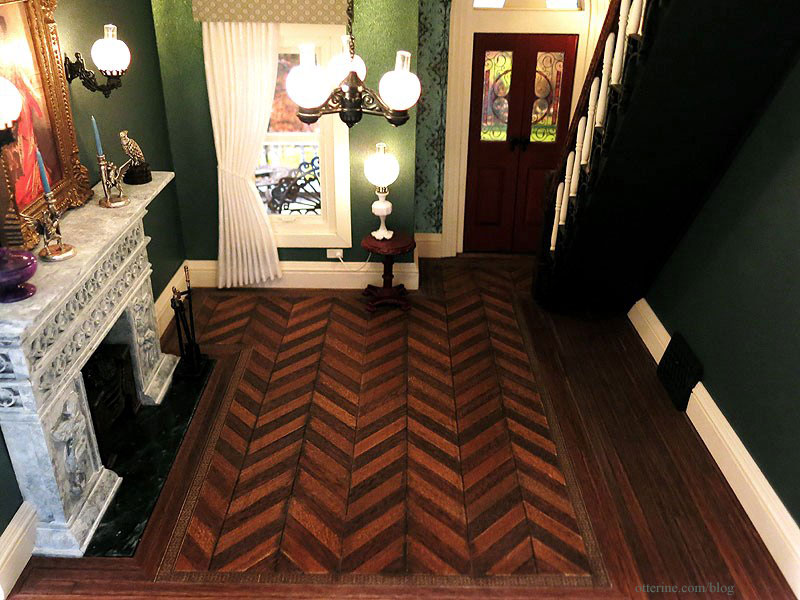
Fancy parlor floor - The Haunted Heritage (part one, two, three, four, five, six, seven and eight)
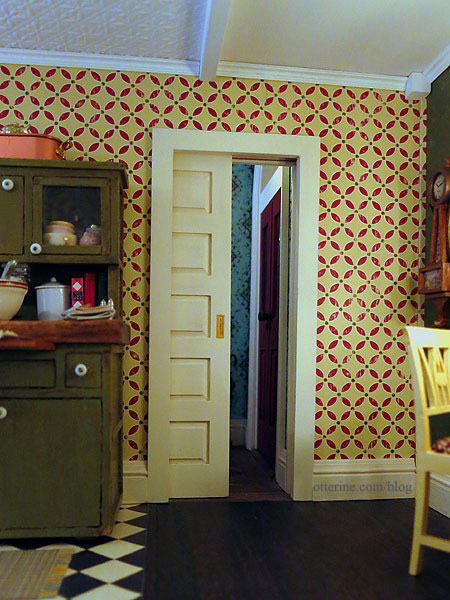
Working pocket door - Haunted Heritage (post one, two, three, four)
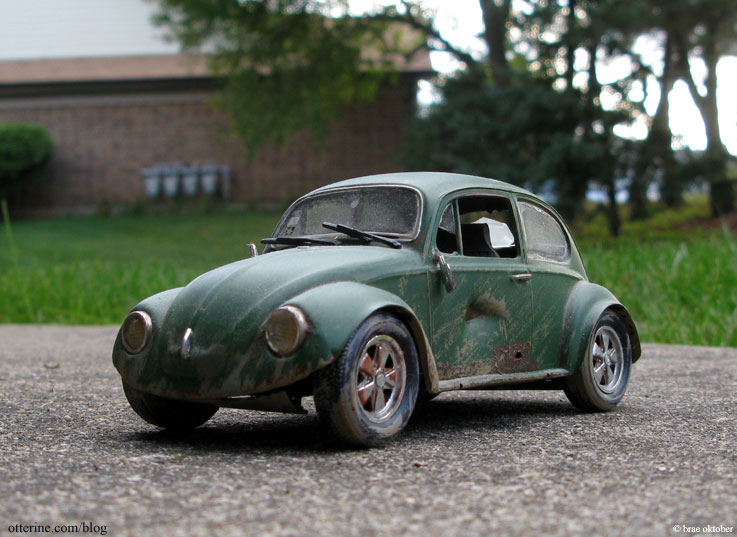
Weathered wood (part one and two)
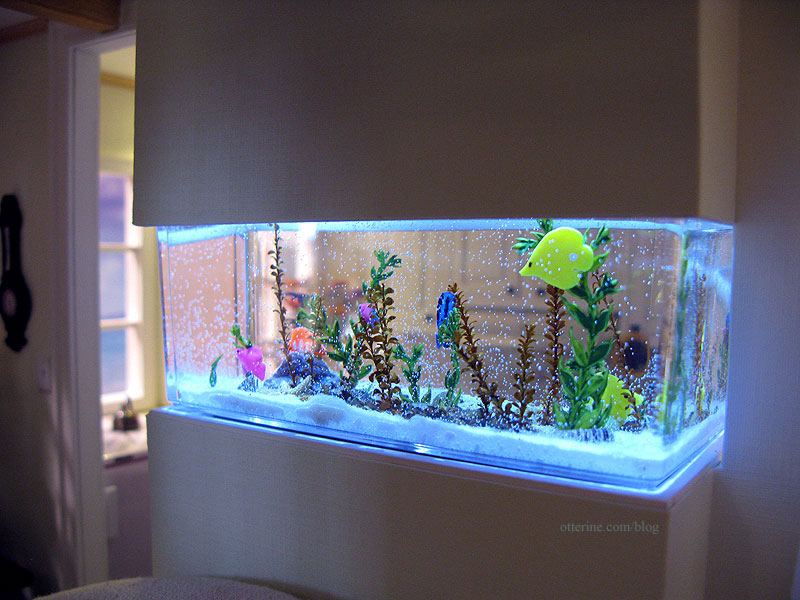
Saltwater aquarium - Baxter Pointe Villa

Fitting Houseworks components - when doors and windows are too thick for dollhouse walls
Fixing gaps in purchased doors - when light shows through the edges around the door

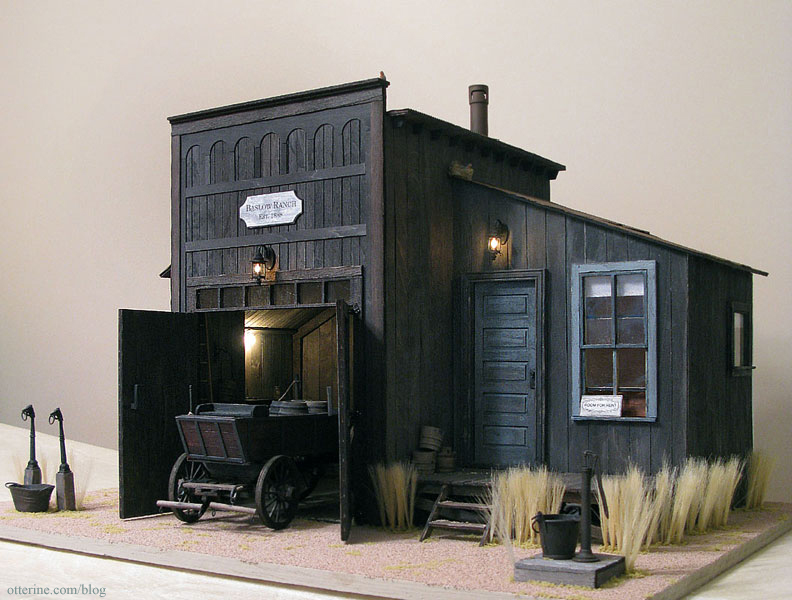
Rusted tin roof - Baslow Ranch

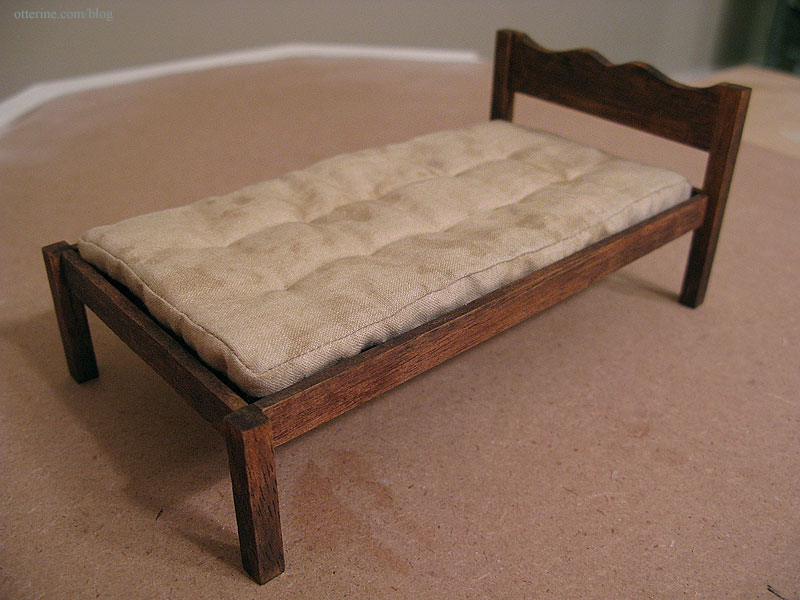
Old worn out mattress - Baslow Ranch
Flipping the opening direction of a Houseworks door

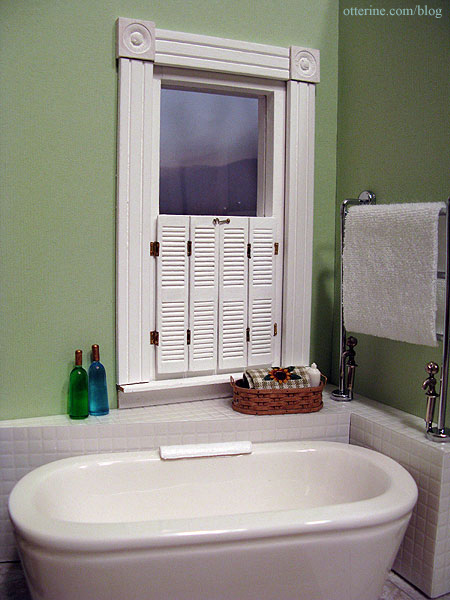
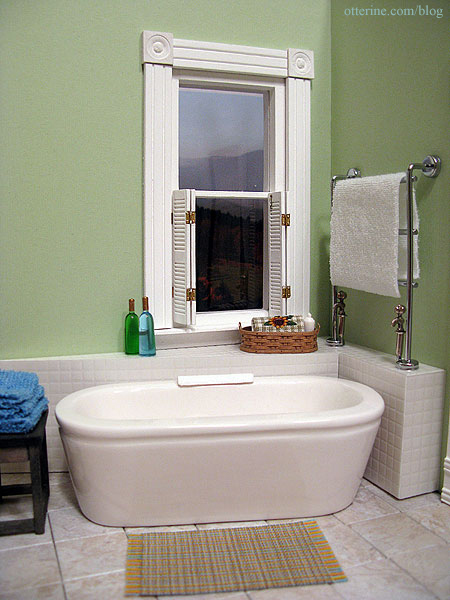
Working café shutters - The Newport
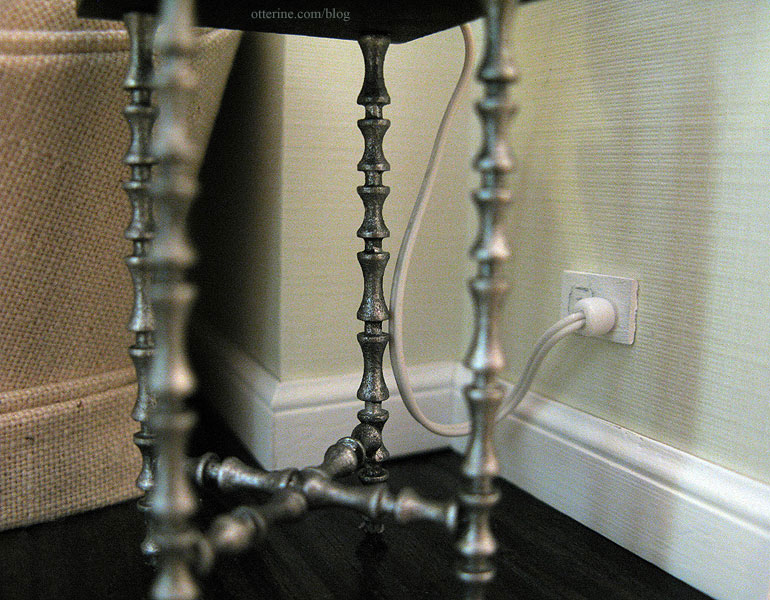
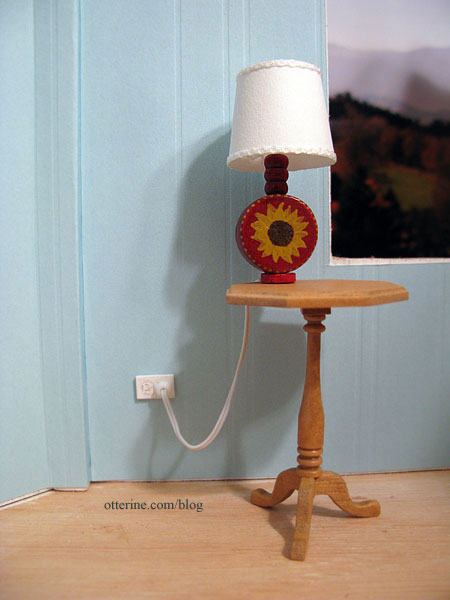
Hard wiring table lamps with faux outlets

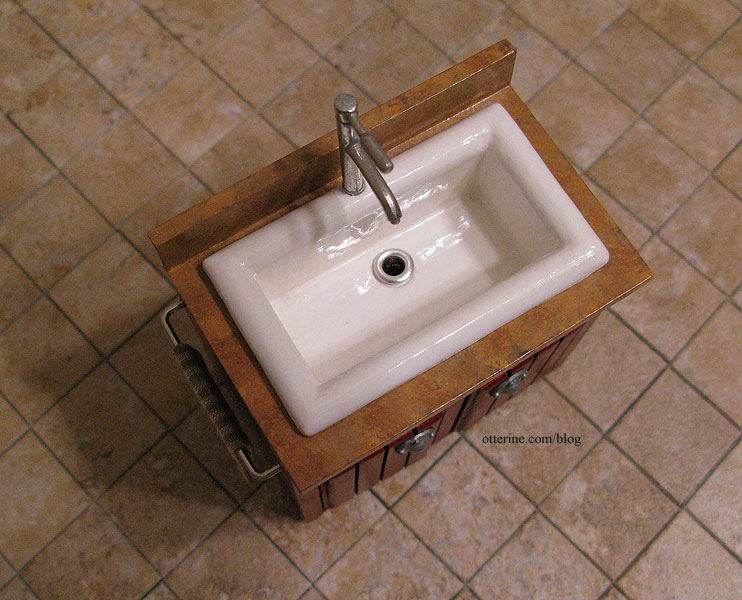
Wood porcelain sink - The Newport
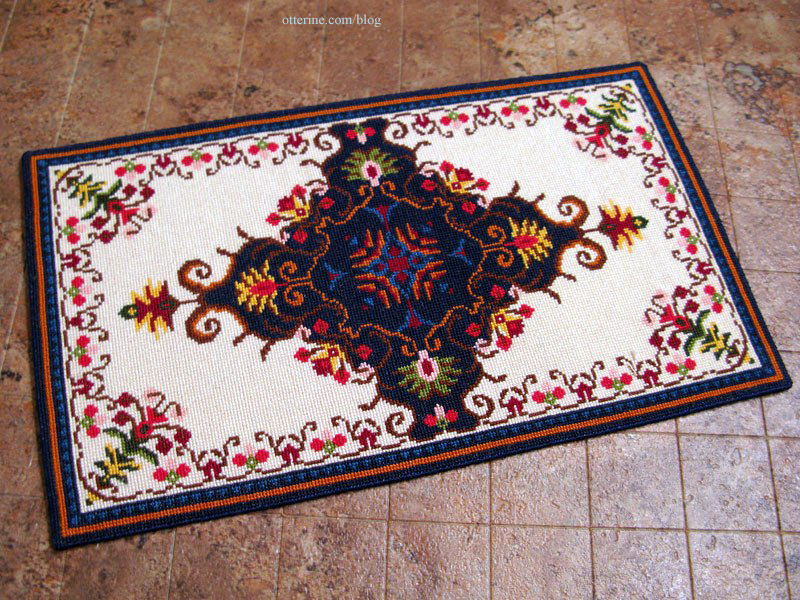
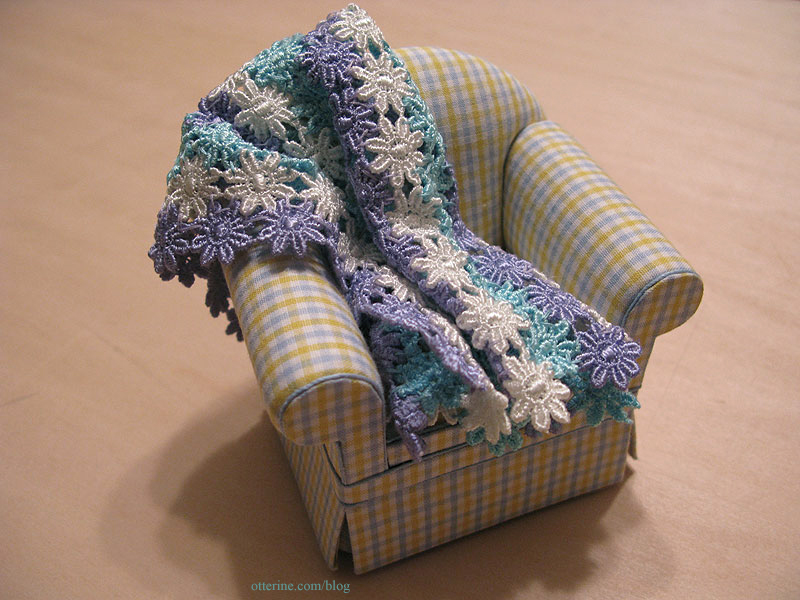
Faux crochet throw blanket - tutorial available in my etsy shop.


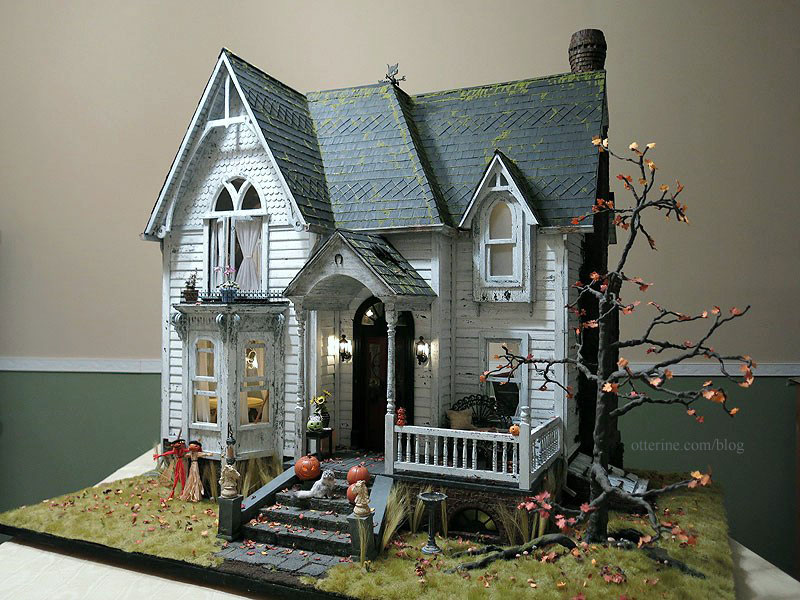
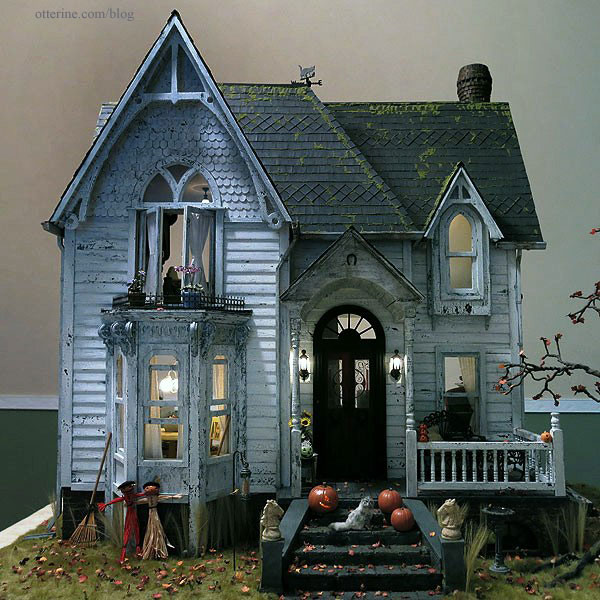
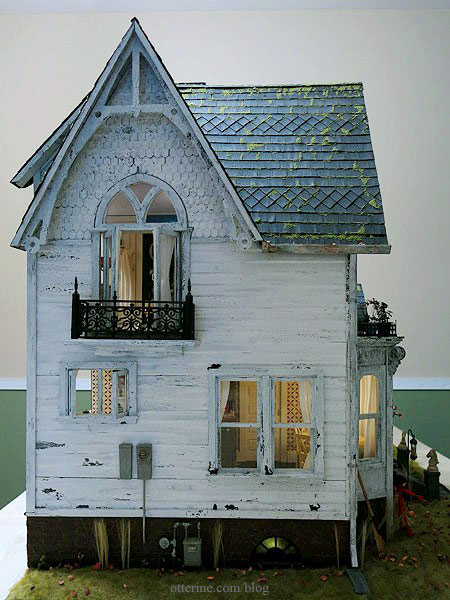
The Haunted Heritage - Exterior details
As of 2024, this post is in the process of being recreated on the new blog. Most links are broken, but the related posts have been moved to the new blog. Please check back later.
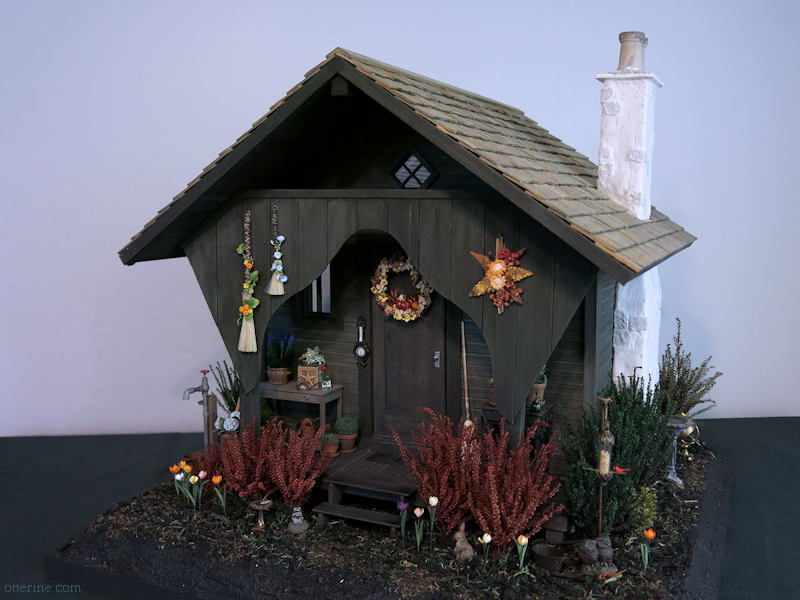
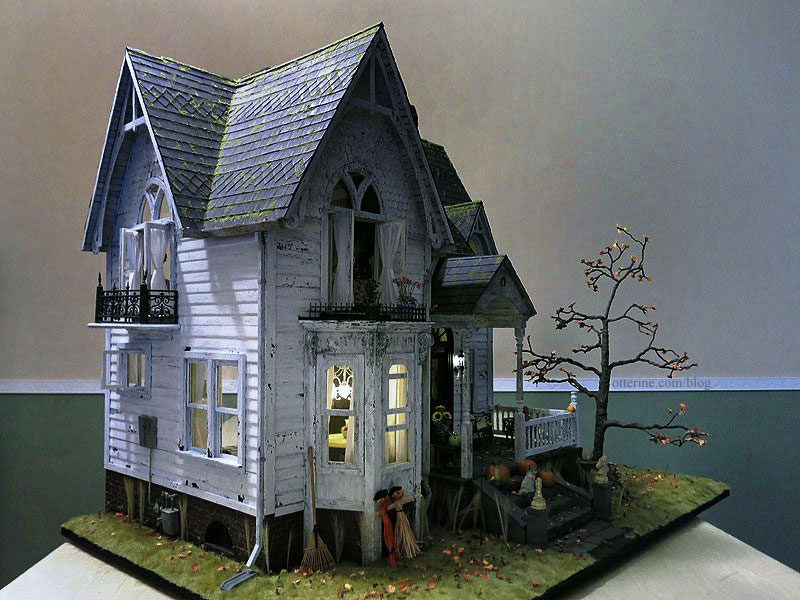
While this won't be the last post ever on The Haunted Heritage, the build has come to the 99.9% completion mark...the only realistic benchmark a miniature house can ever reach.
For The Haunted Heritage pictorial recap post, please click here. Click here for a full list of Heritage posts, including how I made things and the materials used.
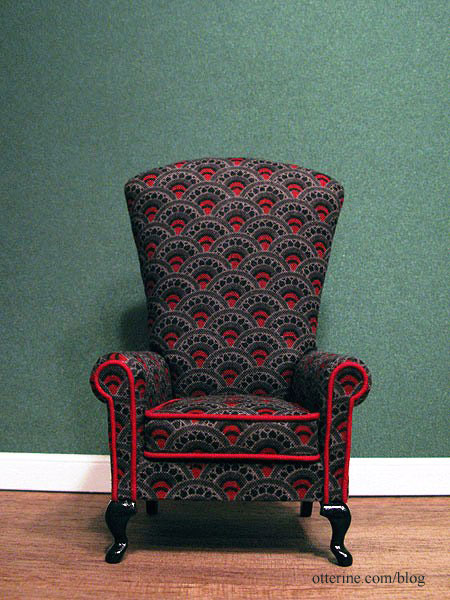
This whole project started with the purchase of The Chair, a wonderful miniature made by Kris of 1 Inch Minis. I had no home for it, but that has since been remedied. :D
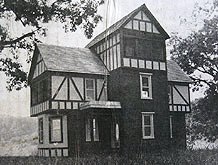
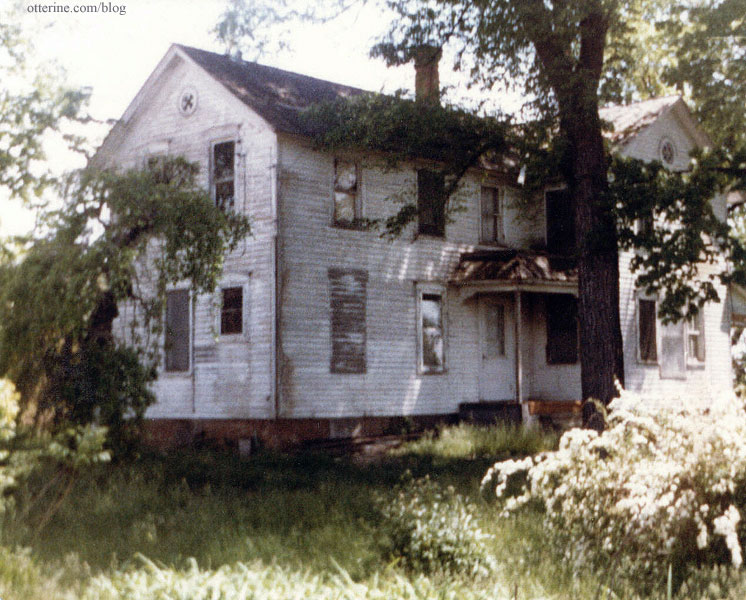
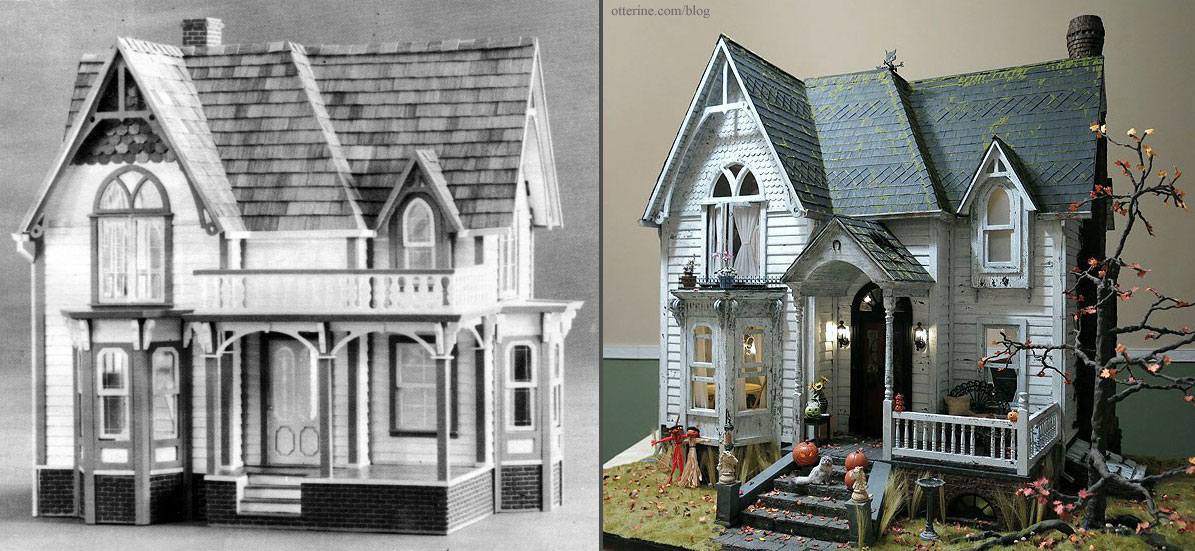
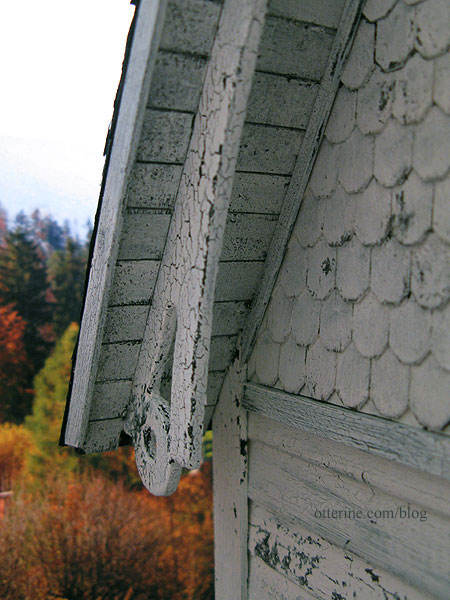
The inspiration for the exterior came from my childhood home. I grew up in an old white farmhouse that probably looked pretty creepy to others, but I loved it. It was way too cold in the winter, too hot in the summer and had generally outdated décor and musty upstairs rooms. But, it was my first home and even though it no longer stands, I love it still.
These first two photos were taken in 1983, two years after my family moved and just before they used it for fireman training. I didn't go watch...I couldn't. It's overgrown and lush and green...and interestingly, when I dream of it, this is how it appears to me.
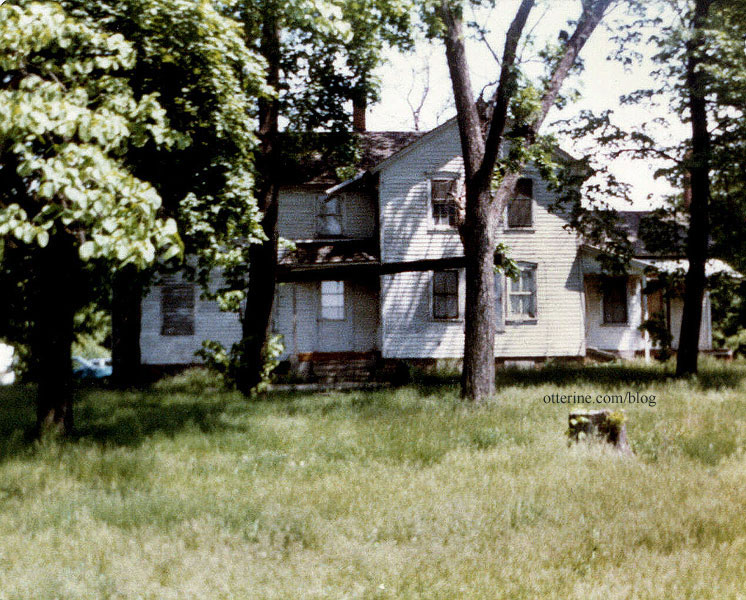
To the left is the mulberry tree where I would gather berries and fell in love with inchworms. :D To the right is one of the many tall and beautiful walnut trees that I often dream about. They were so lovely.
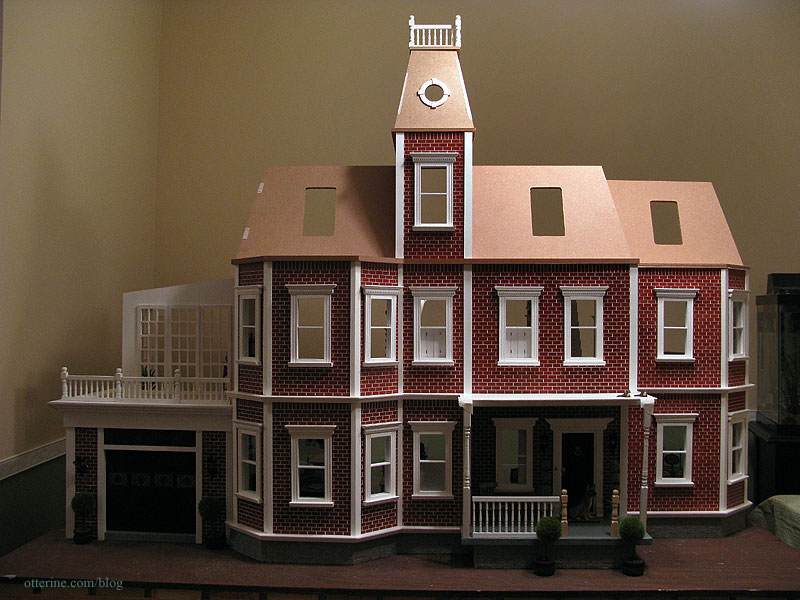
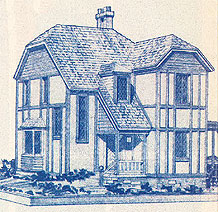
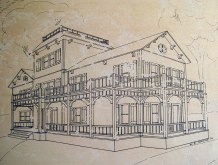
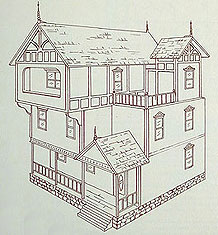
I bought a Dura-Craft Heritage kit when I found a good deal on a kit in near perfect condition (well, all the parts were there), and when this project came about it just seemed the perfect place to start.
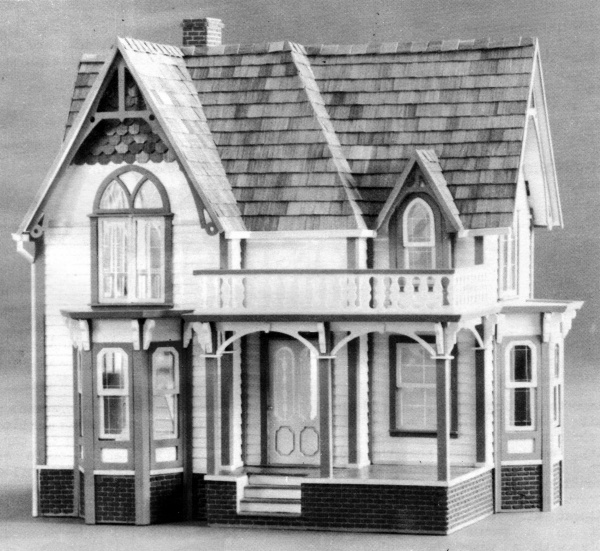
kit photo
My build turned out a little different. ;D

A side by side comparison.
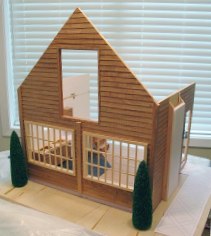
Here's the open back of the finished build to compare to the kit photo.

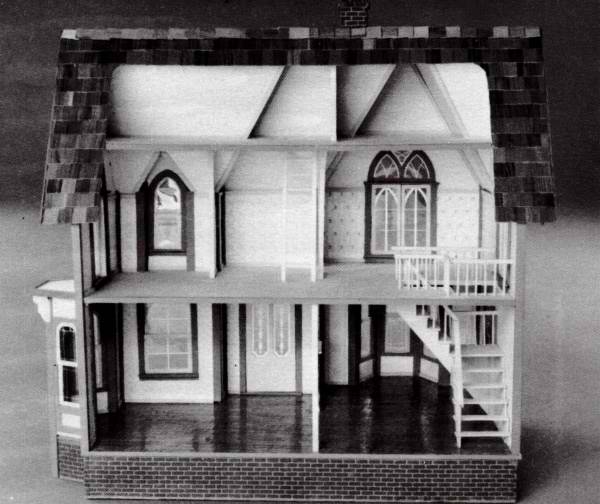
kit photo
A side by side comparison of the back.
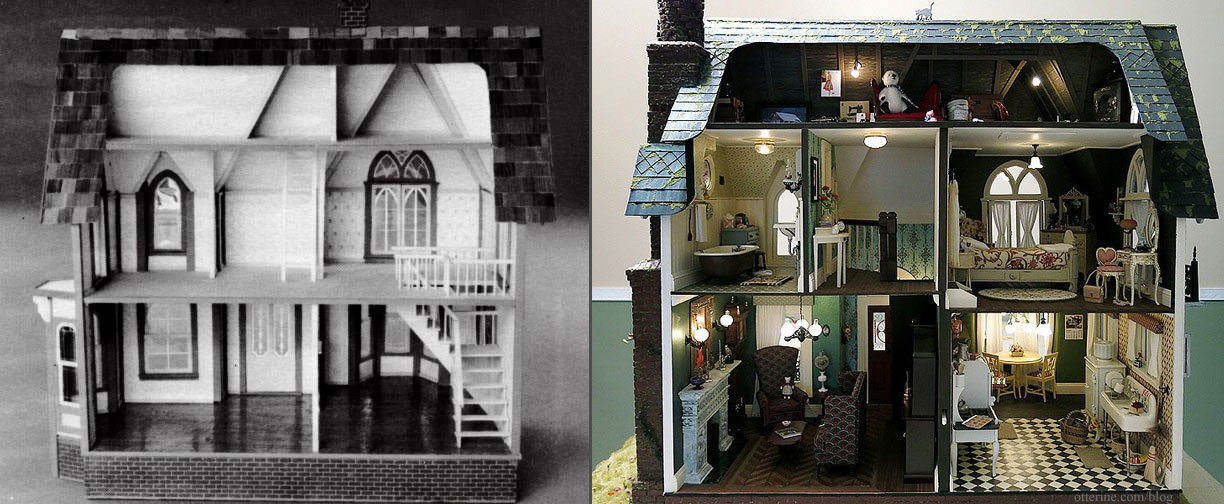
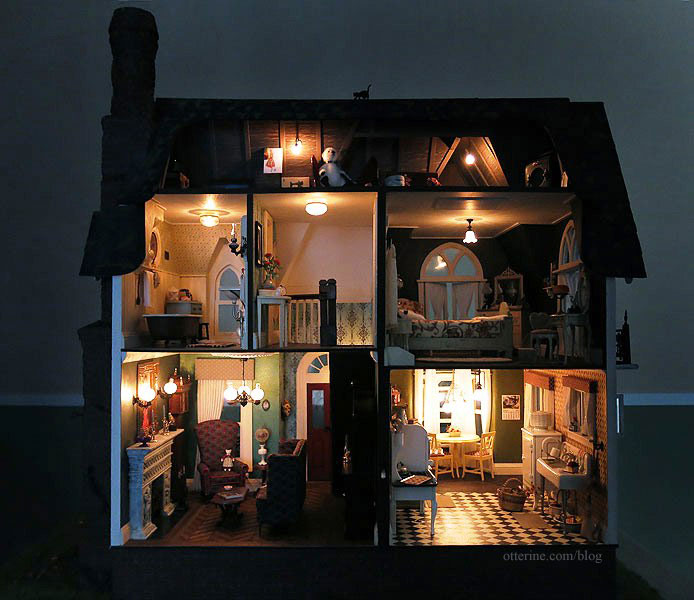
The Heritage is fully electrified.
Even though my childhood home had 1970s décor on the inside, I opted for 1920s inspired for my project. It seemed a good marshmallow center for the crusty exterior I had planned, like a time capsule. Construction began at the end of July 2011, though there have been two builds completed in between in the past two years. Ideas came and went, and now The Haunted Heritage stands as a memorial to my childhood home.
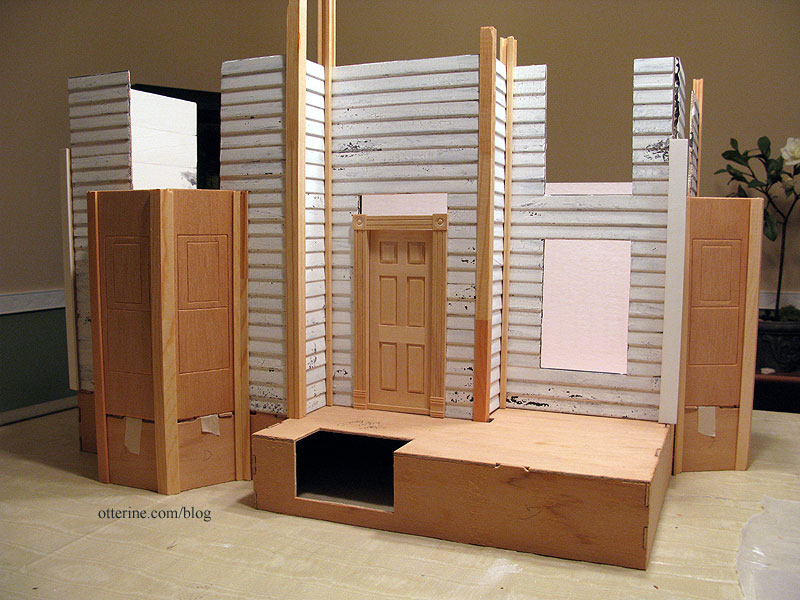
the first dry fit - 29 July 2011
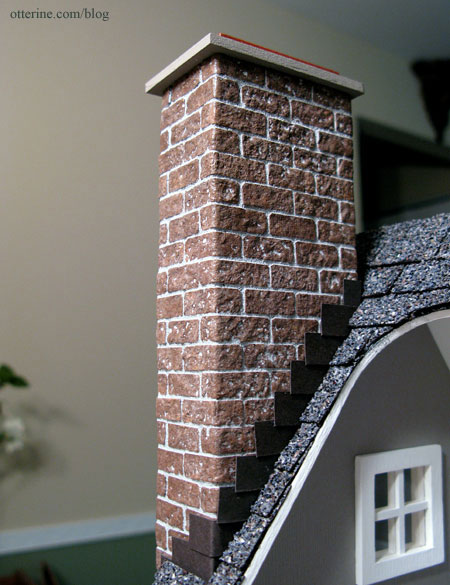
The chimney was modeled after a W E Masonry original. It was scratch built from foam core board, mat board, cardboard, wood and egg carton bricks individually cut and applied. It was then painted, grouted, finished with moss and purchased ivy. It measures 27" tall, and the inside is hollow to hold the wiring for the house. The side wall had to be scratch built to accommodate the chimney. I have a blog post showing the start to finish process.
The chimney side gable trim had to be cut down to go around the chimney. There still could have been better planning with this since the roof extends past the chimney and wouldn't likely be that way in real life...but I still love the way it turned out.
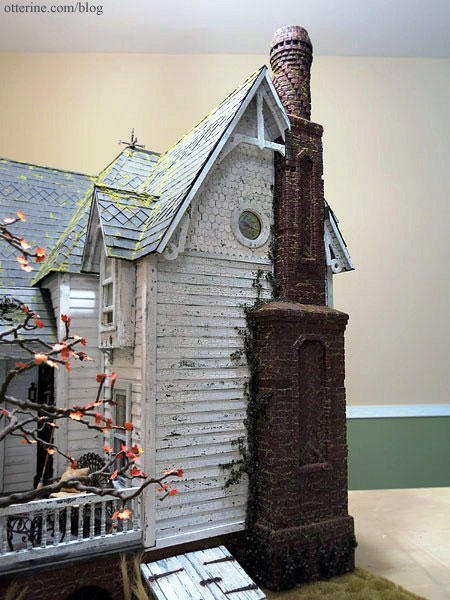
The ivy was not exact to scale, but it worked well.

This outside wall originally had a bay window on the first floor with a large Gothic arched swinging window above. I eliminated these two windows to make room for the fireplace and chimney. I replaced the swinging window with a small round window to keep some light flowing into the bathroom.
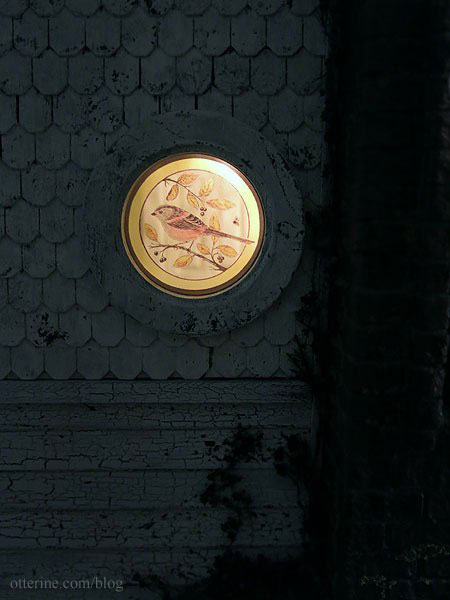
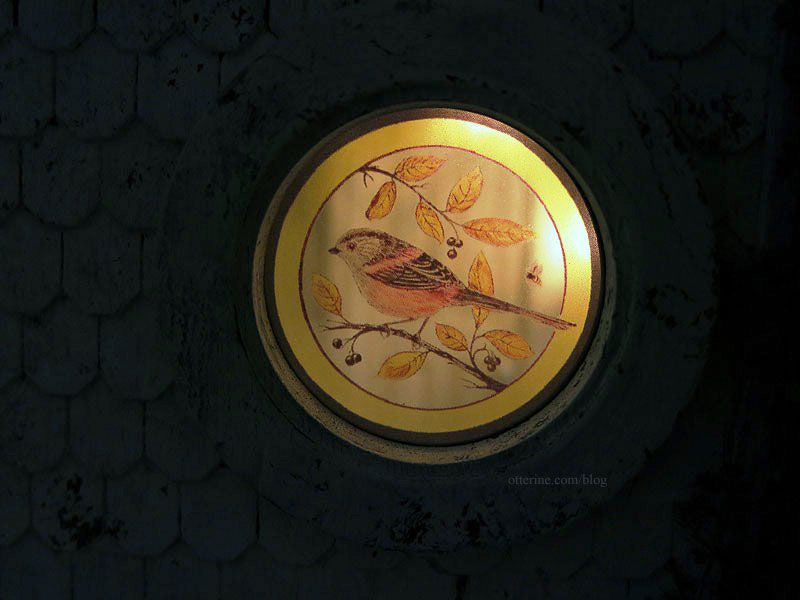
The bird and bee design by Flora for the bathroom window adds so much to the build. After Flora graciously permitted me to use her artwork, I edited the image in PhotoShop, turning the bird more grey and removing all stray spots. The white in the bird wouldn't print on transparency and any spots would be magnified in this small scale. I bumped up the coloration since printing on transparency usually results in some color loss. Beautiful.
The creepy cellar windows were one of the first additions to the kit foundation that otherwise had no particular interest.
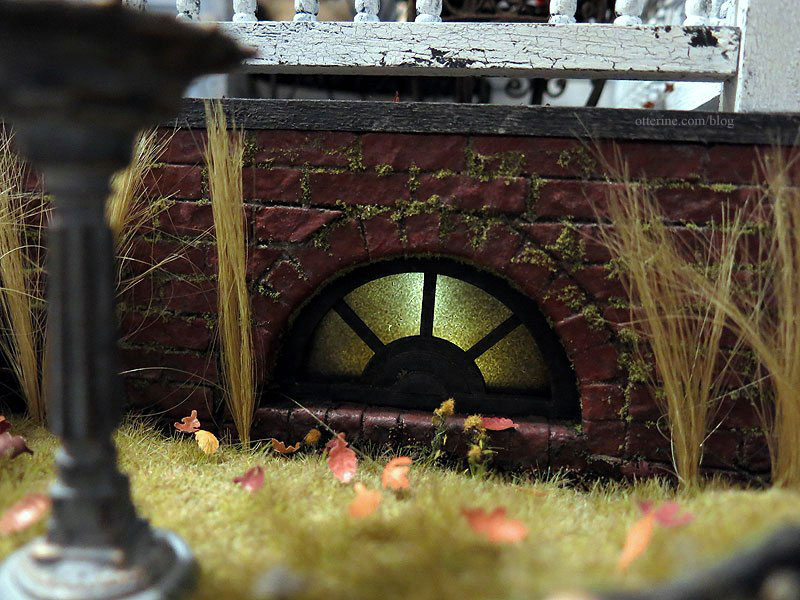
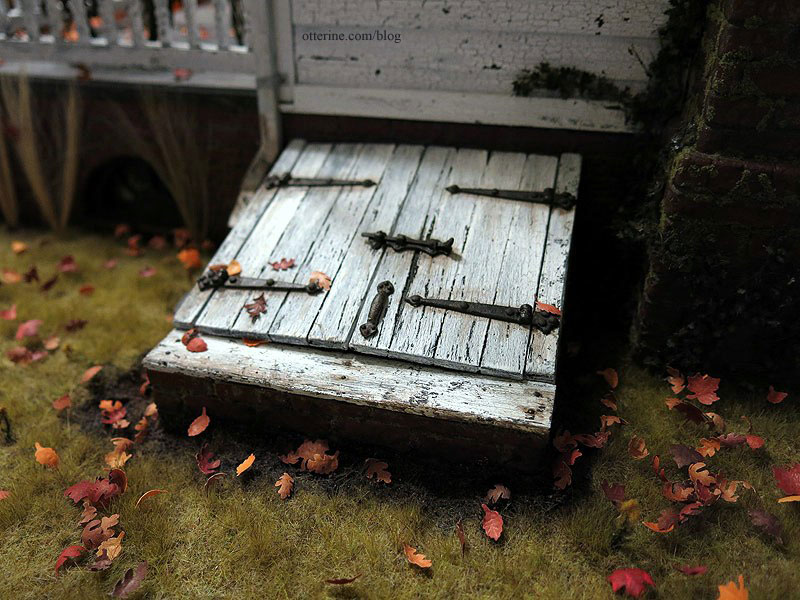
With the added cellar lights, I needed cellar doors.
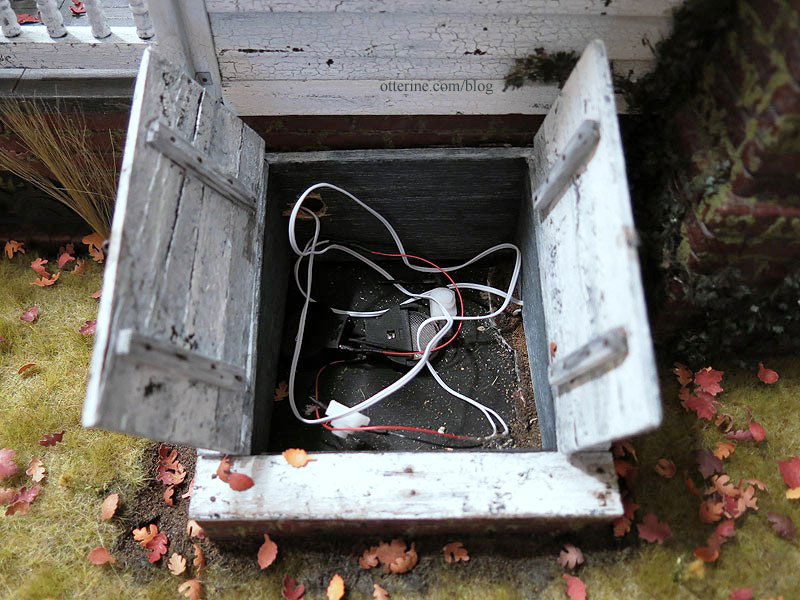
The interior holds the batteries and switches for the jack-o'- lantern and the parlor fireplace flickering LEDs. There's a bit of a mess in there now since I had to move this assembly over when I installed the gutters.
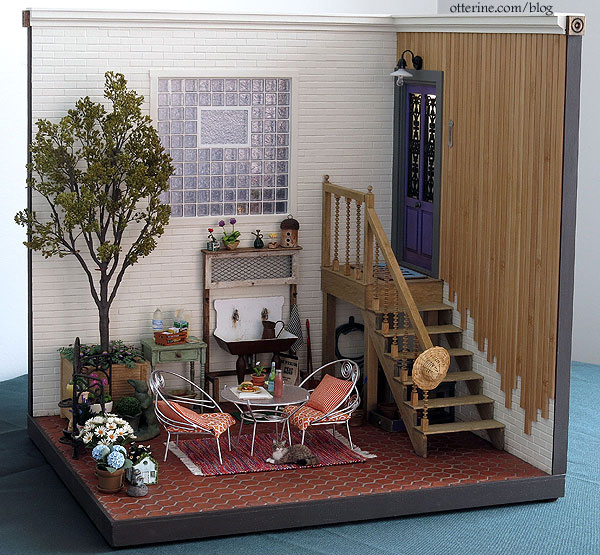
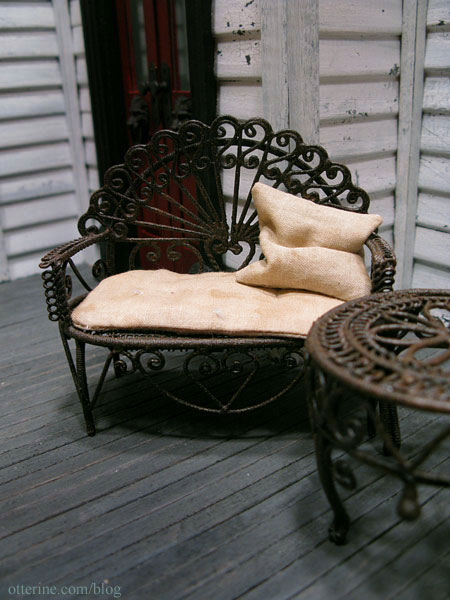
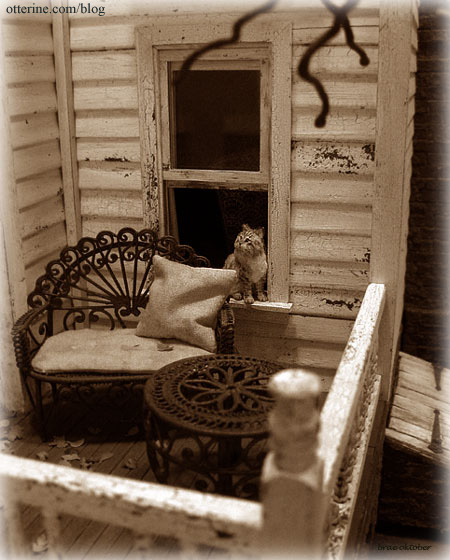
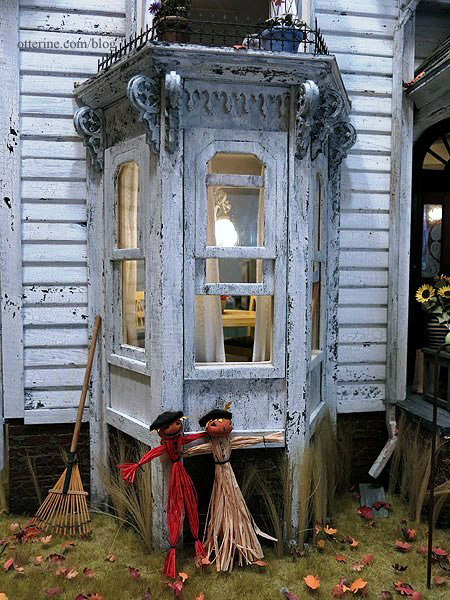
The sunporch went through a lot of stages in mockup, and I'm so pleased with the design I chose in the end.

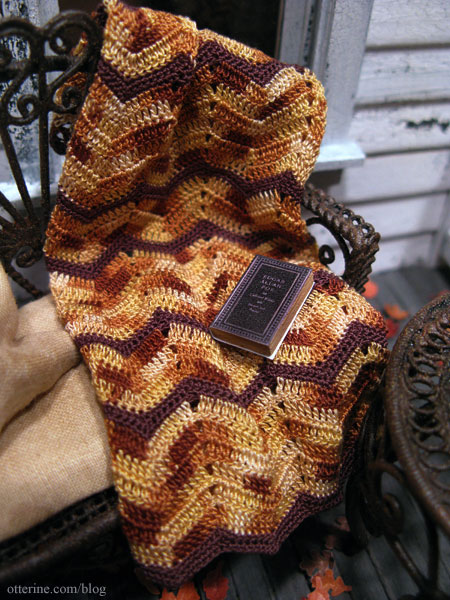
The sunporch has an old rusted settee and side table. The cushion and pillow have seen better days.
The window on the front porch had to be replaced because the kit parts were just too dry and brittle.
These birdhouses are from Whimsy Cottage Minis.
This one Lyssa bought for me. :D
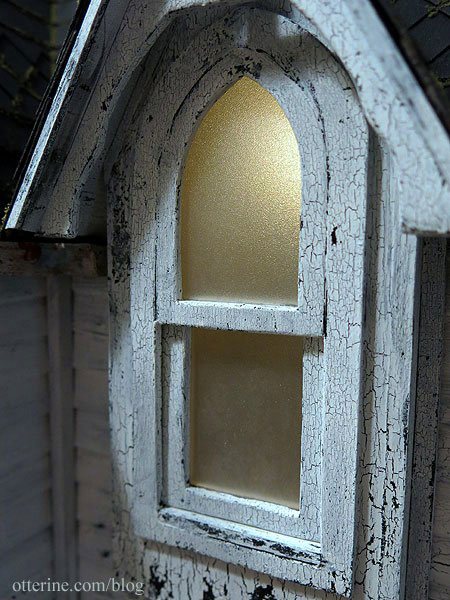
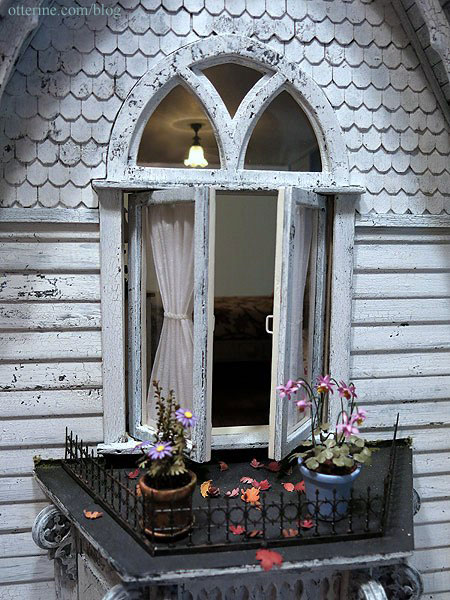
The second floor dormer was to sit atop the original kit porch, which was no longer part of my Heritage. I also raised the ceiling in the parlor, but I couldn't raise this window by the same amount since the roof pieces would no longer fit correctly. And, I couldn't cut down the window. So, instead of building it per the kit instructions, I had to wing it. I used kit parts and scrap wood to build the window and after some coaxing (and swearing) it worked. :] The window sticks a little, but it works...just like a bathroom window in an old house would be after years of moisture exposure.

I used a frosted plastic binder insert for the window glass to give grandma some privacy.
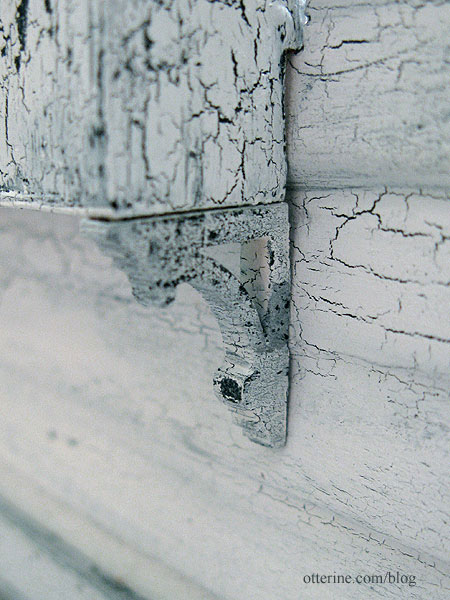
I added brackets to the bottom for extra support.
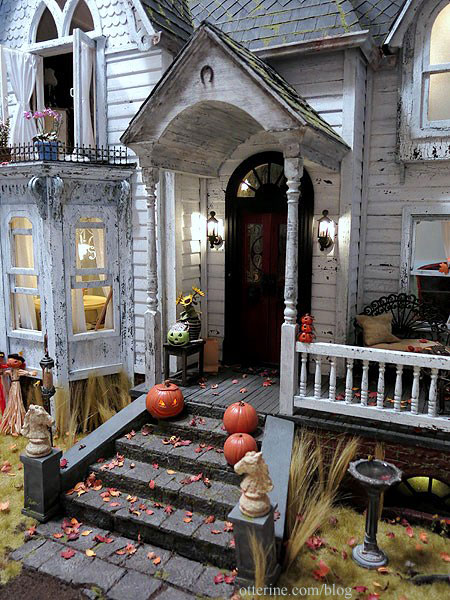
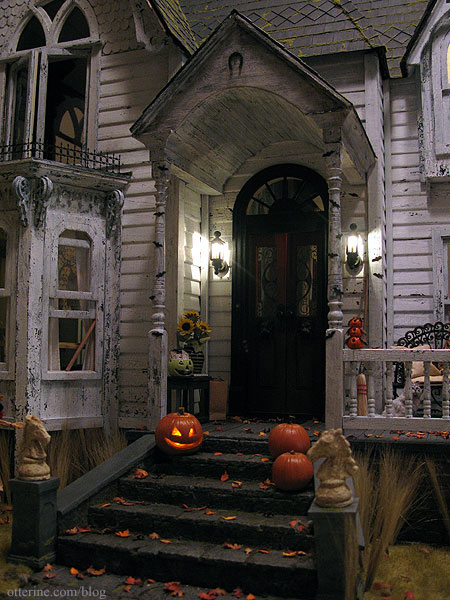
The portico is one of my favorite additions to the exterior and was completely scratch built.
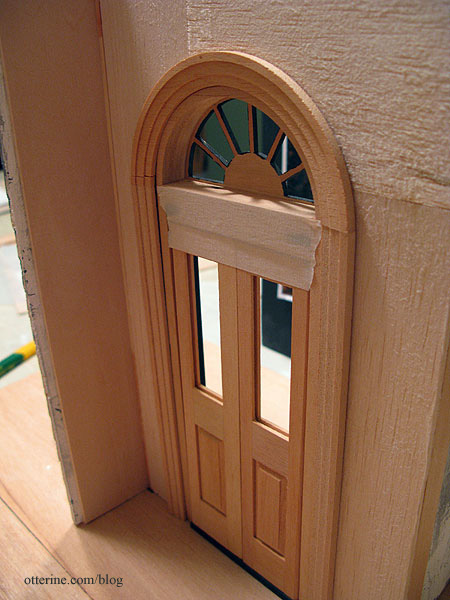
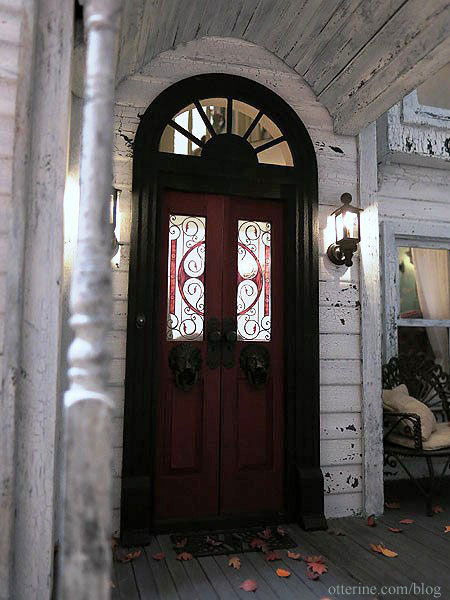
The kit's front door was replaced with a Houseworks Palladian double door. The stained glass inserts are printed designs from MD Doors. They are printed on transparency film, which was slid into the openings with the original door inserts right behind them. It's not a tight fit but it works well enough to keep them in place.
Mike of One Twelfth Scale Miniatures was generous enough to post his exploded drawing of the portico he made. It helped solidify the method in my mind for how I wanted to build my own.
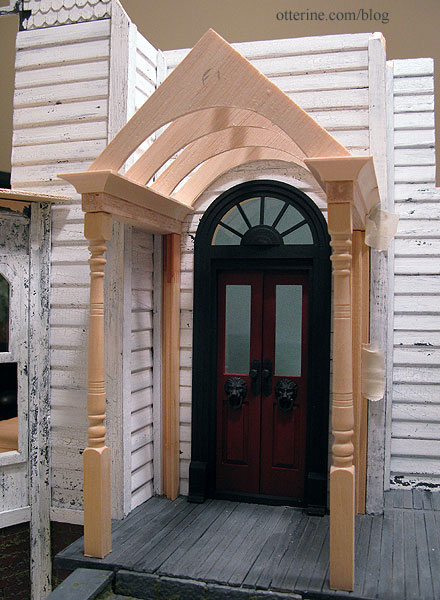
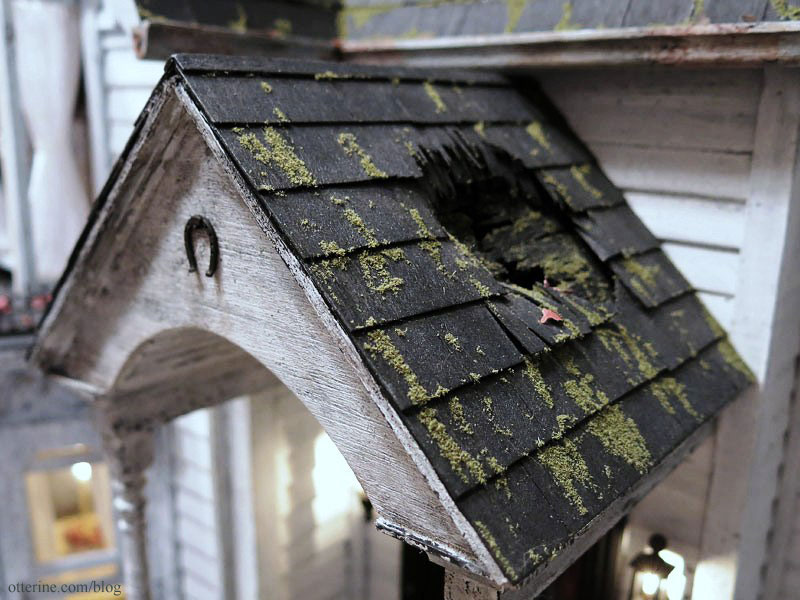
It has a hole in the roof. :D
I believe the horseshoe has an unlimited supply of good luck and it is hung upside down to shower you with this good luck as you pass under it. Chalk it up to my generally optimistic outlook.
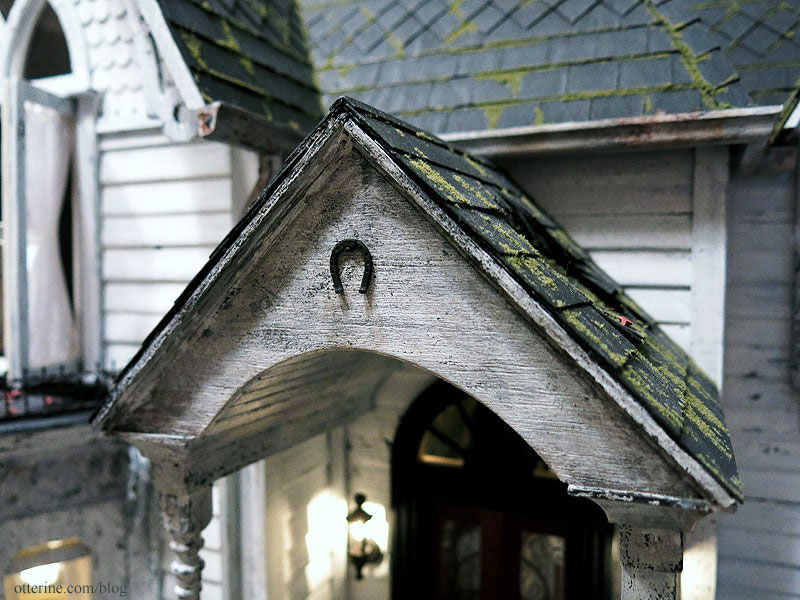
The new portico adds a stateliness that the original kit entrance didn't have.

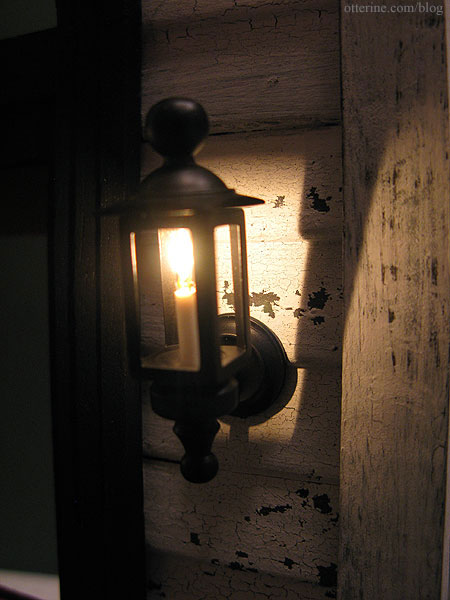
I love the crusty old paint effect on this house. This is done by using a dark primer and then adding a white crackle finish over it.
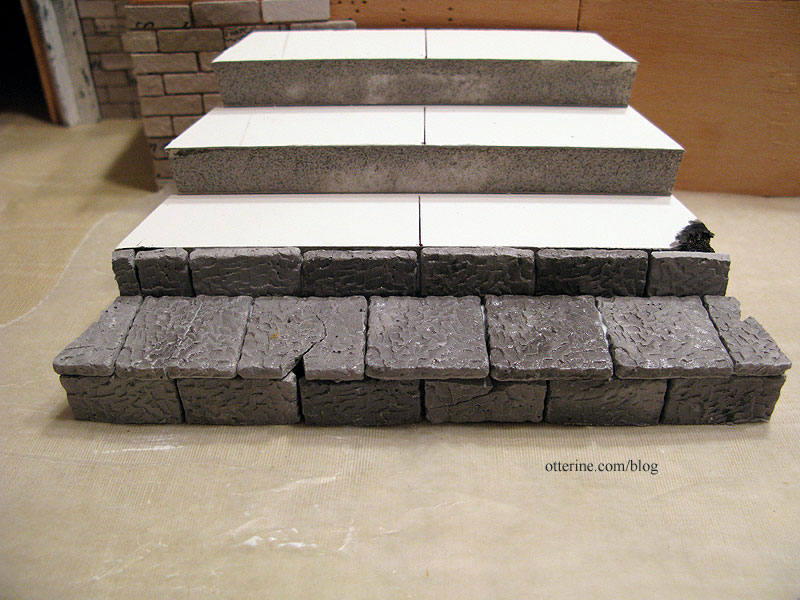
There's Ophelia by *Reve*, and the lovely horse statues are from Katie's Clay Corner. The stone steps were an upgrade from the inset kit stairs.
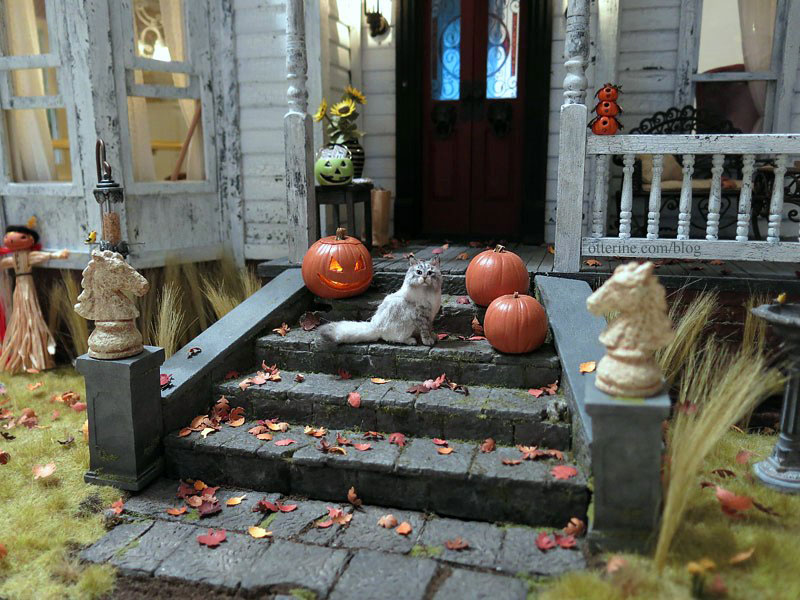
They were made from foam core board and mini pavers from miniatures.com.
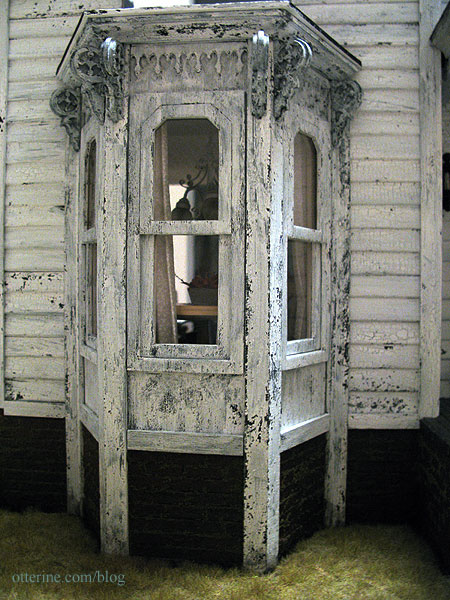
Considering the age of the kit wood I was happy with the way the kitchen bay window turned out. One window assembly is completely glued together and the window is shut since the wood for these pieces was beyond repair. But, guess what? The other two windows actually work!!!! The second window is set partially open, and though the window slider isn't glued in place, the wood for this assembly is not in the best condition and doesn't allow for very fluid raising and lowering of the window. But, it works! The third window, however, works so well that I need a dowel to keep it propped open! How positively wonderful! It's just like a real life old house - one window is painted shut, one window sticks and one won't stay open!!! :D
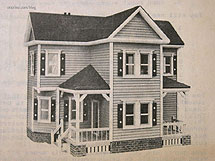
The bay window is one of the nicer elements of the Heritage dollhouse, but, straight out of the box, they are somewhat lacking in pizzazz. I did a bit of sleuthing around the internet and found the lovely B Street House Bed & Breakfast in Virginia City, Nevada, which has very nice details. And, this is what it looked like before restoration.

Photo: B Street
House B&B, Virginia City – Steve Bingham
Whoa! Now, this was an awesome inspiration for my old haunted Heritage! The B&B's gallery has some detailed photos of before and during renovation, definitely worth a look.
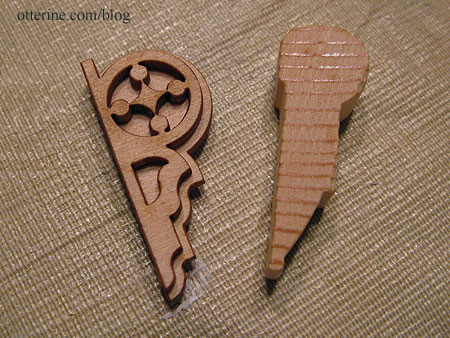
In order to capture some of this essence, I removed some original trim and added laser cut pieces as replacements. The most noticeable change came from swapping out the old kit corbel brackets for Laser Tech fancy corbels (purchased from Manchester Woodworks).
I also added some Laser Tech fancy roof trim (purchased from Green Gables Dollhouse) to the upper flat portion of the window walls and a more decorative molding along the upper edge that sits just under the roof piece. Each tiny element added made it all the more convincing as an old stately house.

I kept the original swinging window above the bay as well as the one on the side wall just around the corner here. There were originally three swinging windows - one in the bathroom and two in the bedroom. Since I eliminated the one in the bathroom when I added the chimney, I had two left. The extra parts from the bathroom window assembly tipped the odds in my favor so I had enough good kit pieces to get these to work without have to build my own from scratch. They don't close all the way, but they work and that is perfect for me. :D
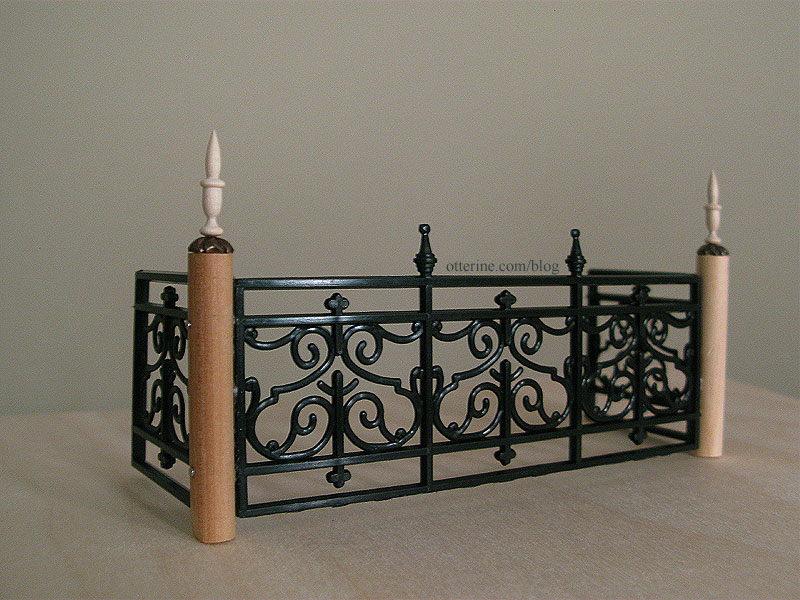
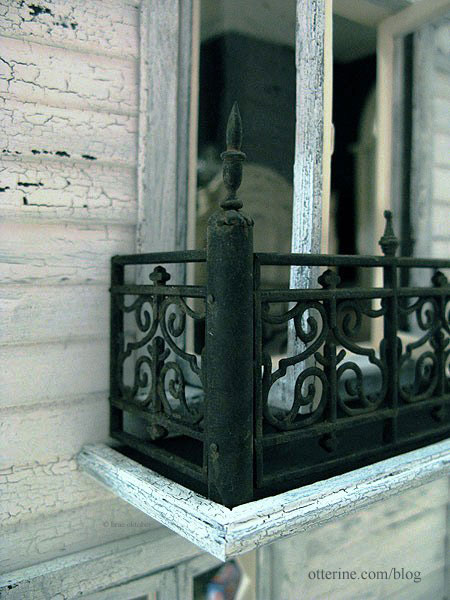
To finish the bay window balcony, I added quarter scale widow's walk railings by Grandt Line. The railings are very delicate but look suitable in scale for the bay window. I spray painted them flat black to start and then trimmed them to fit end to end. I dabbed on some Bittersweet Chocolate and Terra Cotta by Americana and rusty old iron was born.
After finishing the top of the bay with painted sandpaper, I attached the railings with a combination of super glue gel and tacky glue. These are so delicate that I am certain they will need to be repaired or replaced at some point in the future. I painted six to use three, so I've stored the extras in the crawl space along with the extra painted spindles from the stairs and balcony.

I get the feeling Ophelia spends a lot of time on the bay balcony. :D Pretty kitty.
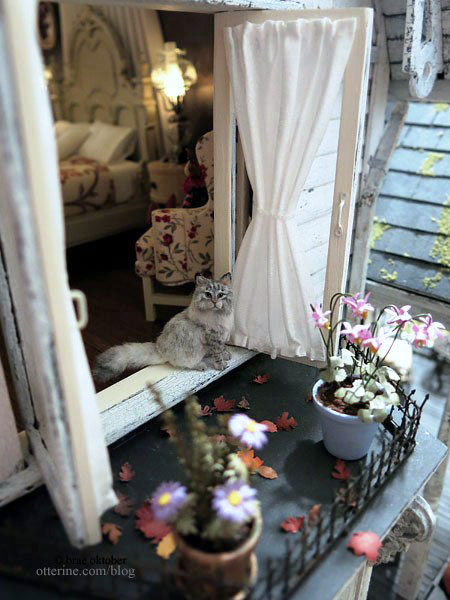
Around the side wall, I added a casement window and also replaced the original side window with a Houseworks working component.
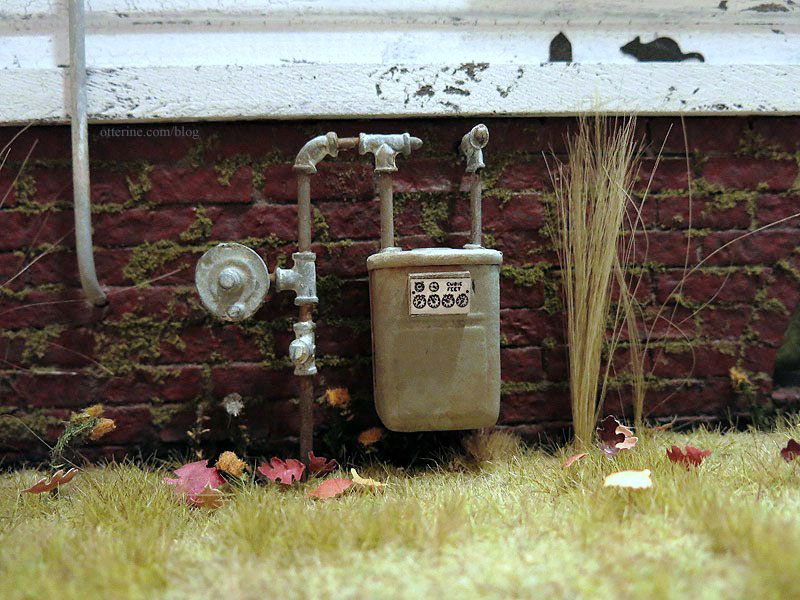
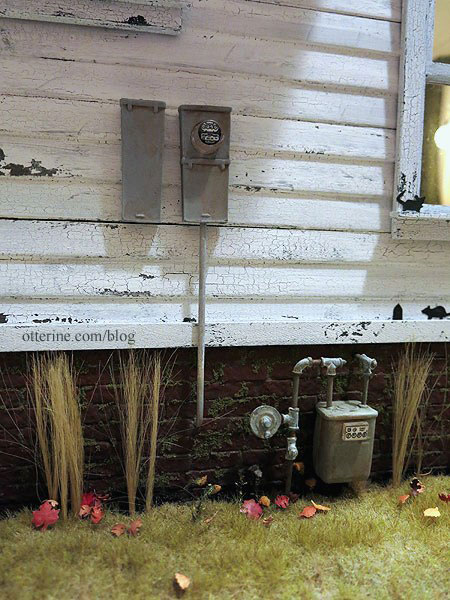
I added the Handley House electric and gas meters. These are well designed metal kits that take paint finishes readily. I used the gas meter as is, just painting it to look old and weathered. These meters aren't usually right against the wall, but the piece is hollow and it was too heavy to hold in place with glue points on the pipes alone. So, it is glued to the foundation and the pipes. I drilled into the foundation to insert the right side pipe.
The electric meter didn't come with any conduit, and I've seen a number of real life examples of how these are done. Since I'm not going into the electricians' trade, I decided a little artistic license was called for in this instance. I added a conduit into the house, again drilling into the foundation. I positioned the boxes on the house in such a way that I can always add wires later in case I decide to build a utility pole. :D
For this swinging window, I had to add a Juliet balcony for grandma's safety. In the original layout, there would have been a stairway here and no way for someone to fall out of the floor to ceiling window. By moving the stairs to the center of the house and adding a full floor in the bedroom, that meant grandma could tumble straight out the window. Not good. :[
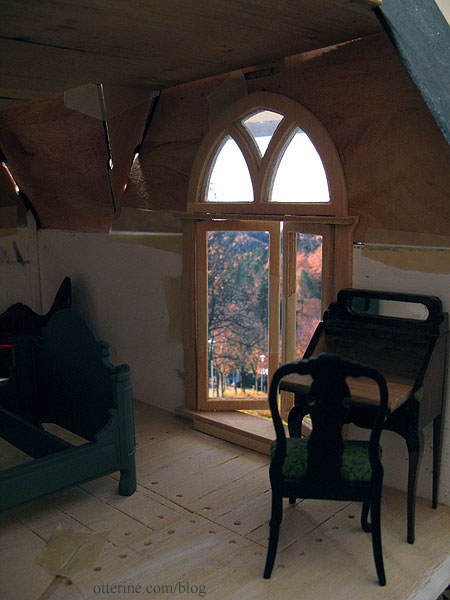
The Juliet balcony was made from was made from wood dowels, plastic railing from The Dolls House Emporium, bead caps, Houseworks finials and pins.
I added a base from scrap wood and trims, with a painted sandpaper floor. I attached the balcony to the house with headless pins and glue. It wasn't until after I did this that I realized the balcony was not centered around the window. But, you know what? Maybe the miniature carpenters who built this house didn't measure twice drill once and just left it. Who am I to argue? :D I also added a bottom support beam to keep the balcony from falling off the house. :O

Love this rickety old balcony!
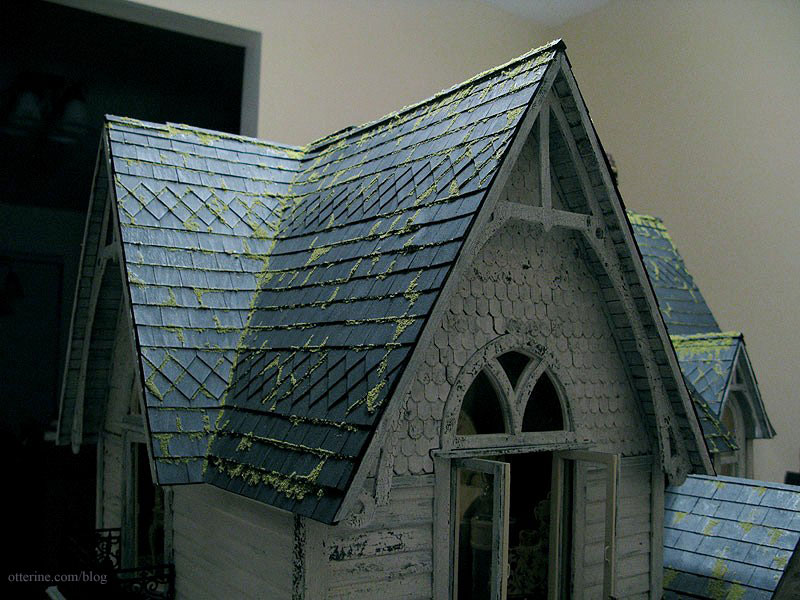
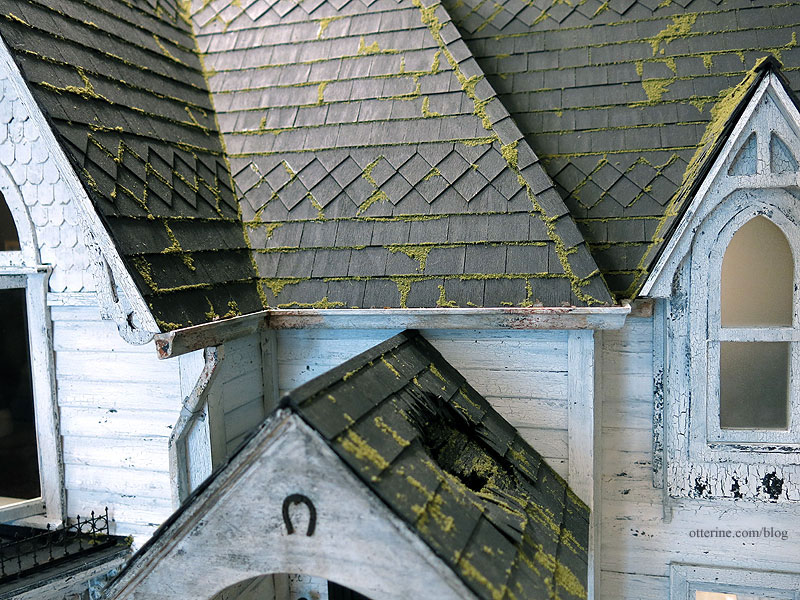
I wanted to do something special for the roof and opted for two designs of shingles. There are two sections of diamond shingles between the rectangular rows.
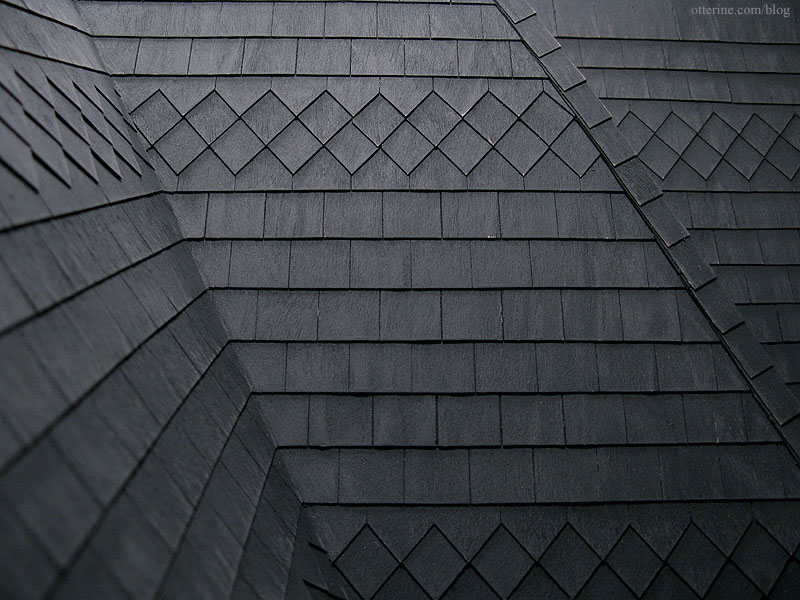
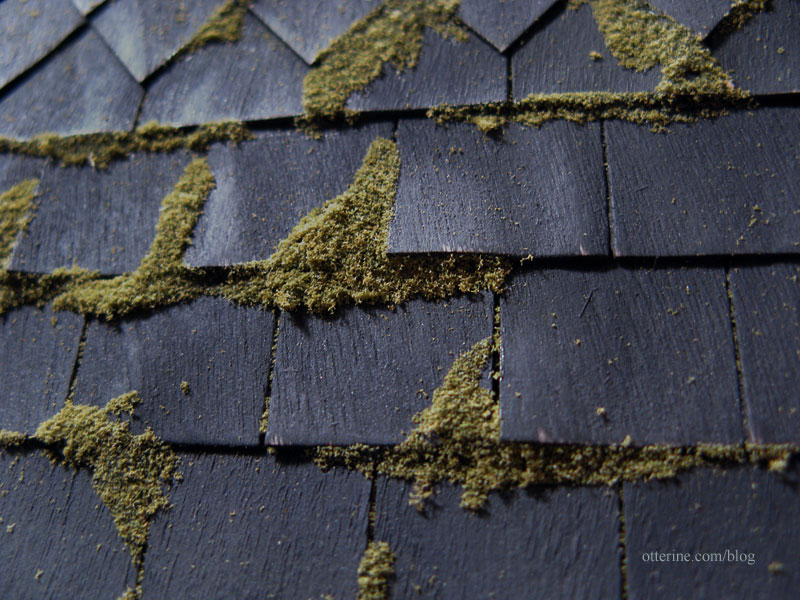
Once the roof was completed, I added moss to make it older and spookier.
For the especially warped shingles, I worked those in my favor by adding a lot of glue under and around them. This makes them stand out more, but they look more realistic. I think grandma might want to look into replacing a few of these before she ends up with water damage. ;D
This raised portion of the back roof is an addition I scratch built.
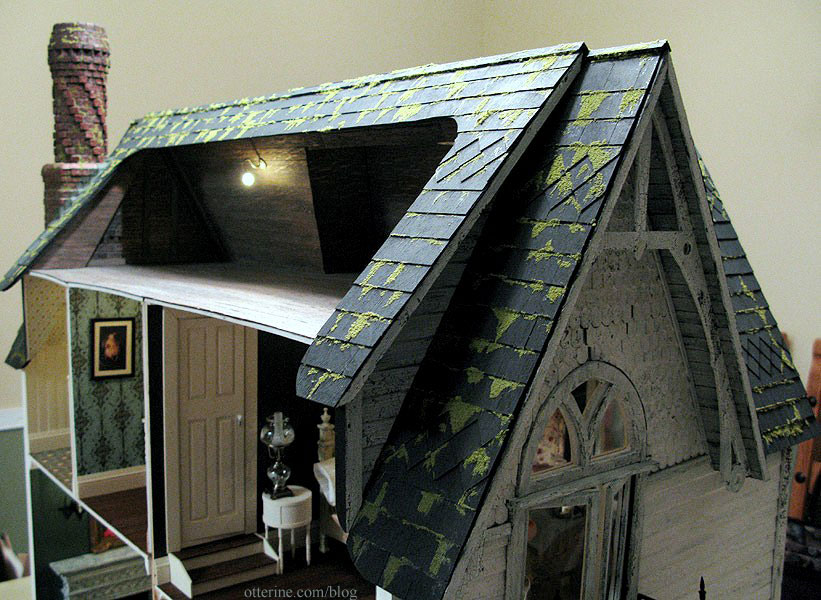
When I added to the second floor ceiling boards in the back, I effectively eliminated the sloped ceilings on that floor, except at the outer side gables. The bathroom vanity cabinet, hall table vignette and bedroom door would not have been possible had I kept the angled back walls that followed the slope of the roof. However, when viewed from the side, these outcroppings were visible. The new side roof additions solved that problem.

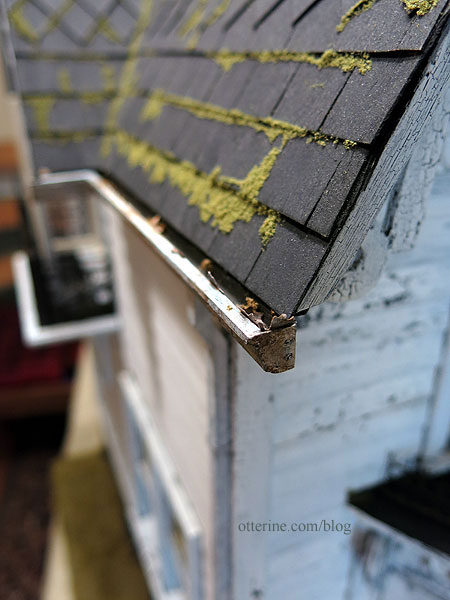
I finished the eaves with strips of wood scored to look like individual boards and added trims to cover gaps and seams. I've found that the more trim I add, the more realistic the house seems.
The fancy gables are one of the best features of this house, and I kept them as is for the most part. I did shingle the entire surface of the gables instead of only partial coverage as indicated in the original kit. I also used half scale shingles for a better representation of what these would look like on a real life house.
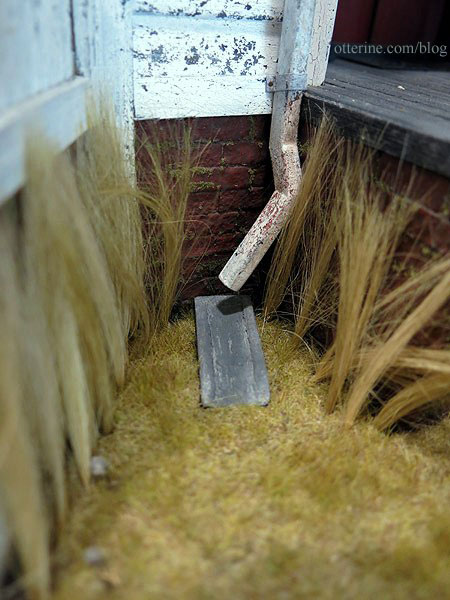
The Heritage kit included gutters and downspout materials that were acceptable, but I went with different parts. I bought gutter shaped wood that was shaped differently and was lighter in weight. I formed the downspouts from 1/8" x 1/4" wood. The original kit intended for only the left side to have a downspout yet there would be gutters all around the front. :\ Well, that wouldn't do! Water would be pouring over the sides all over the entryway and porch.
I painted the pieces to look old and rusty, filling the gutters with leaves and moss.
The bottom ends of the downspouts aren't easily seen, but I did paint them black to give the illusion of being hollow.
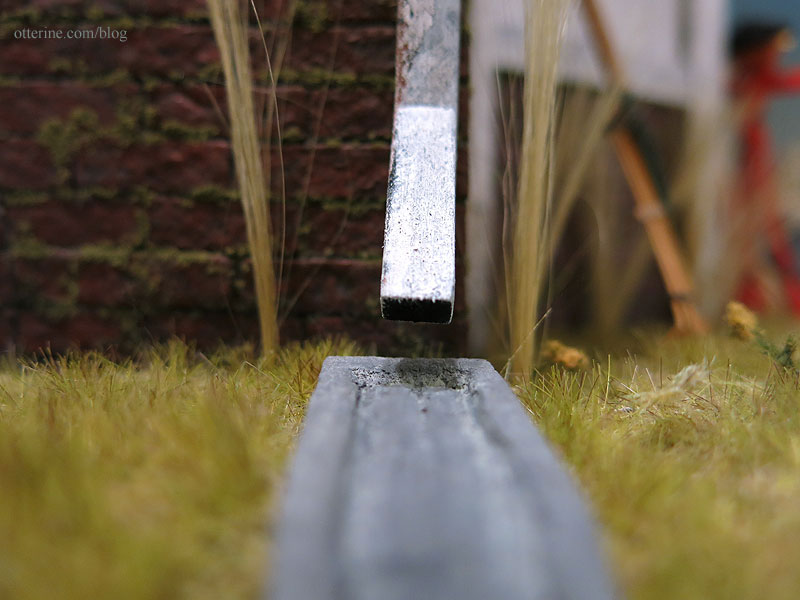
The splash blocks are balsa, shaped by sanding and painted to look like concrete.
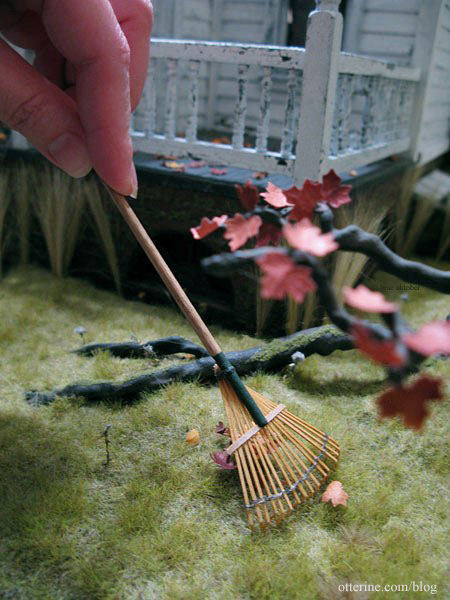
Grandma has no leaf screens, so looks like she'll need some yearly help getting these cleaned up. :D
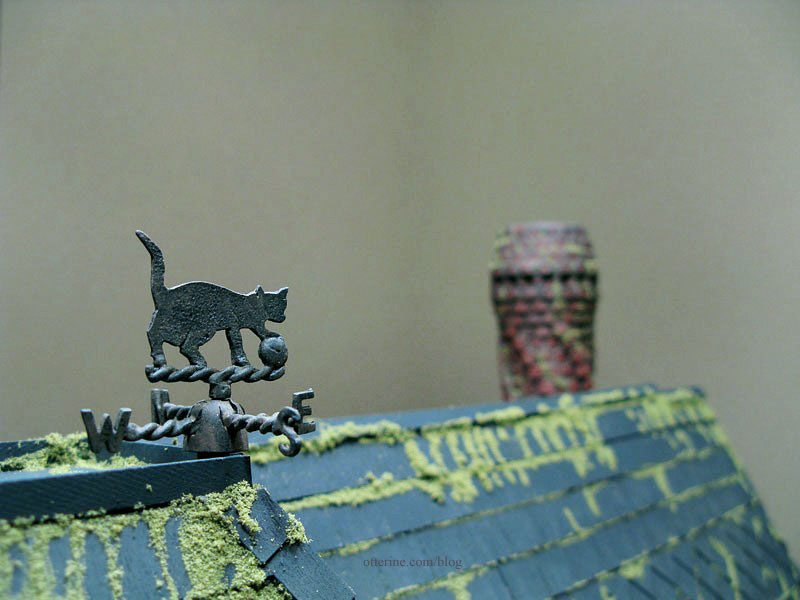
What's a haunted house without a black cat? Boring and unfinished, that's what it is. I bought this delightful weathervane from Minimum World Furniture Limited. It's made from silver metal, so you can paint it any color you like. I sprayed the pieces flat black then applied a little Bittersweet Chocolate followed by a wash of Terra Cotta, both by Americana.
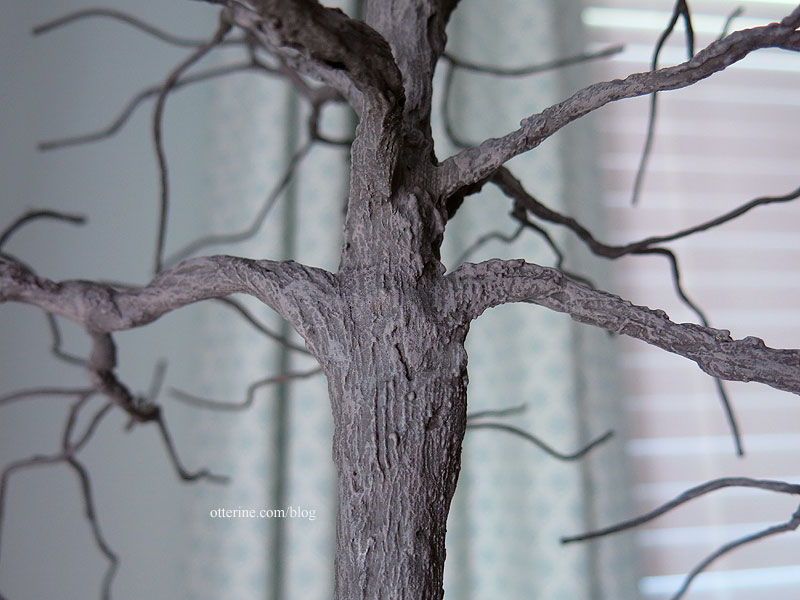
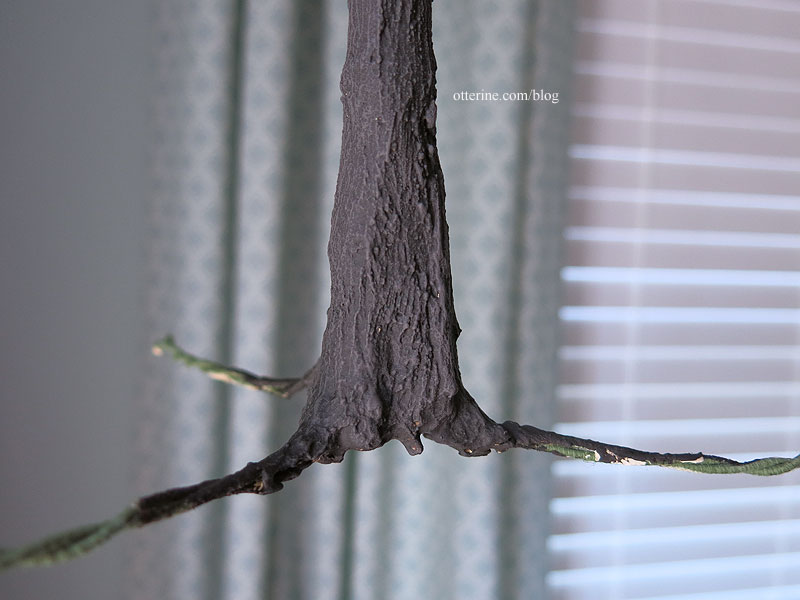
The landscaping started with scraps of builders foam to make the ground uneven. Then came planting The Tree made following the tutorial from the DVD Master Miniaturists: Landscaping Primer with Diane Myrick. I love the texture on this tree!
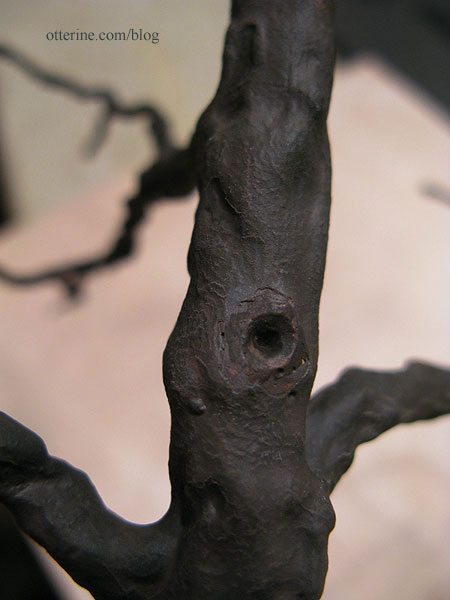
Instead of using the foliage materials recommended in the DVD, I punched colored leaves from paper and shaped each one individually. This old tree isn't dead or dying by any means. It's just ready for its winter slumber. zzzzzzzzzzzzzzzzz
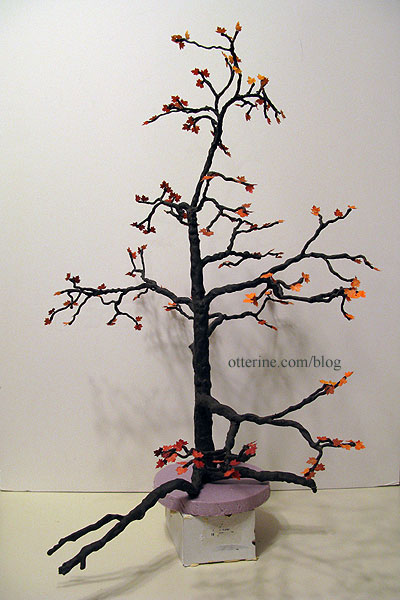
When planting The Tree, I formed Grahame's burrow. Grahame the badger was made by *Reve*.
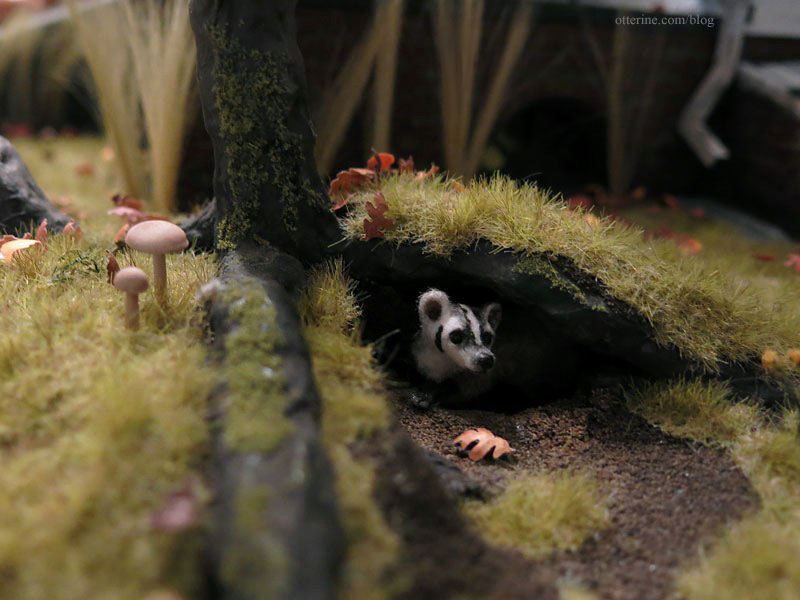
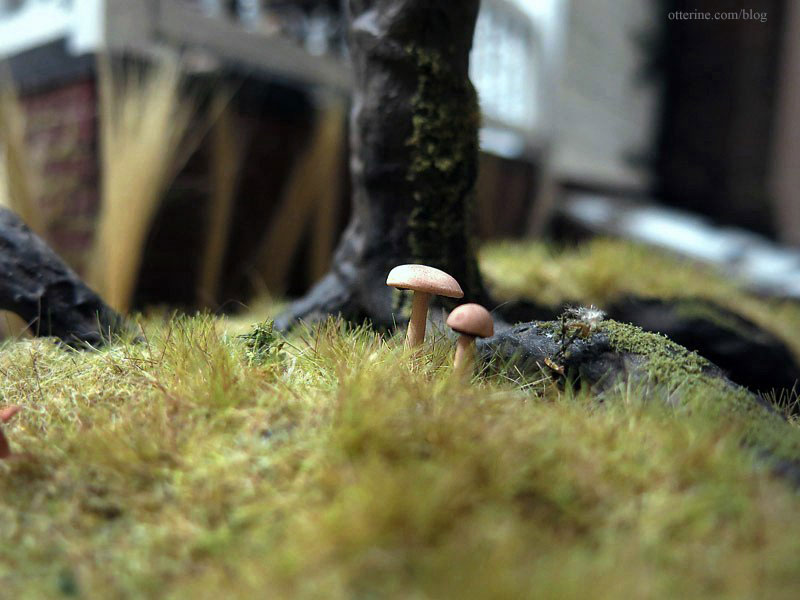
The main grass texture is Savannah TuftGrass by Heki. I added Goldenrod Weeds and Extra Long Autumn Tufts, both "Silflorettes" by MiniNatur for some variety in the vegetation. There's also a bit of moss on the trunk and roots. The long grass tufts are Woodland Scenics Field Grass. The mushrooms were made starting with Peiwen Petitgrand's polymer clay book, though I made some modifications to achieve the look I wanted.
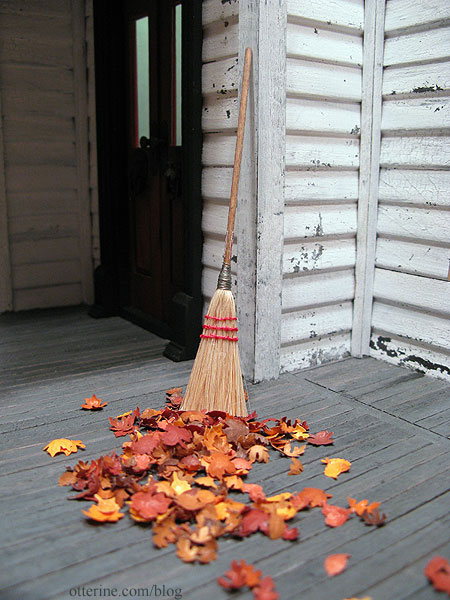
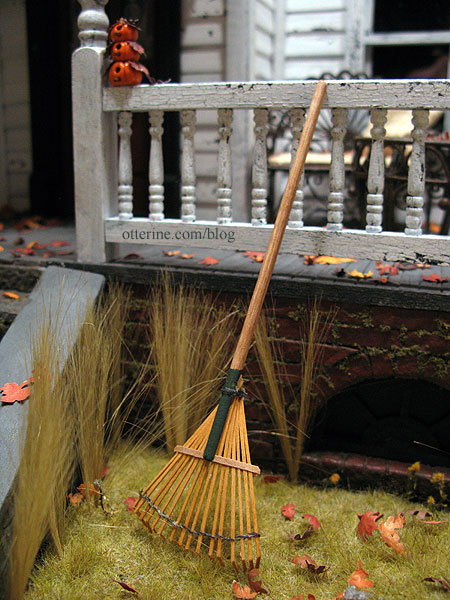
The leaves you see scattered around were handmade from paper - individually punched from marker colored paper and shaped.
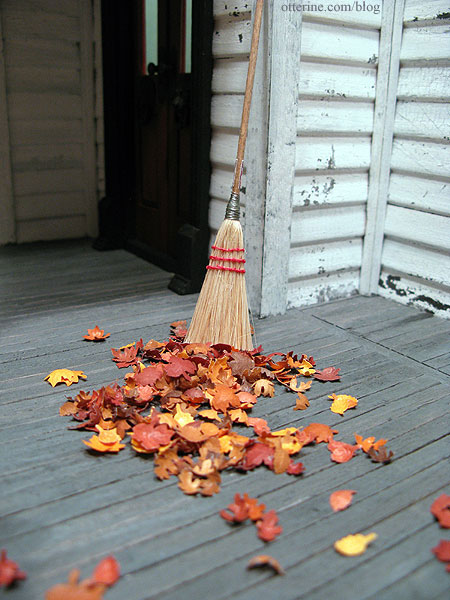
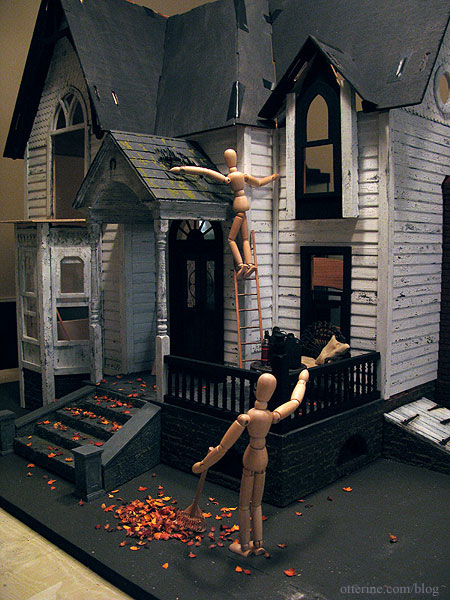
The rake is by Sir Thomas Thumb.
I added a beautiful aged metal birdbath by Island Crafts & Miniatures to the front lawn. The last time I made an aquarium, I used some leftover Acrylic Water resin to fill the bowl. The birdbath is from Dejoux Miniatures.
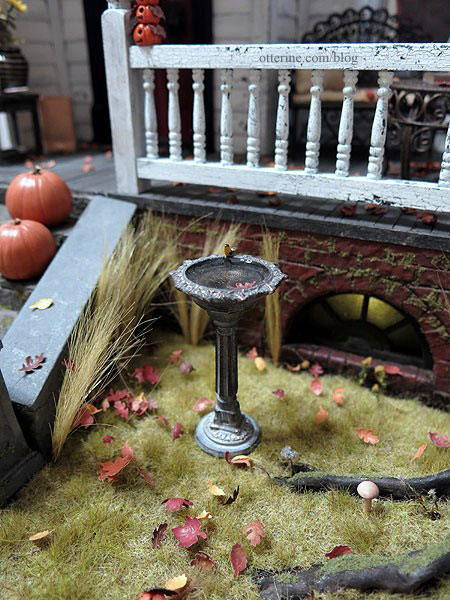
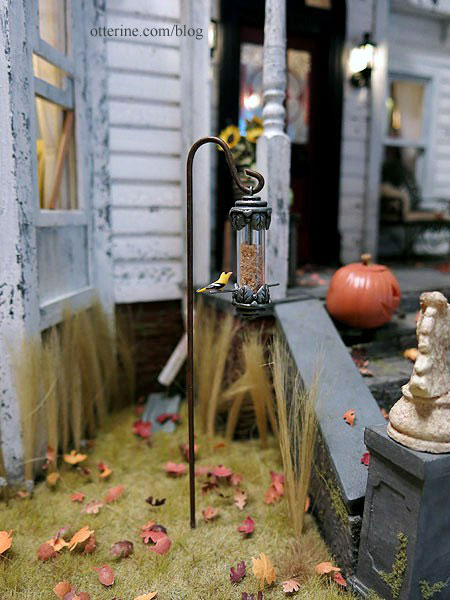
I also planted the shepherd's hook on the side of the stairs to hang one of my birdfeeders. :]
One element I ended up leaving off was the fence and front gate. I was on the fence...er...about the fence for awhile and then decided against it. Here's the quick setup I did to see if I liked it.
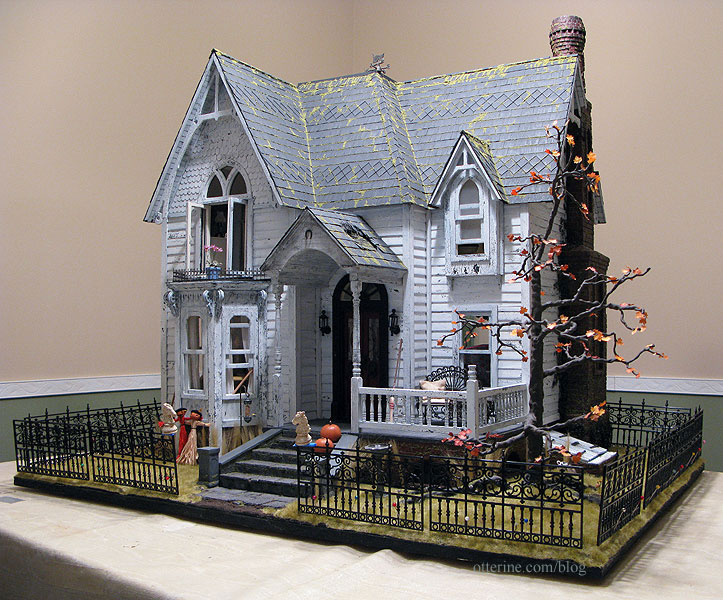
Though I do see the appeal, I think what bothered me about the fence was the fact that it obscured the wonderful tree roots, leaves, mushrooms, Grahame's burrow, the stone steps and the cellar doors and windows. And, it seemed to turn the Heritage from interesting old house into Halloween Village house...less architectural model and more holiday decoration. I can always add a fence, but it would have been a lot of work for something I wasn't 100% thrilled about. For now, grandma's neglected lawn stays open.
I missed Halloween 2011...
But, even though the house was still incomplete at the time, grandma did it up big for Halloween 2012.
Grandma read Edgar Allan Poe outside while enjoying the crisp autumn air. The afghan was made by Mary of Woodland Miniatures. I made the book for the Heritage parlor bookcase.
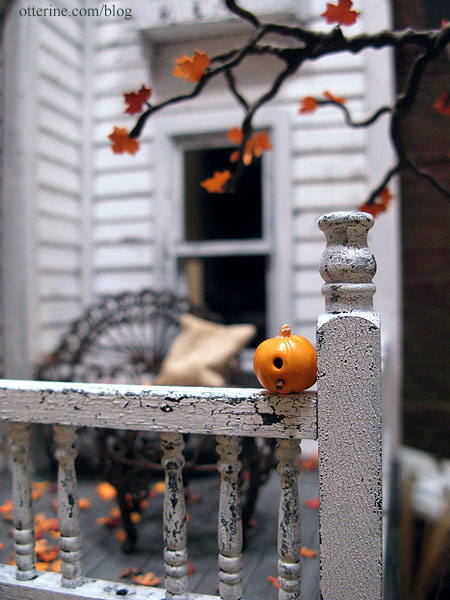
Every Halloween display needs a jack-o'-lantern! Ophelia wouldn't have it otherwise.

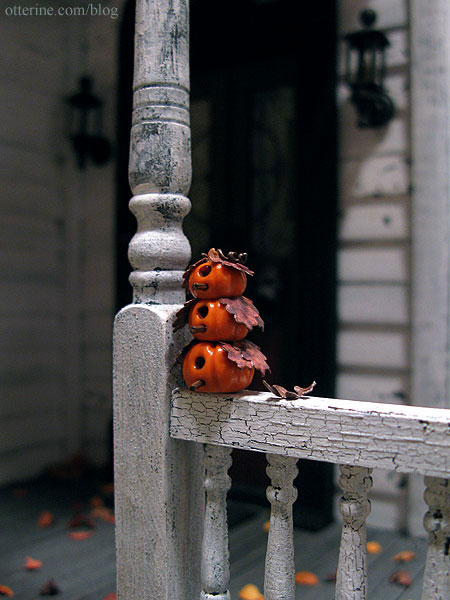
I made the pumpkins out of two colors of clay baked around foil spheres. I was planning to carve all three, but the first one was hard enough to make me skip the other two. :D

I used a single orange bulb flickering LED from Evan Designs. It is attached to a 3V battery adapter with a switch, which sits inside the cellar doors. Hooray!

I apologize for the poor quality of the video, but it's the best my camera will do. At least you get to see the flickering LED!
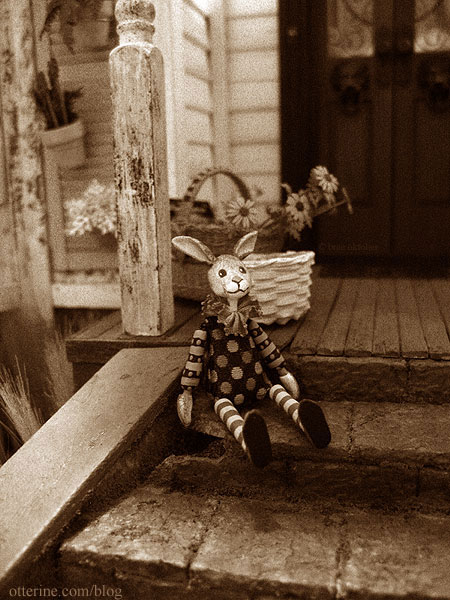
And, grandma even celebrated Easter 2013.
With The Haunted Heritage completed, grandma is looking forward to Halloween 2013. It's certain to be a big celebration inside and out!
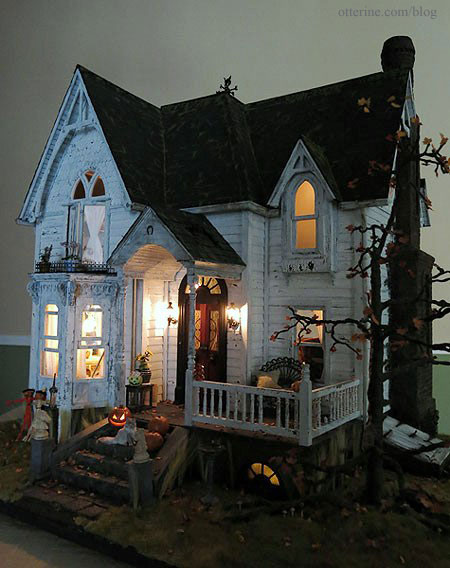
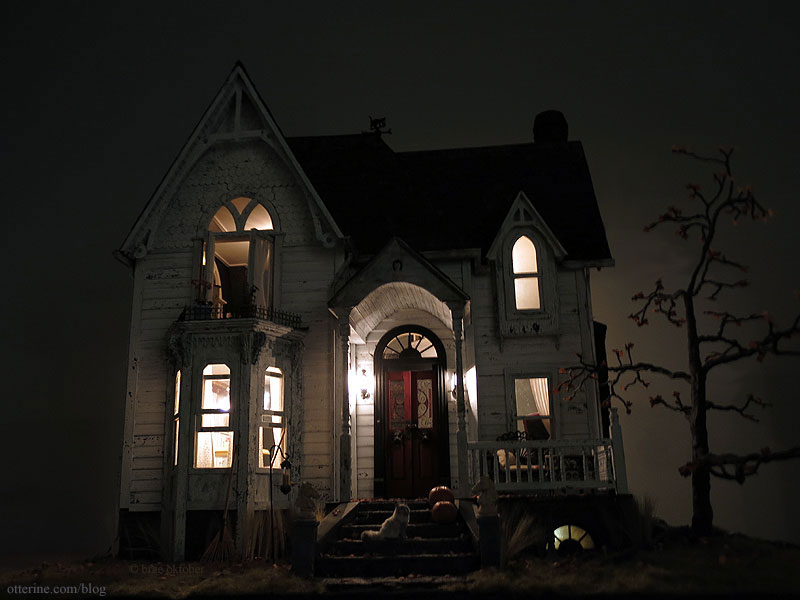
Always love a nighttime photo...
-------
I hope you've enjoyed following this build as much as I have enjoyed swearing while putting it together! Haaaaaa! In all
seriousness, thank you all for the kind comments, invaluable help and generous gifts along the way. Hugs all around!!! :D
Ok...I have yard work to do.... Ta!