Category: "Greenleaf 2012 Spring Fling - The Aero Squadron Lounge"

 Find me on Instagram


The Aero Squadron Lounge - a pictorial review
UPDATE 2024: This post is being moved to the new blog so the links included are broken. Please check back later.
------
Many images in this post can be clicked to view larger. To see a list of posts showing details on how I made things or what materials I used, as well as more pictures, click this link.
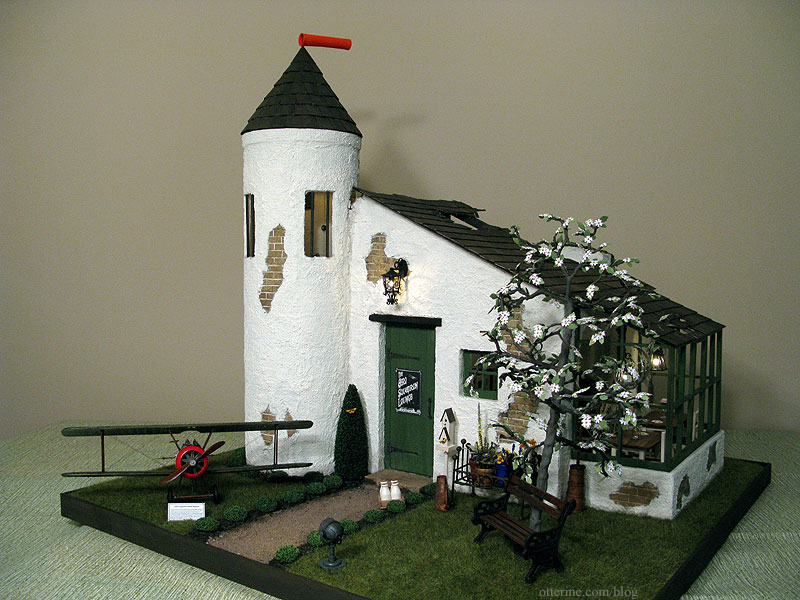
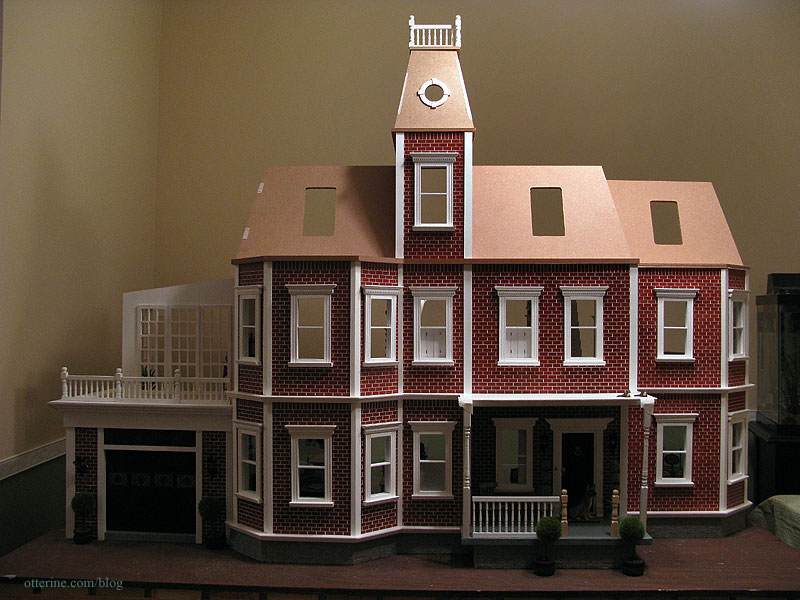
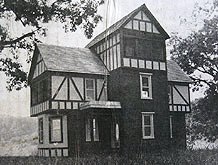
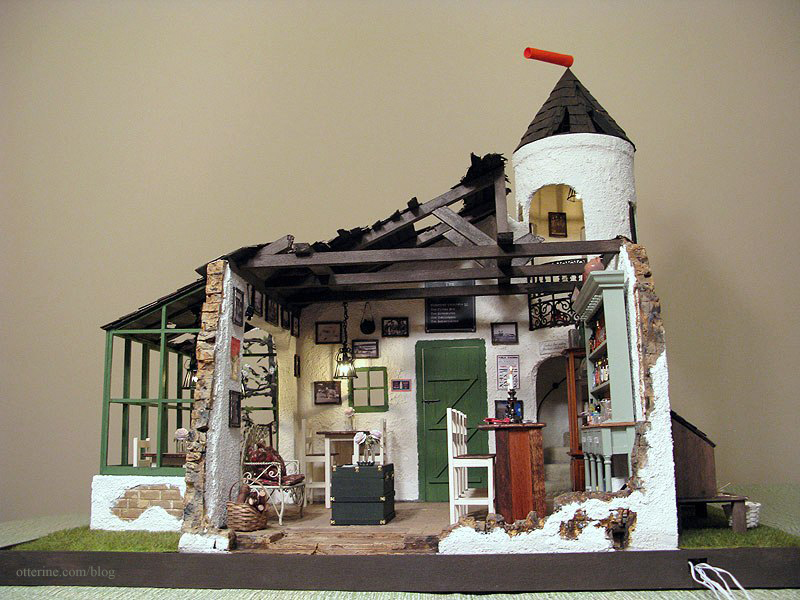
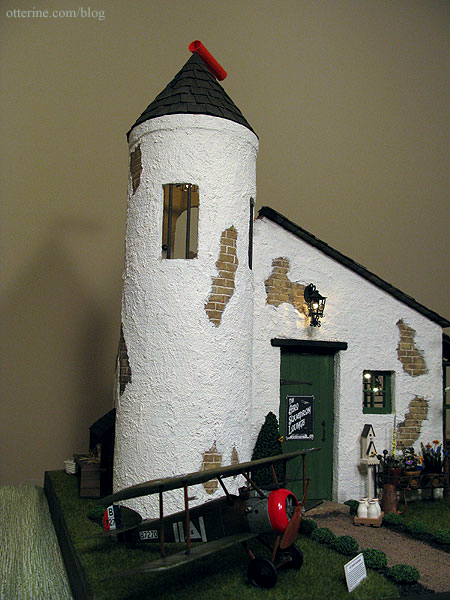
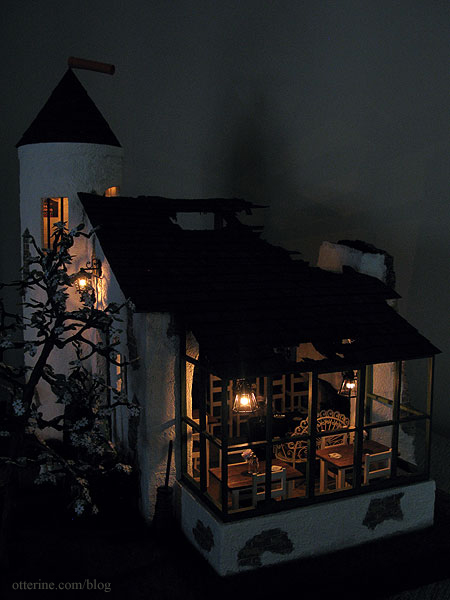
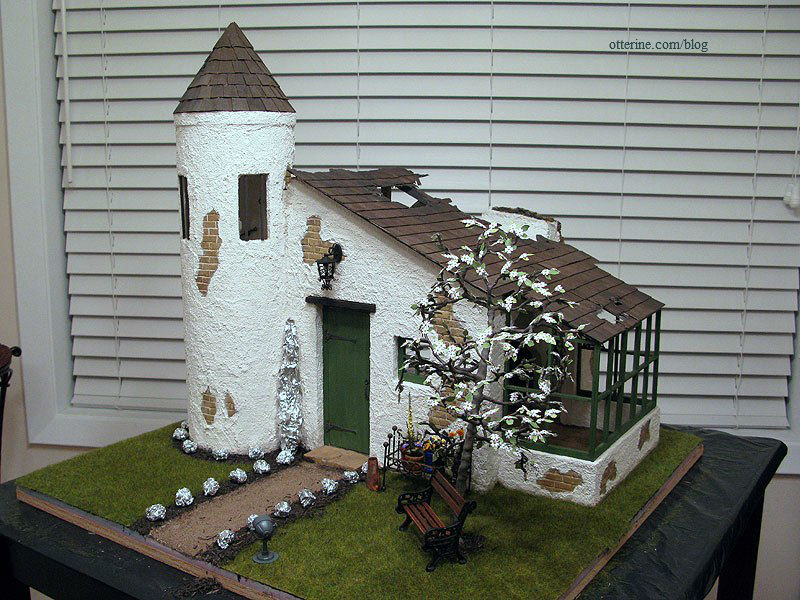
On the property of the local aviation museum sits The Aero Squadron Lounge, a WWI themed lounge modeled after a French farmhouse ruin. Outside is a replica 1917 Sopwith Camel aeroplane, and inside you will find a unique setting to enjoy a beverage and view the WWI and aviation memorabilia. Climb the tower for an aerial view of the Sopwith Camel and picturesque grounds. Stop in today and enjoy one of our signature cocktails: The Flying Ace, The Bombardier, The Tailgunner (limit two please) or The Barnstormer. Please don't feed the hens.
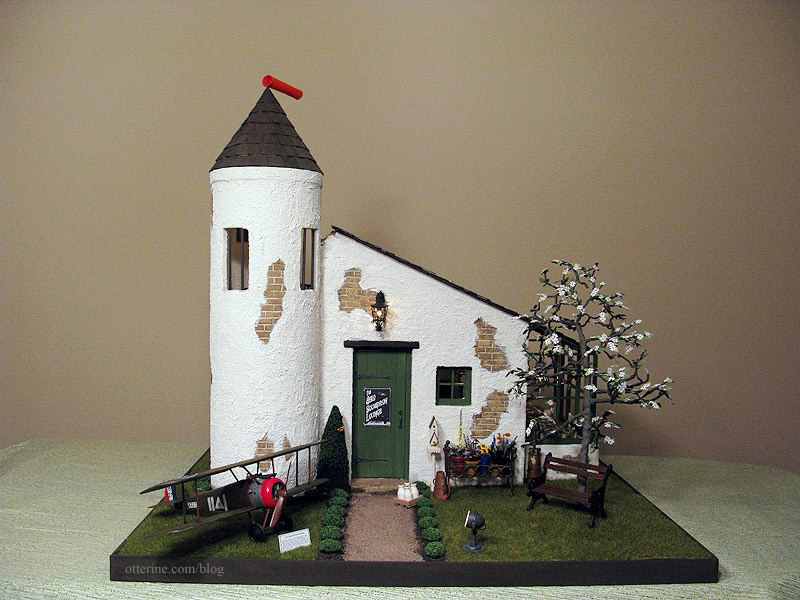
This build was so much fun, but so challenging, too! I made just about everything for this build myself, including the 1:32 scale Sopwith Camel, dogwood tree, flowers, hens, fireplace and furnishings. The things I purchased include the glass, plastic and metal items as well as the display cabinet, shrubs and lighting.

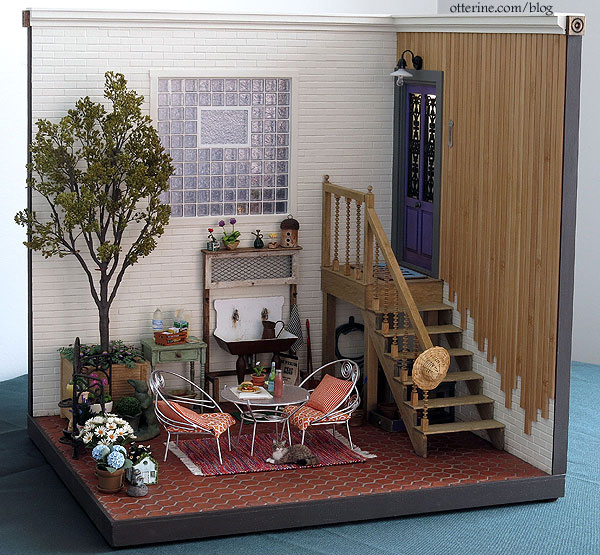
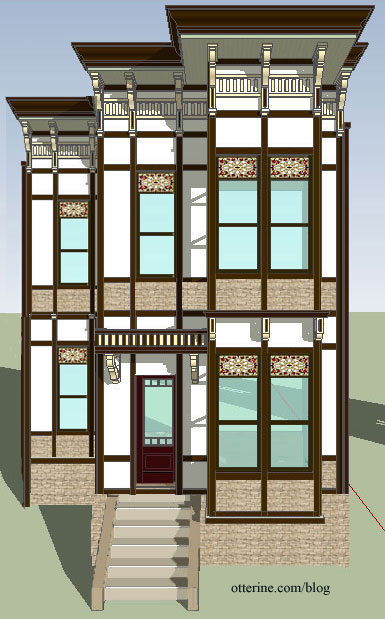
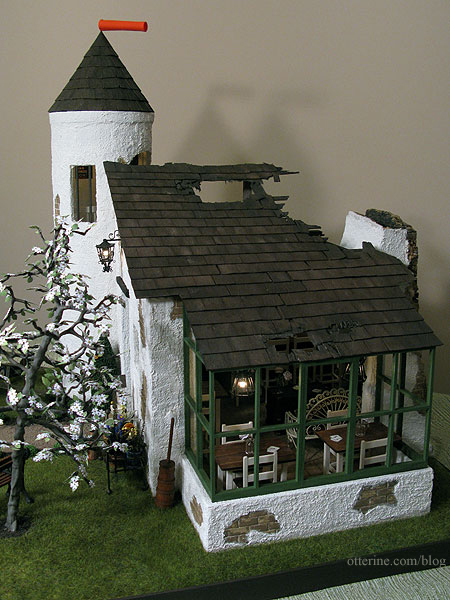
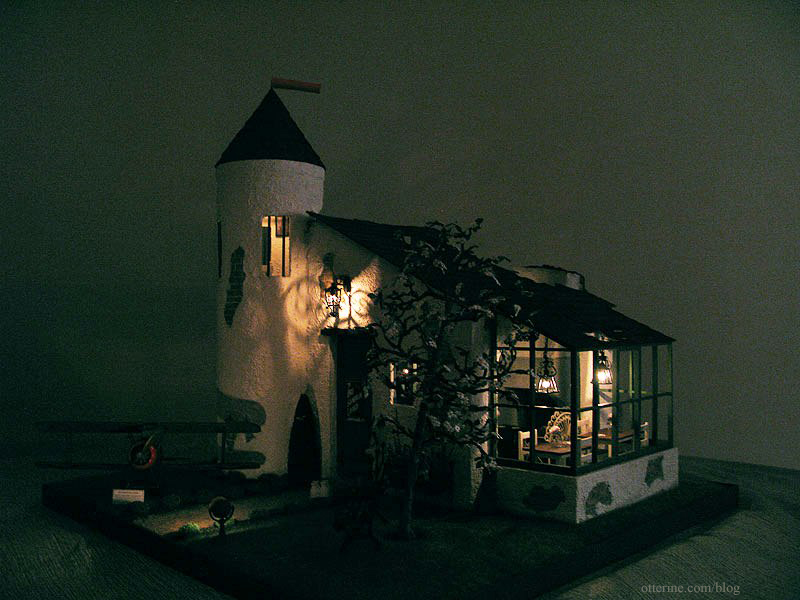
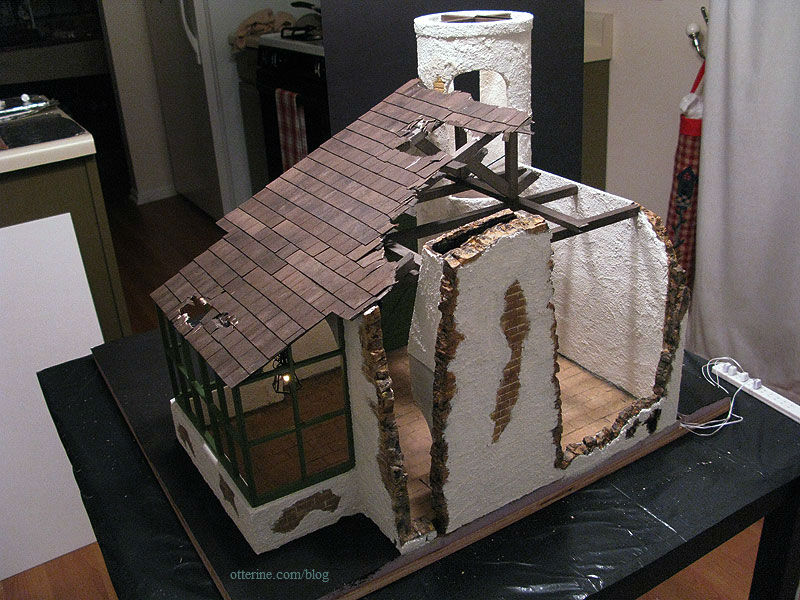
As you can see, this is a 360° build, with the removable fireplace being the remaining component of the bombed out back wall. This allowed me to include more inside while still maintaining a view of the inside. It's a difficult build to photograph and is best seen in person where you can walk around and peer into all the openings.

Making things look blasted apart while still holding structural integrity was not easy. :D
I learned so many new techniques and used a LOT of math. :O
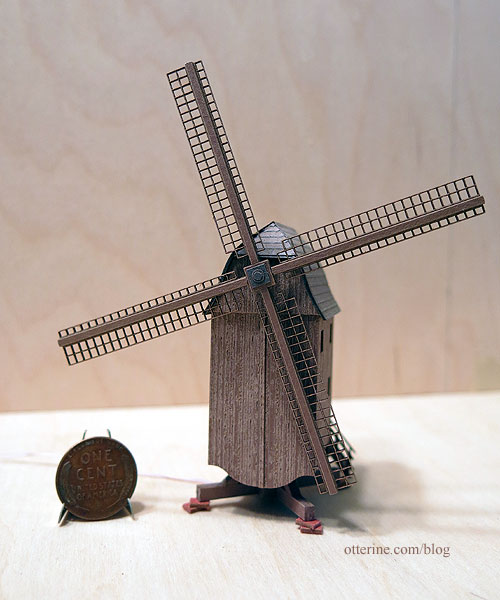
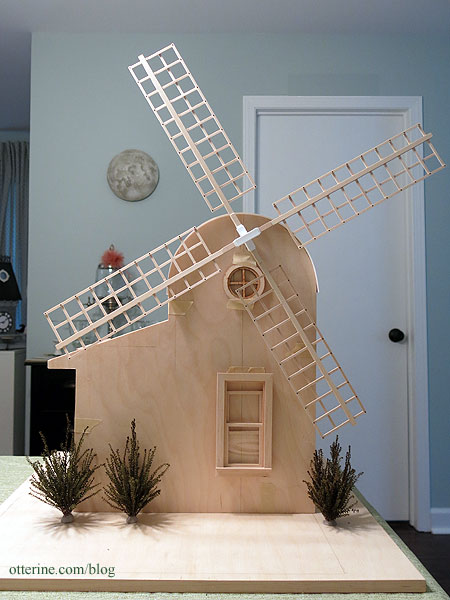
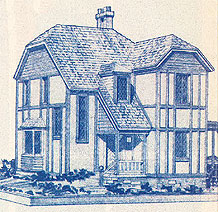
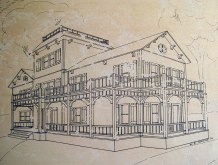
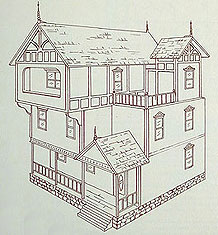
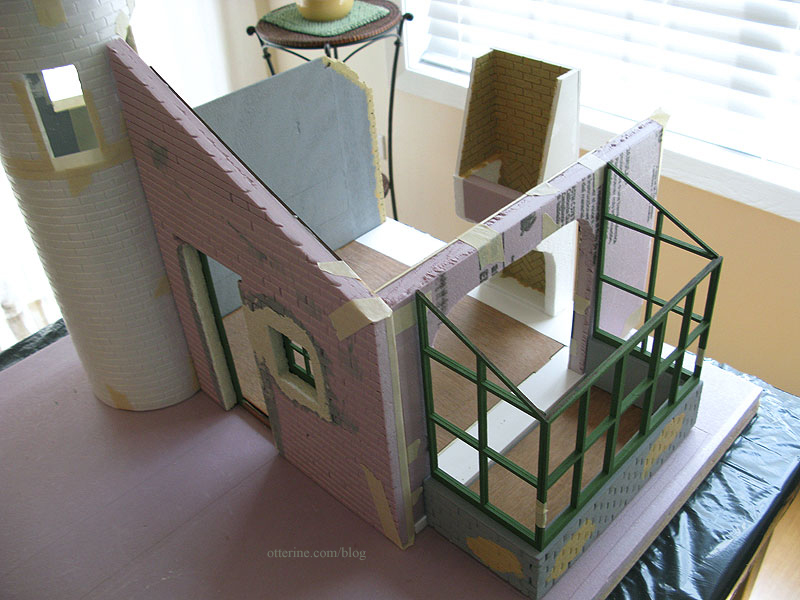
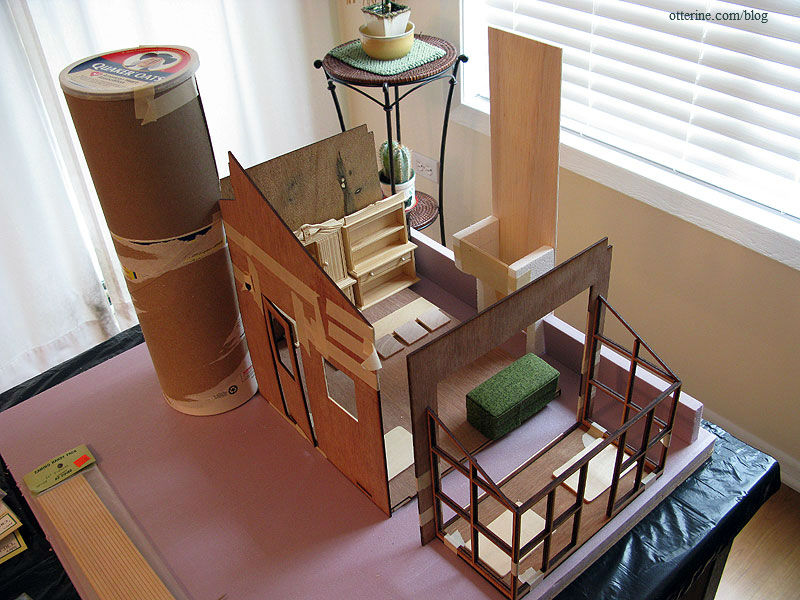
The Lounge was made using the base kit and the greenhouse addition. Here's where the idea started.
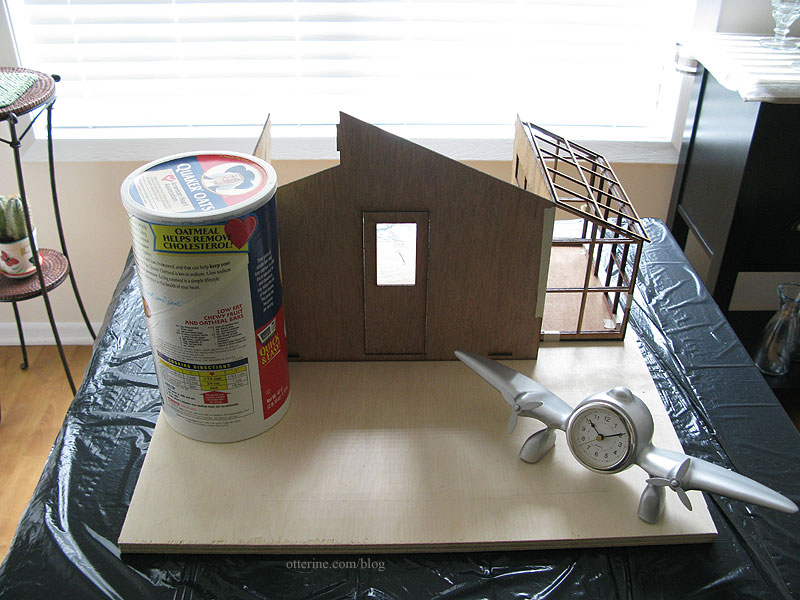
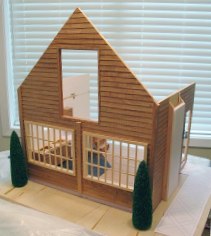
I swapped the oatmeal container for a mailing tube found on Freecycle and altered the kit by adding two inches to the height, width and depth. The mailing tube story is rather humorous. I put an ad on Freecycle looking for a 5-8" diameter mailing tube at least 24" tall. I had a reply within two hours and picked it up that evening. You should have seen their faces as I stood in their foyer wide-eyed with a huge grin and actually said, "Hooray," in a tiny sing-songy voice. Haaaaaaaa!!
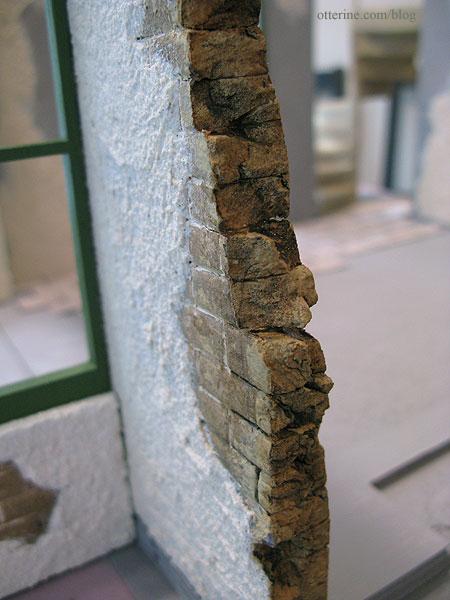
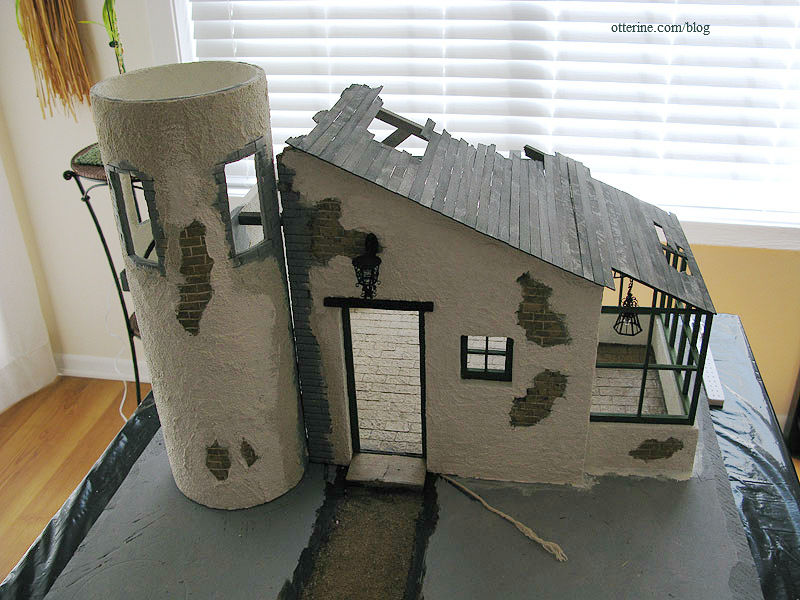
The outer walls and the lower portion of the greenhouse addition are pink builders foam. This stuff was awesome to work with. All of the outer walls were scored with a brick pattern, even though I planned to cover the exterior with stucco and leave only a few patches bare. The tower is covered with white styrofoam sheet also scored in a brick pattern.
I couldn't believe how realistic the stone looked after painting.
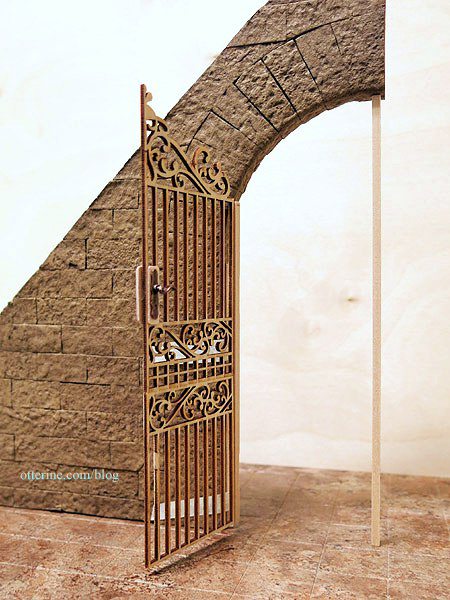
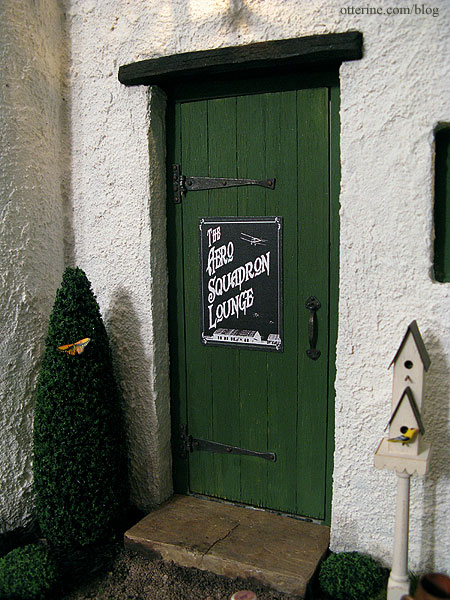
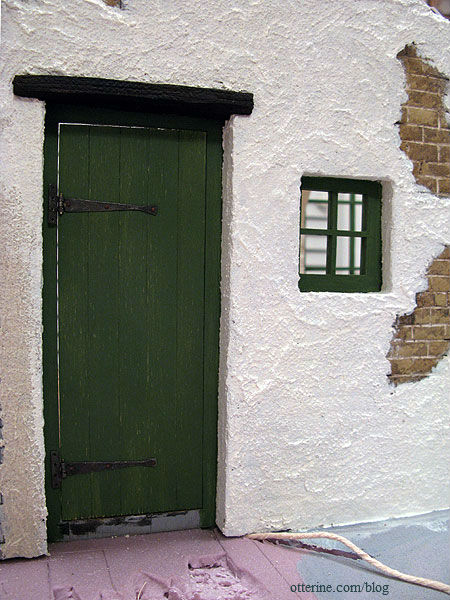
The front door was made from scrap wood to replace the clean laser cut door of the original. The working hinges are from Olde Mountain Miniatures.
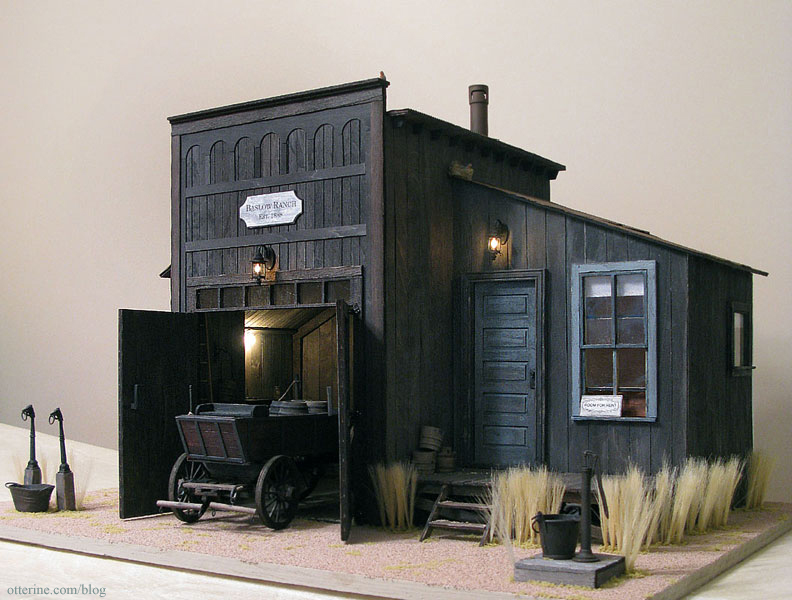
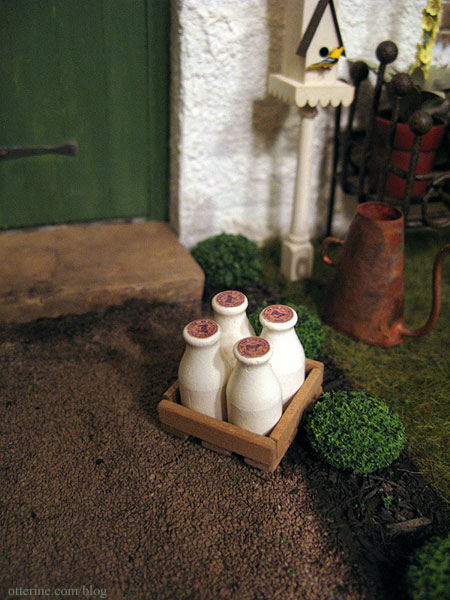
This stone slab was made using white styrofoam, spackling and paint. The gravel is Woodland Scenics Ballast left over from Baslow Ranch.
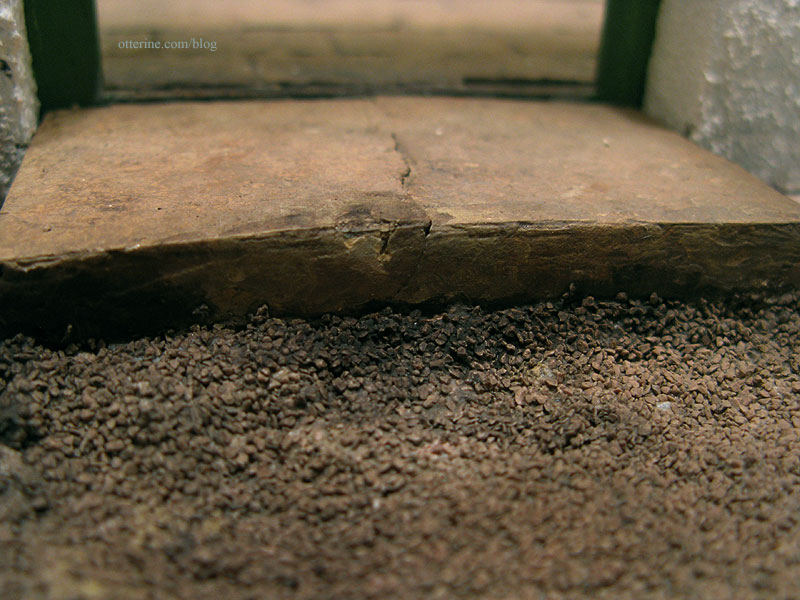
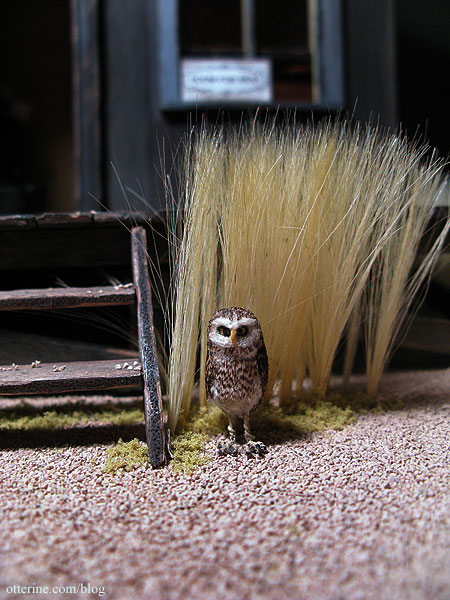
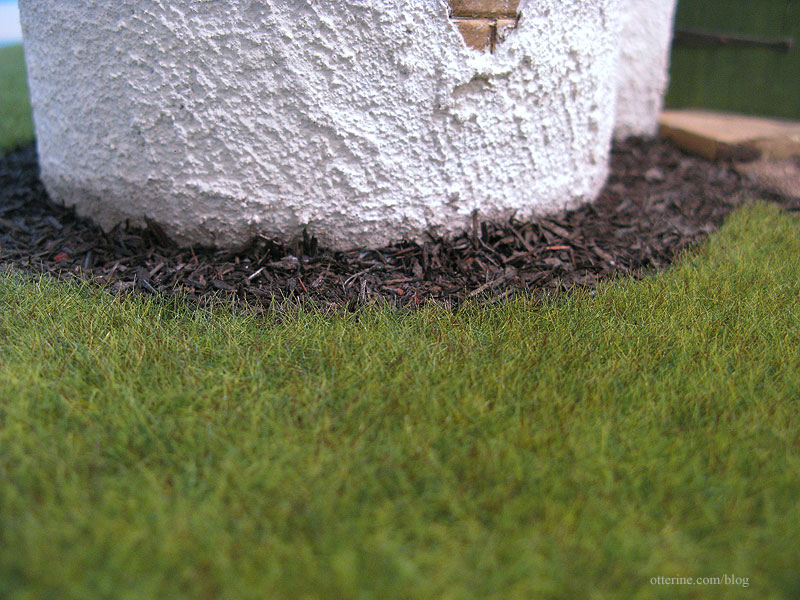
This was my first time landscaping in earnest. I started with a sheet of builders foam for the base, and used a carving knife to slope the edges. The dogwood tree has been detailed previously, and it had its own raised base. The grass is Woodland Meadow Field Grass by Heki, from Scenery Express. It's so realistic! The mulch is from A Little More in Miniatures, and the gravel path is Woodland Scenics Ballast leftover from Baslow Ranch. The shrubs and smaller trees are Squeeze Me trees from Model Builders Supply.
The dogwood tree has been detailed previously, and it had its own raised base created during the assembly phase.
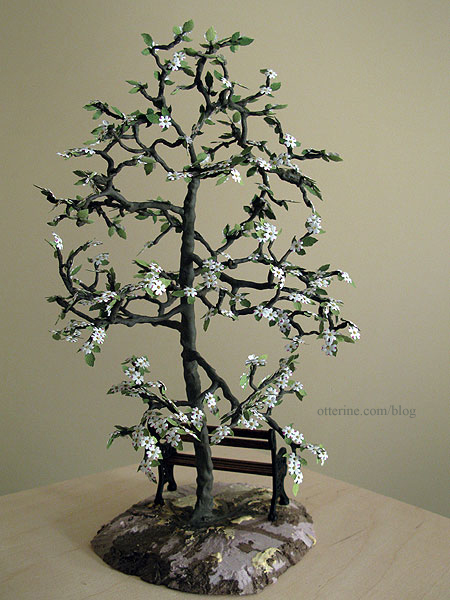
I love the way it looks with the bench in front of the tree.
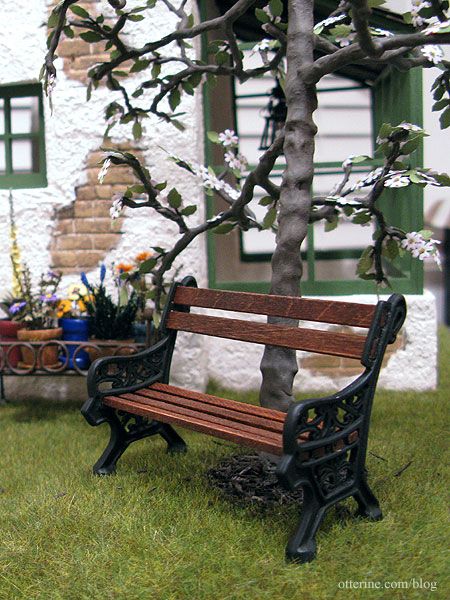
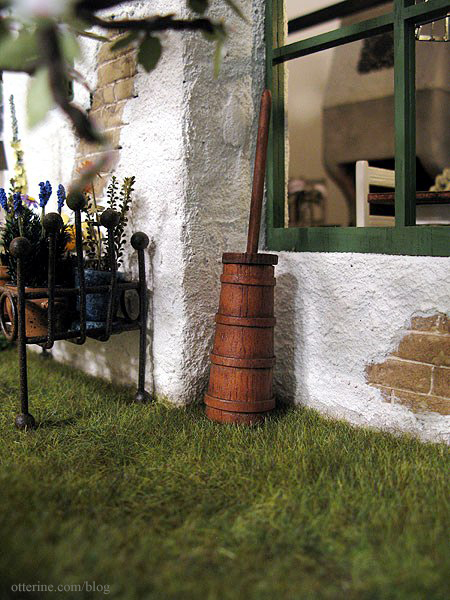
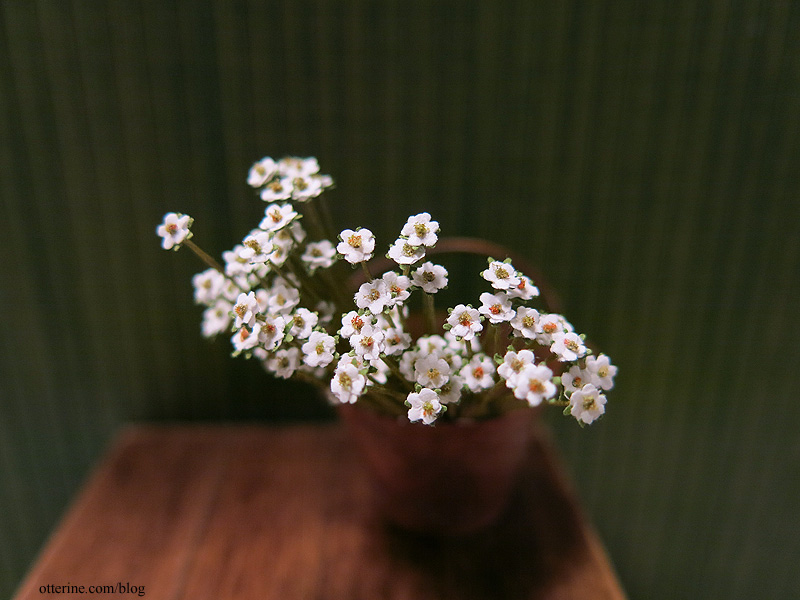
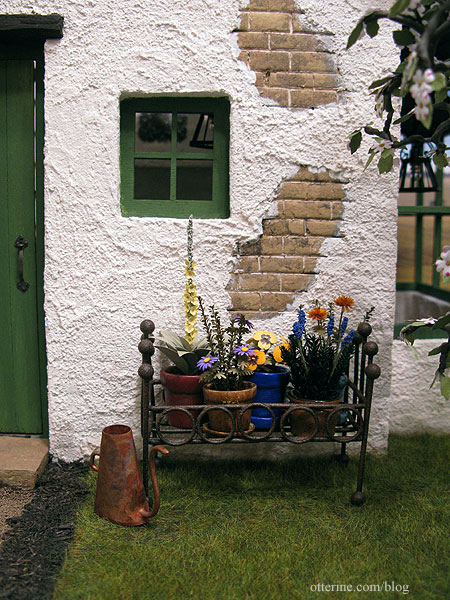
The rustic planter filled in the remaining area and helps disguise the front lawn seam, which is slightly visible from some angles. The plants are detailed here and here.
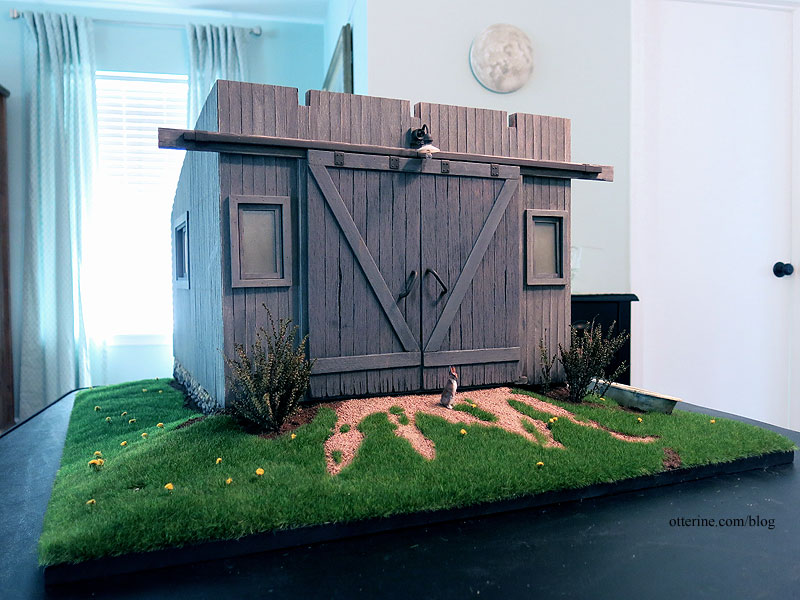
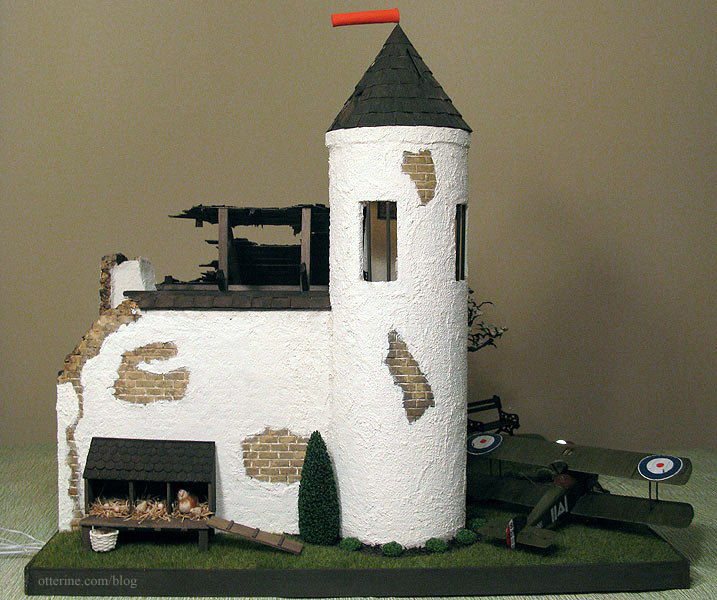
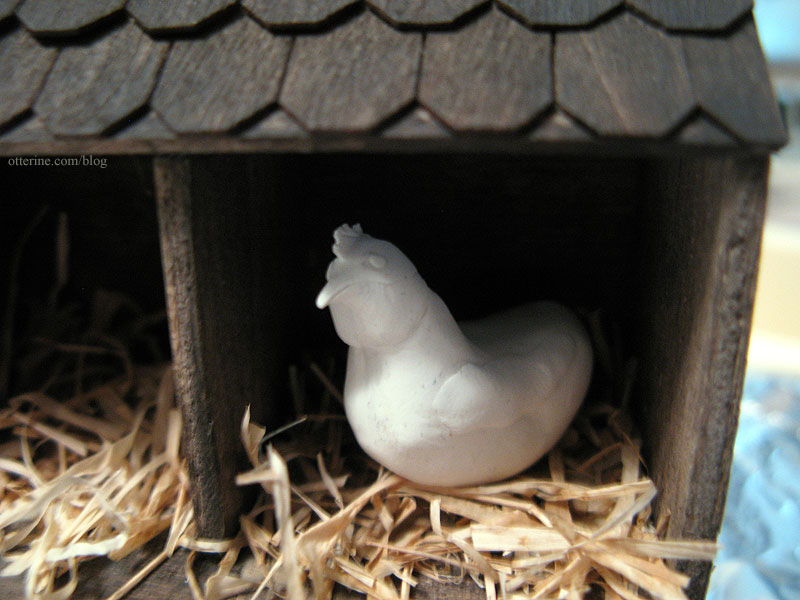
The henhouse was inspired by one made by Terry Harville that I saw at the Bishop show. If there's one thing I have, it's leftover scrap wood, especially from the Heritage build. I've been throwing all my scraps and punched out pieces into a plastic bin that I can rummage through as projects come up. The henhouse was made using only scrap items from this bin.
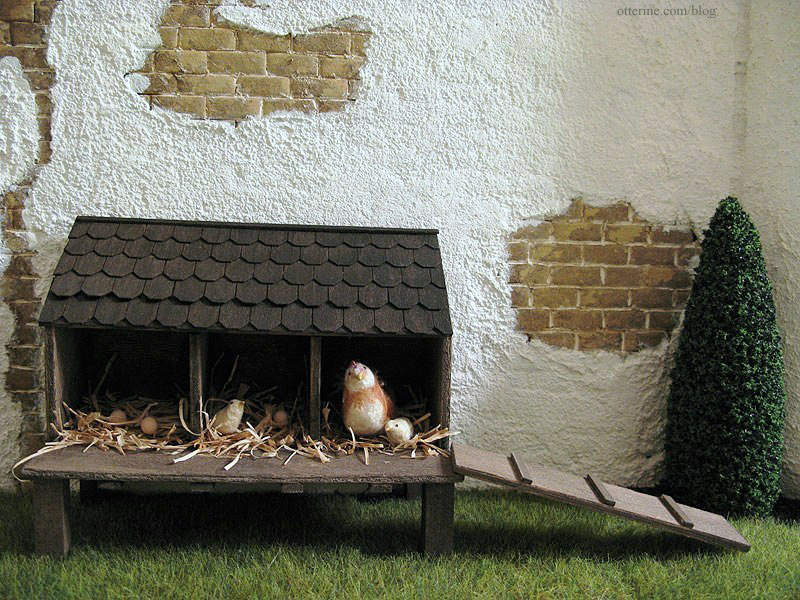
I used Greenleaf half scale speed shingles that I had left over from the Heritage gables for the roof. The nests are made from raffia cut into small pieces and glued in place.
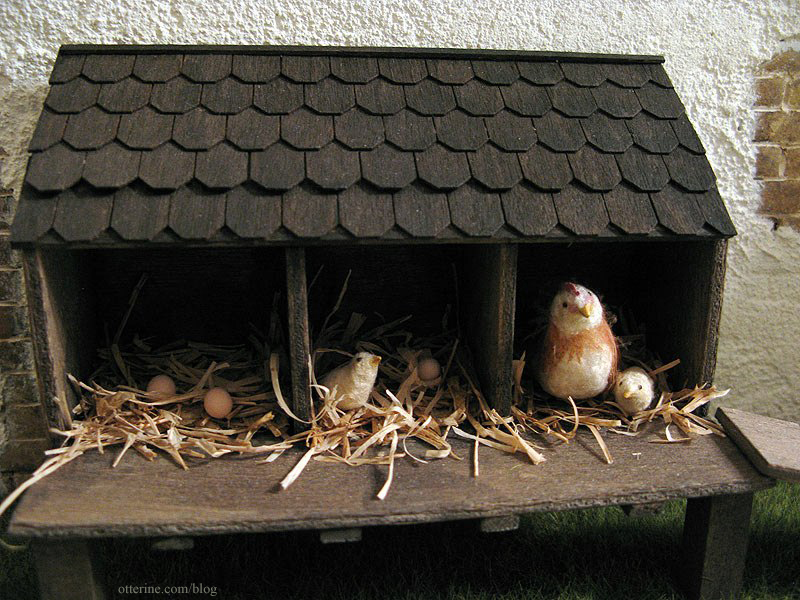
The breed of hens I've made are Faverolles, a French hen suggested by Teddi. I have a standing hen not yet completed, but I will add her later. :D These are made from polymer clay.
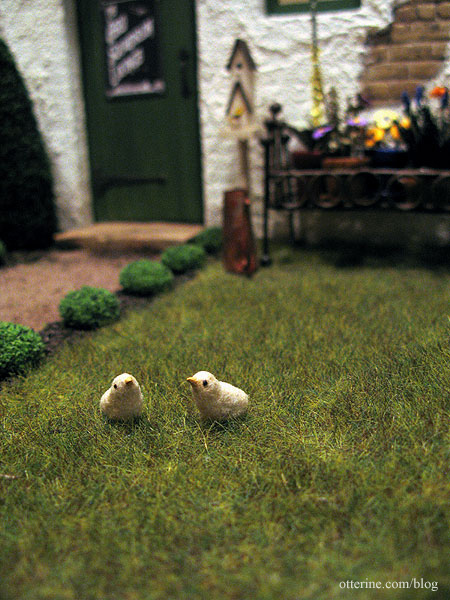
The chicks are flocked using snipped emboidery floss to make soft down.
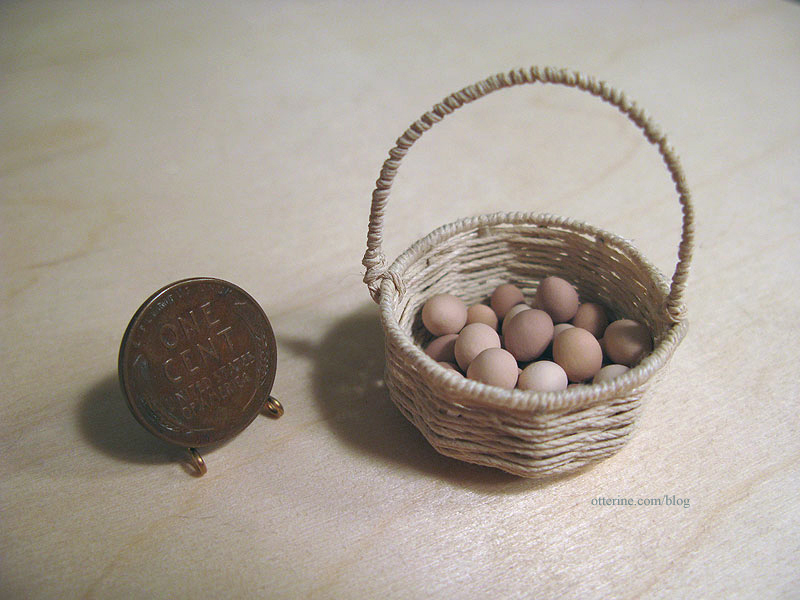
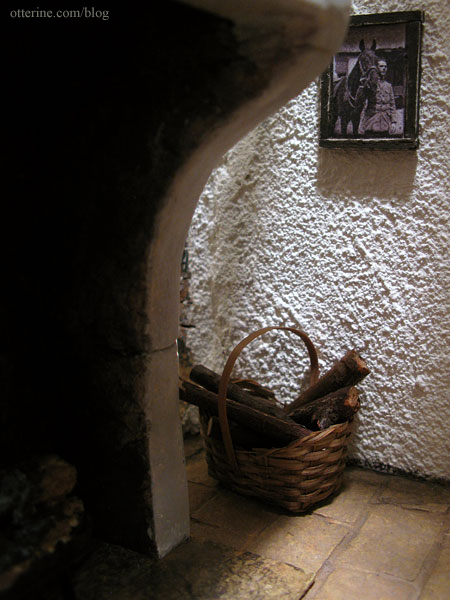
The eggs were made from clay, using several shades of pale brown. Lyssa made the basket. :]


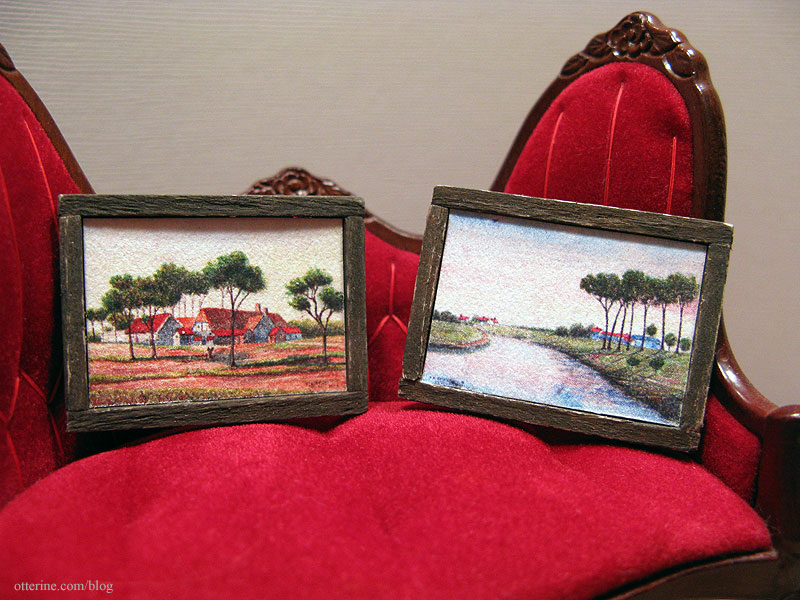
Detail shot of the watercolor paintings from 1916, wartime, that Elga scanned and sent to me.
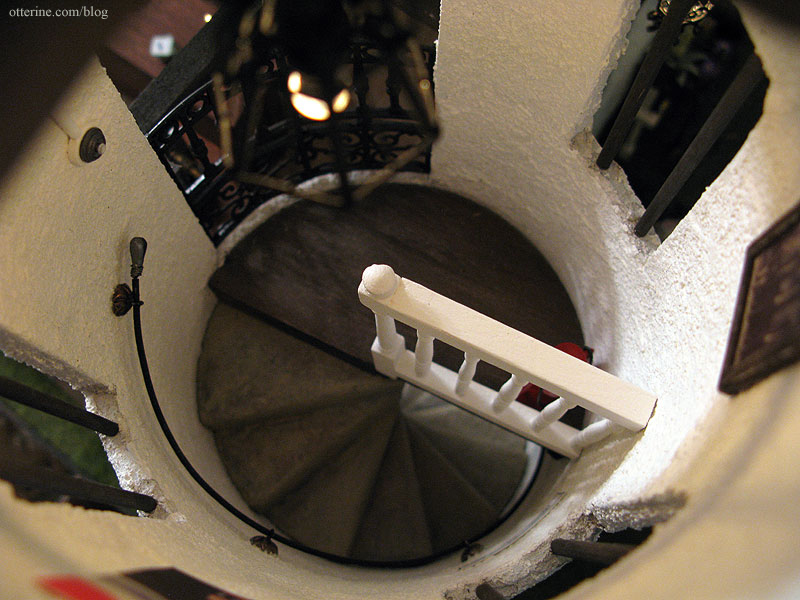
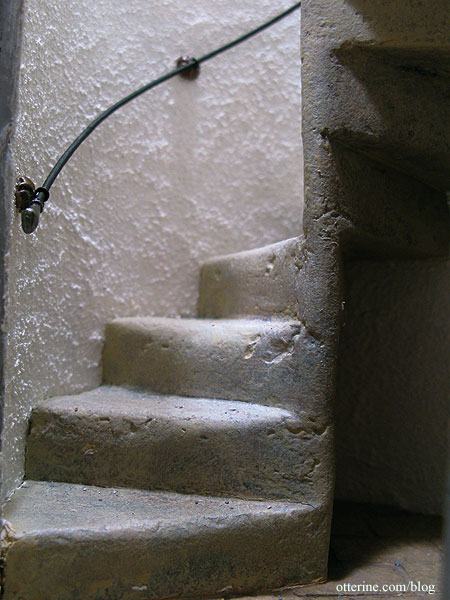
The tower spiral stairs were a challenge, but I love the way they turned out.

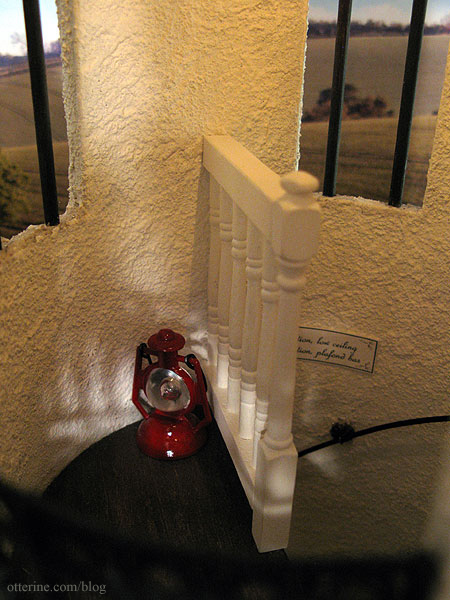
The most challenging light to wire was the tower light.
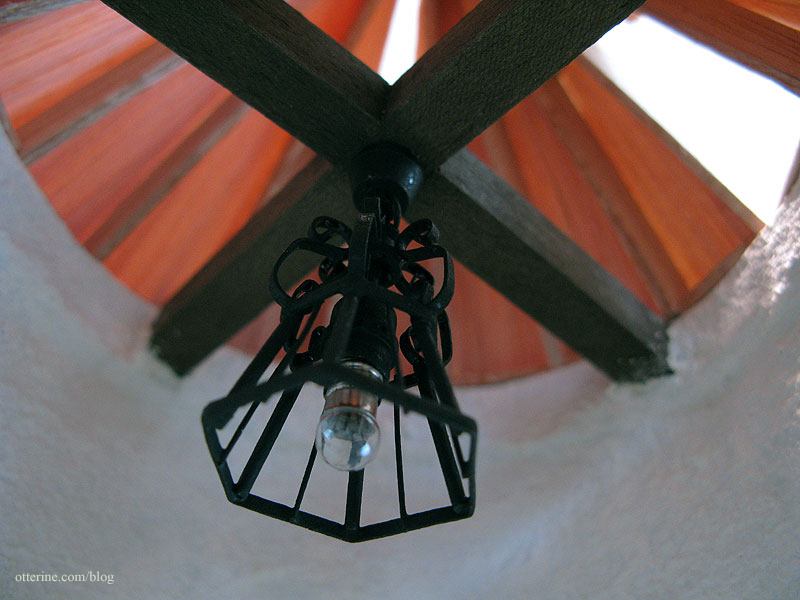
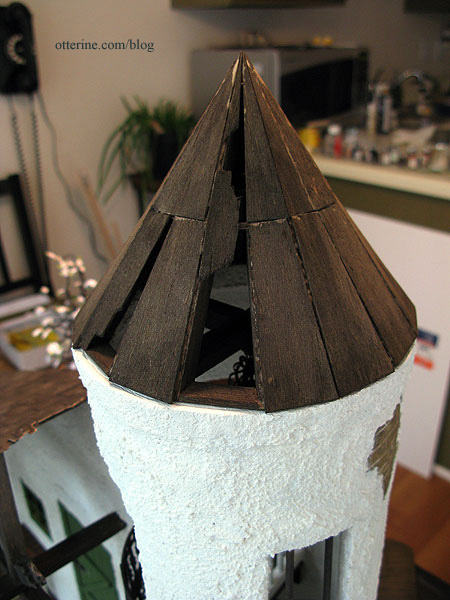
Even if I hadn't made the tower roof removable in the end, I wanted exposed rafters and holes in the roof. That meant you would be able to see the wire, even if I cut a channel into the balsa beam and painted it.
I opted to hide the wire in plain sight with conduit made from 3/32" aluminum tubing from my local hobby shop. I eliminated the chain on this light and made it a ceiling fixture. The wire goes up through the beam, through the conduit and out the side of the tower. The end wire runs between the tower and side wall, eventually to be covered with stucco.
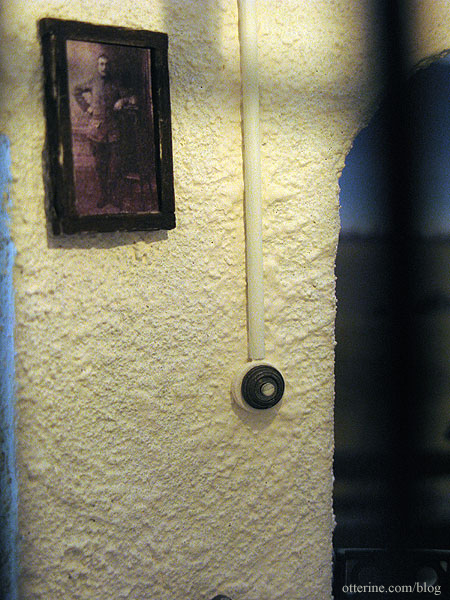
To disguise the end of the wire inside, I used a round wooden bead. I painted the conduit on the beam brown to match the wood. I painted the conduit along the wall and the wooden bead warm white to make it blend in with the wall color. I have seen conduit done like this in real life many times. I added a metal doorbell from Sussex Crafts to act as a vintage light switch. Now the illusion is complete. The whole process is detailed in the tower construction post, part 3. Here is the faux switch for the tower light.
The tower roof was my second major foray into math. I found this forum thread on conical roof framing, which had exactly the reference photo I needed to help it click for me.

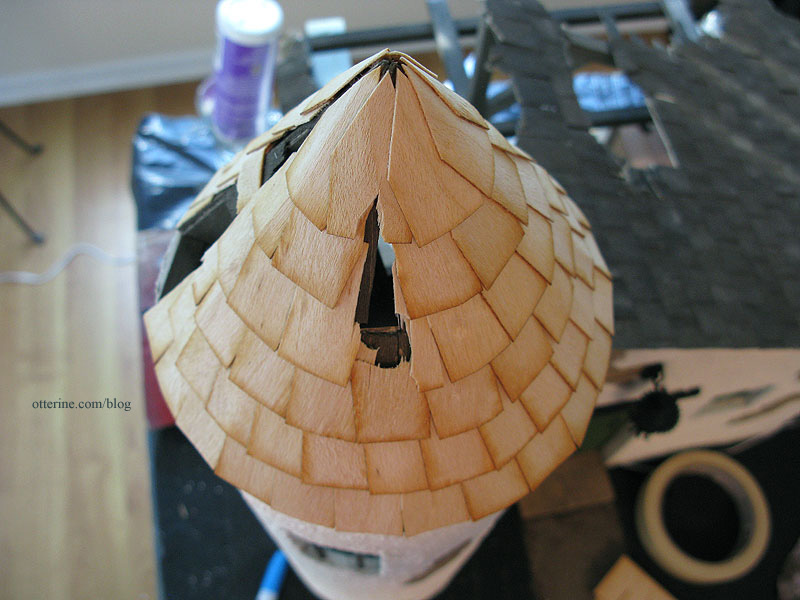
After the supports were formed, I added thin sheets of balsa, shown here after painting. The support system was one thing, but shingling a conical roof is another thing entirely. I used the same Greenleaf speed shingles, but I cut and applied them one at a time. With all the layers, the roof ended up being very stable, so I've left it removable.
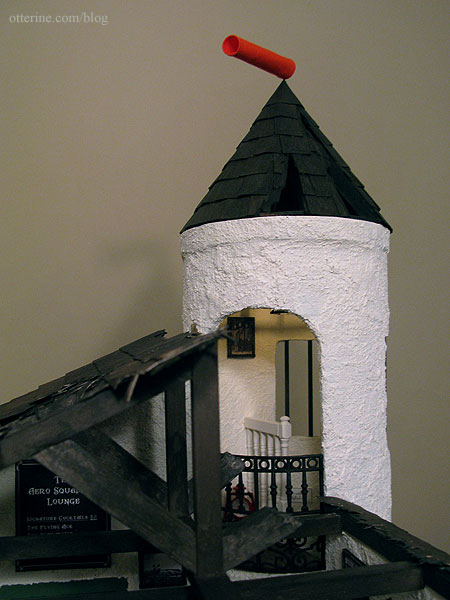
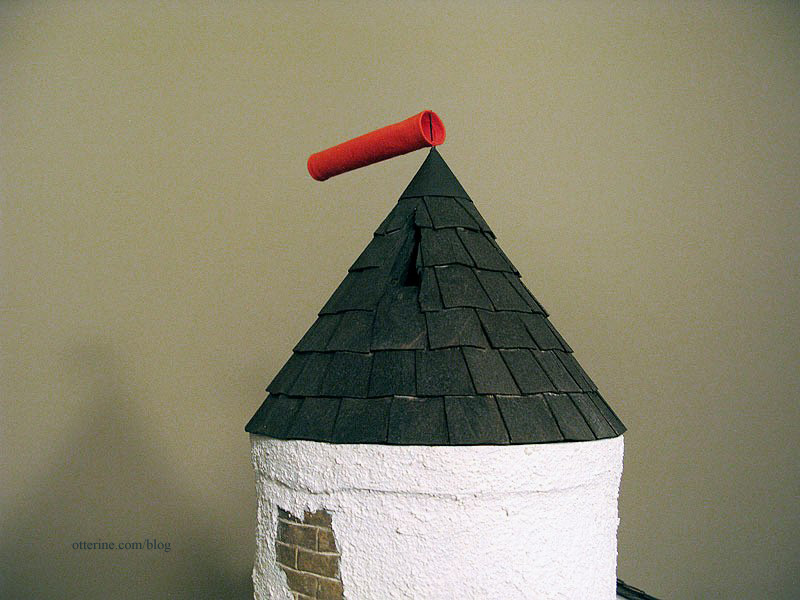
The cone cap is just a piece of heavy paper painted to match...and the windsock is a glued tube of orange cotton held in place with a head pin. Yes, it rotates, though it pretty much always falls back into the same place. :D
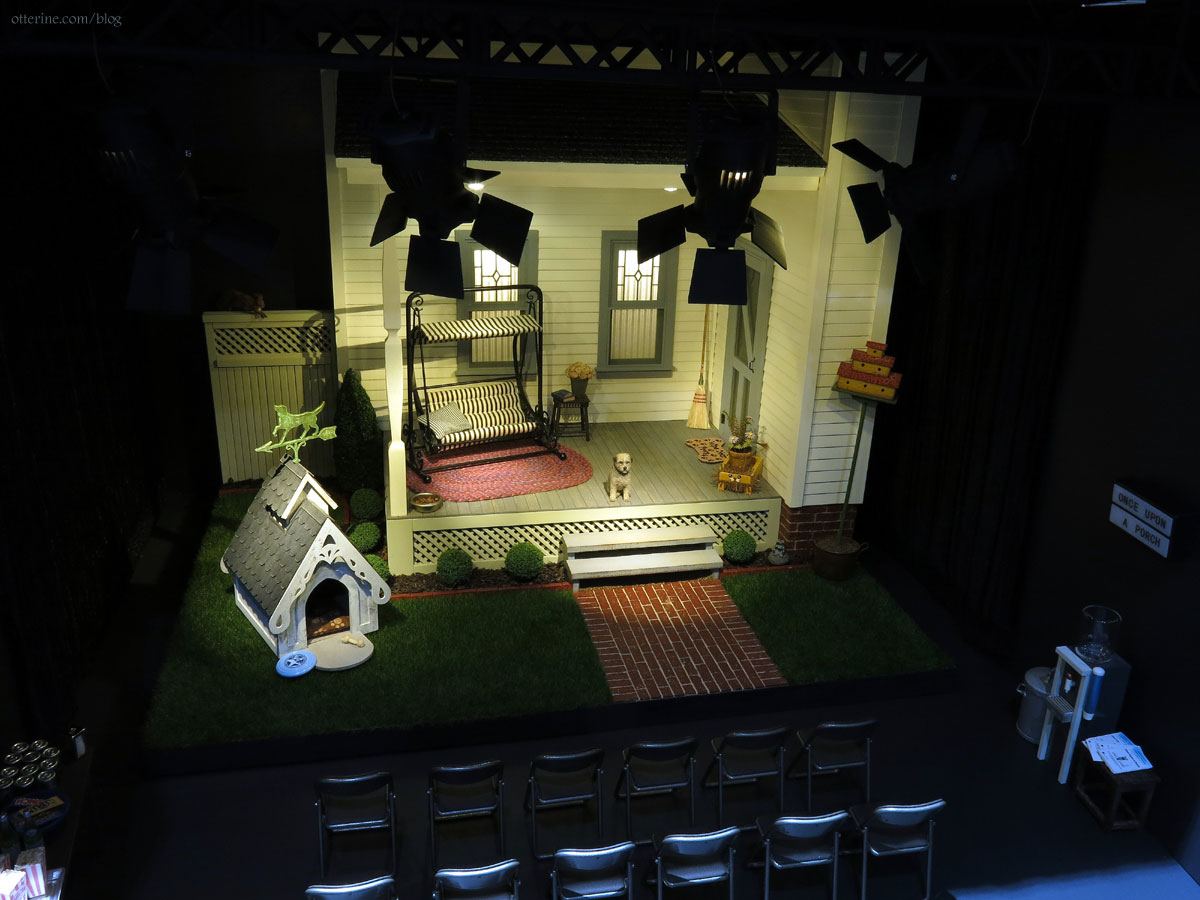
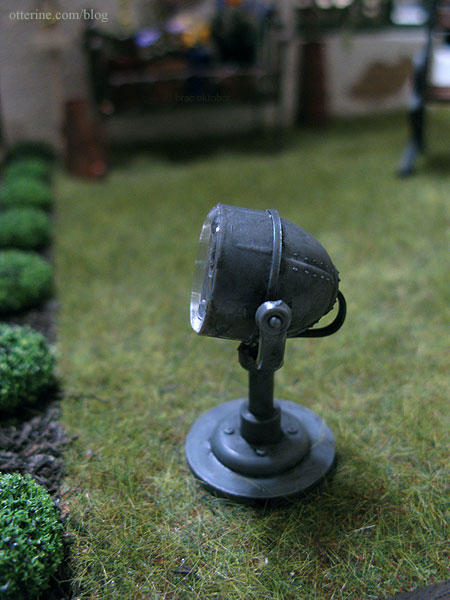
I found these fantastic Scene Master spotlights on amazon.com and instantly knew they would be perfect for lighting up the plane. They have a vintage industrial look about them that complements the plane and building. They are labeled multi-scale, and I think they work wonderfully in my scene. In the final layout, I used only one of the pair that were included in the package. I aged it with brown and black acrylic to remove the plastic sheen.
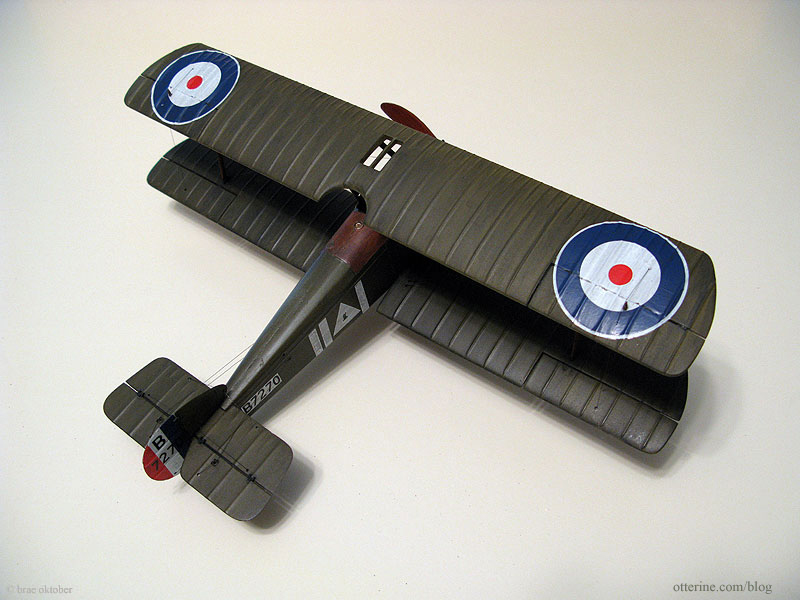
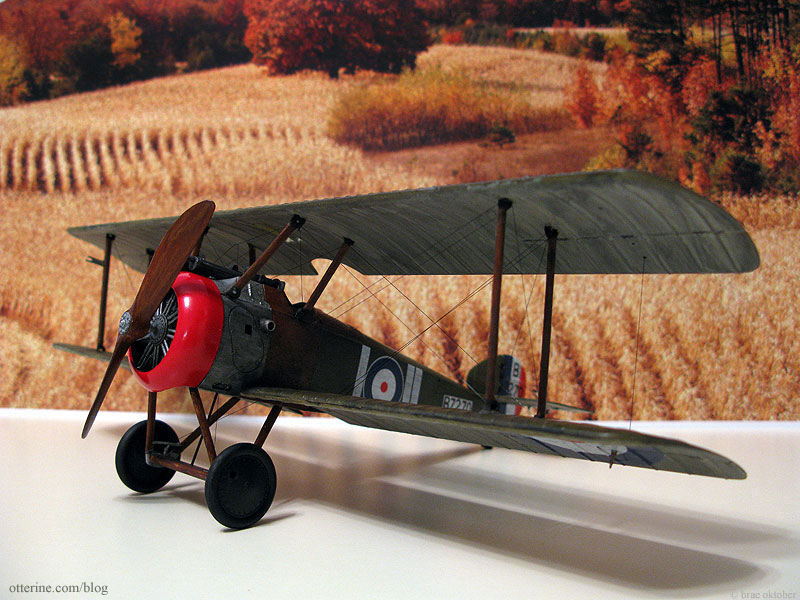
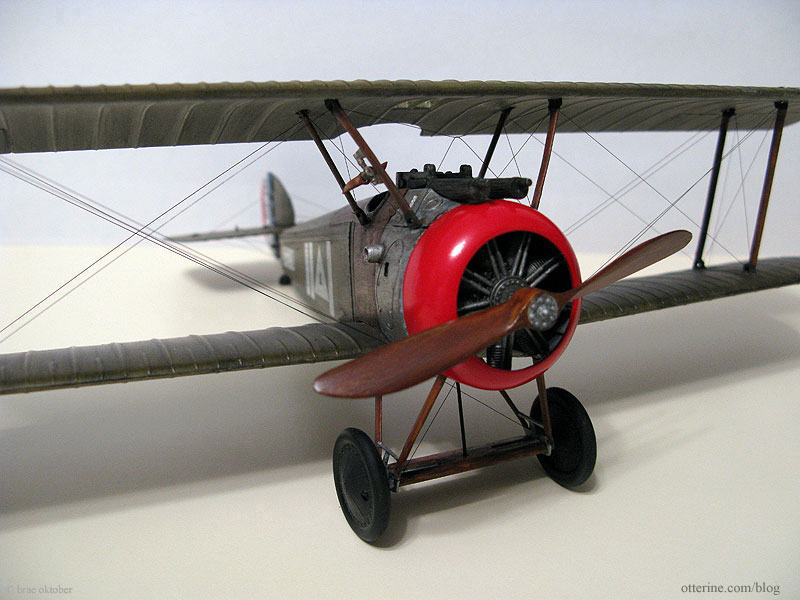
The most challenging part of the build had to be the 1:32 scale Sopwith Camel, built from a plastic kit by Academy.
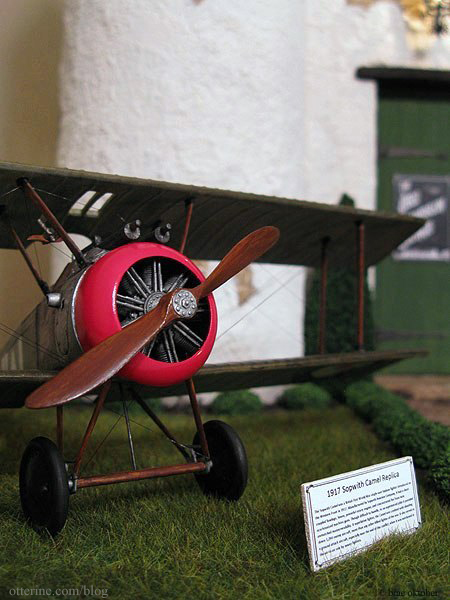
It's been a long time since I built a model car, and I've never built an airplane let alone one with rigging. I love the way it turned out!
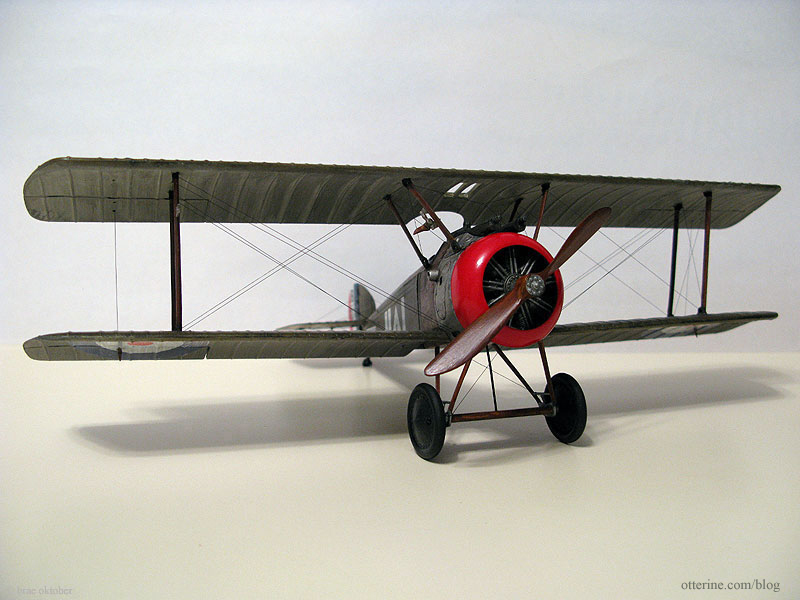
The shiny red nose turned out so well, I couldn't bring myself to age it or dirty it in any way.
The rest of the plane received a modest amount of wear and weathering.

The "wood" portions were easier to mimic than I thought they would be. When I read that you were to first paint the base color and then paint on the wood grain, I thought, "Riiiiiiiiiiiight." But, it works! :D I used a hand painted base coat of Testors Flat Light Tan followed by Testors Flat Military Brown, also hand painted and then wiped away with a paper towel. Maybe it's not fine woodgrain, but it is remarkably convincing.
Nothing brings a miniature build together quite like lights, but wiring a structure always has challenges. This build has its own particular challenges with removable pieces and exposed rafters. I have a full post on the wiring here.
------
For those of you in the U.S. who'd like to see one of these theme restaurants in real life, there are still a number of 94th Aero Squadron Restaurants in operation, namely in San Diego, Van Nuys, Miami and Columbus. The one near me in Wheeling, Illinois has since closed, which is a real shame. I spent a few birthdays there and even one New Year's Eve. It was an interesting restaurant and lounge with good food and wonderful artifacts and planes. Had it still been there, I would have taken some photos of my model in front of it. :D
The results are in! - The Aero Squadron Lounge takes third!!!
The results are in for the Greenleaf Dollhouses Spring Fling 2012 contest (the link its currently broken but may be restored so I am leaving it as is for now). I am so thrilled to have placed in the top three!
my entry - The Aero Squadron Lounge
What an amazing array of entries this year! They seem to get better every year. You can see the full gallery of entries here.
It came as no surprise to me that April won with her beautiful Asahi Tea House!! And, I loved Karin's Harvest Home, so perfect for this time of year. Congratulations to April and Karin as well!! :D
As always, I thank you for your kind comments and support for The Aero Squadron Lounge and my other projects! I'll post the usual pictorial recap soon. :]
Introducing....The Aero Squadron Lounge
My entry in the 2012 Greenleaf Dollhouses Annual Spring Fling is The Aero Squadron Lounge. To see a list of posts showing details on how I made things or what materials I used, as well as more pictures, click this link.
On the property of the local aviation museum sits The Aero Squadron Lounge, a WWI themed lounge modeled after a French farmhouse ruin. Outside is a replica 1917 Sopwith Camel aeroplane, and inside you will find a unique setting to enjoy a beverage and view the WWI and aviation memorabilia. Climb the tower for an aerial view of the Sopwith Camel and picturesque grounds. Stop in today and enjoy one of our signature cocktails: The Flying Ace, The Bombardier, The Tailgunner (limit two please) or The Barnstormer. Please don't feed the hens.
As you can see, this is a 360° build, with the removable fireplace being the remaining component of the bombed out back wall. This allowed me to include more inside while still maintaining a view of the inside. It's a difficult build to photograph and is best seen in person where you can walk around and peer into all the openings.
I made just about everything for this build myself, including the 1:32 scale Sopwith Camel, dogwood tree, flowers, hens, fireplace and furnishings. The things I purchased include the glass, plastic and metal items as well as the display cabinet, shrubs and lighting.
I will be doing the usual detailed recap posts in the coming weeks, but there are a few details I will share here in this post. Here's where the project started.
To start with, I added two inches to the height, width and depth of the original kit. To fill in the gaps, I used the wood cut from the side wall and the wood cut from the corners to allow access to the tower. So, the whole kit is indeed in there, it's just all jumbled around. :D
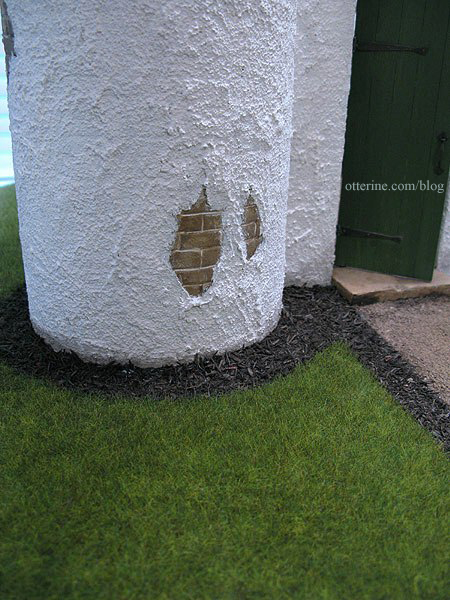
The outer walls and the lower portion of the greenhouse addition are pink builders foam. This stuff was awesome to work with. All of the outer walls were scored with a brick pattern, even though I planned to cover the exterior with stucco and leave only a few patches bare. The tower is covered with white styrofoam sheet also scored in a brick pattern.
I was glad I did this because you could still see the stone texture underneath the stucco where I spread it thinly. I love that extra push of realism. I used the leftover small front windows from Baxter Pointe Villa to make the front side window. The exterior color is Warm White by Americana. The green accents are Clover by Folk Art.
I couldn't believe how realistic the stone looked after painting.
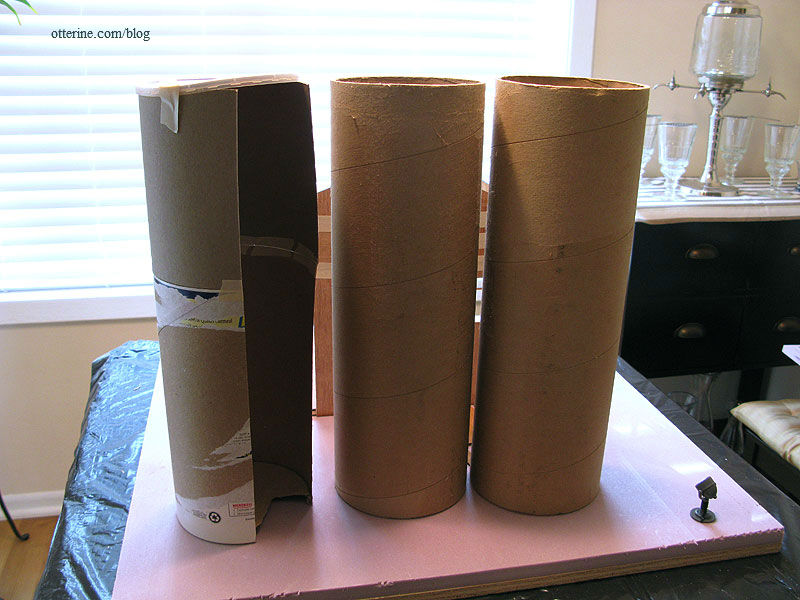
The tower was an interesting addition - as you can see I started with an oatmeal container. It ended up being too short and flimsy. The final tower is a Uline mailing tube. :D I put an ad on Freecycle looking for a 5-8" diameter mailing tube at least 24" tall. I had a reply within two hours and picked it up that evening. You should have seen their faces as I stood in their foyer wide-eyed with a huge grin and actually said, "Hooray," in a tiny sing-songy voice. Haaaaaaaa!!
The 31" tube was exactly twice the height I needed, so that gave me two attempts to get it right. I still have the second one left over.
The spiral stairs were my first major mathematical endeavor for the build. They are made from styrofoam. I'll post the full tutorial soon.
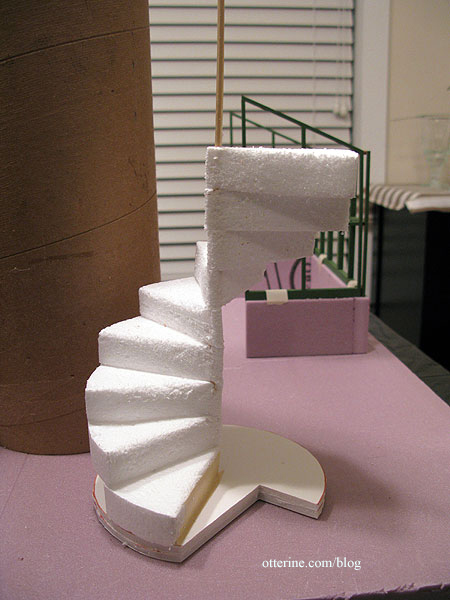
I am most proud of my metal railing, held in place with eyelets capped with jewelry findings. I used a liquor bottle to bend the railing to the proper shape. Tutorial to come....
The roof supports are balsa, some snapped to mimic broken rafters.
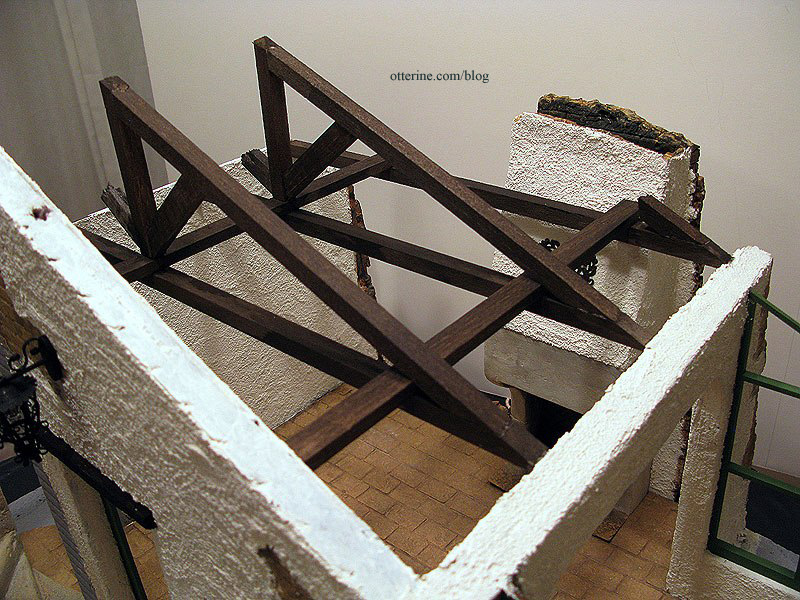
I covered those supports with cross boards cut from bass wood.
I stained the Greenleaf speed shingles prior to gluing them on since there were gaps in the boards and the unpainted side would show through. I clipped and snapped the shingles to follow the broken pattern of the boards underneath.
The tower roof was my second major foray into math. I found this forum thread on conical roof framing, which had exactly the reference photo I needed to help it click for me.
After the supports were formed, I added thin sheets of balsa, shown here after painting.
The support system was one thing, but shingling a conical roof is another thing entirely. I used the same Greenleaf speed shingles, but I cut and applied them one at a time. With all the layers, the roof ended up being very stable, so I've left it removable.
The cone cap is just a piece of heavy paper painted to match...and the windsock is a glued tube of orange cotton held in place with a head pin. Yes, it rotates, though it pretty much always falls back into the same place. :D
This was my first time landscaping in earnest. I started with a sheet of builders foam for the base, and used a carving knife to slope the edges. The dogwood tree has been detailed previously, and it had its own raised base. The grass is Woodland Meadow Field Grass by Heki, from Scenery Express. It's so realistic! The mulch is from A Little More in Miniatures, and the gravel path is Woodland Scenics Ballast leftover from Baslow Ranch.
The shrubs and smaller trees are Squeeze Me trees from Model Builders Supply. While I was awaiting their arrival, I was reduced to using aluminum foil stand-ins. ;D
I had also originally planned to have the plane and dogwood trees switched, but when I did the layout, it just looked and fit better this way. The tree blocked too much of the tower, and the plane was lost in the larger space on the right.
Let's not forget the hens! The breed of hens I've made are Faverolles, a French hen suggested by Teddi. I have a standing hen not yet completed, but I will add her later. :D
I've used a few of the eggs I made, too.
The henhouse is just what was needed to fill the open area on this side.
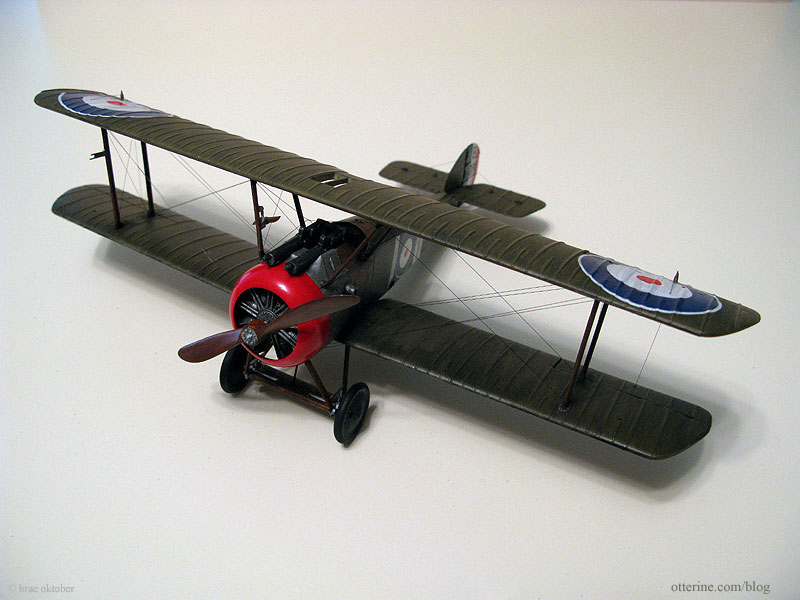
The most challenging part of the build had to be the 1:32 scale Sopwith Camel, built from a plastic kit by Academy.
It's been a long time since I built a model car, and I've never built an airplane let alone one with rigging. I love the way it turned out! Click here for the full post and more photos of the Sopwith Camel build.
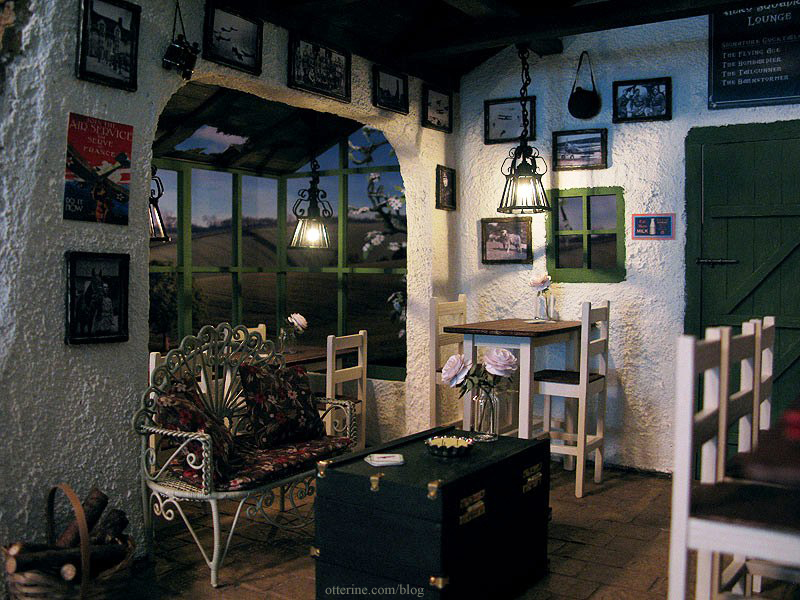
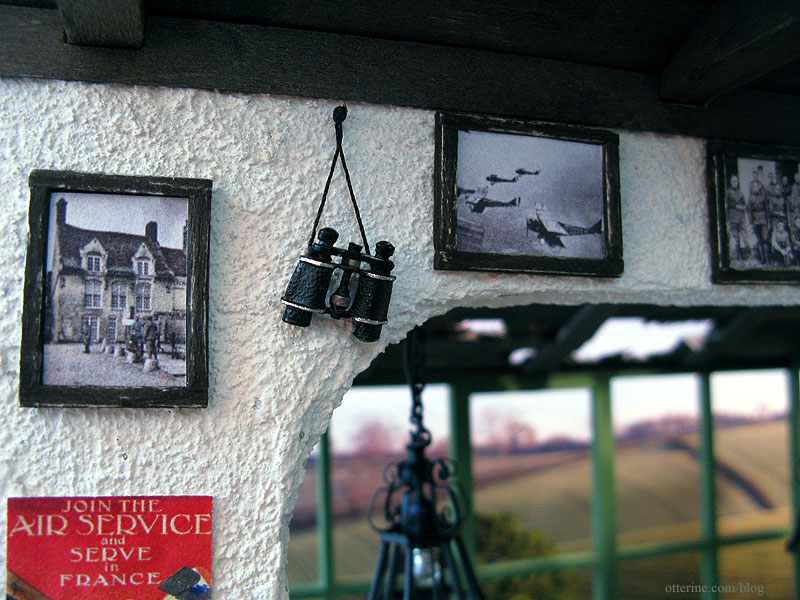
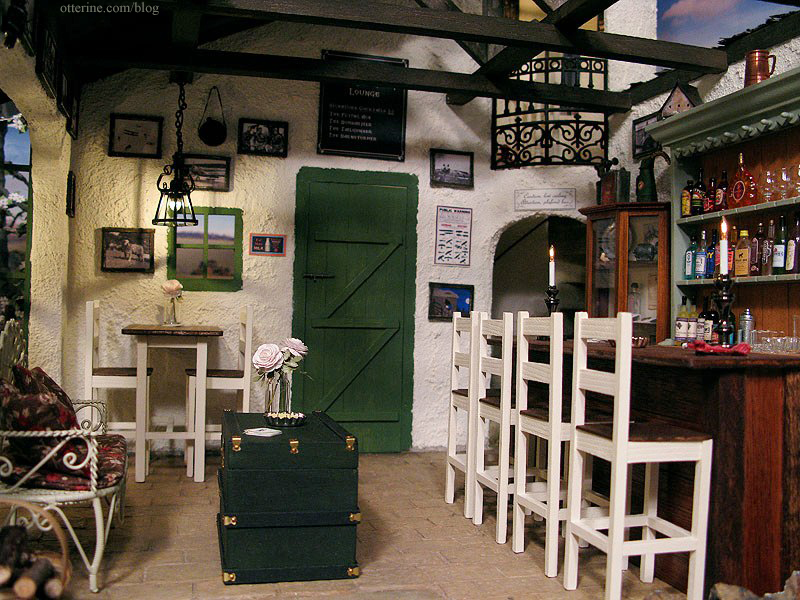
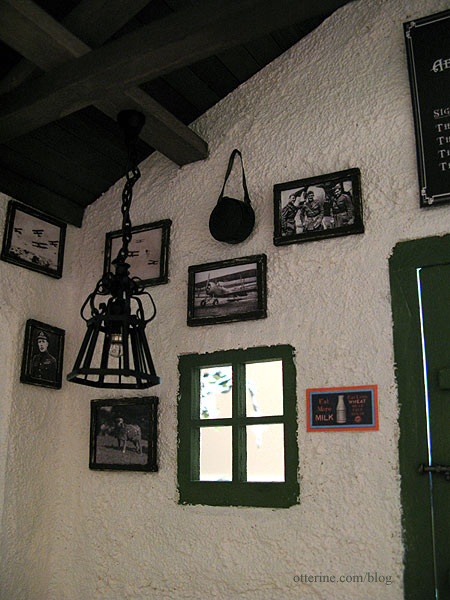
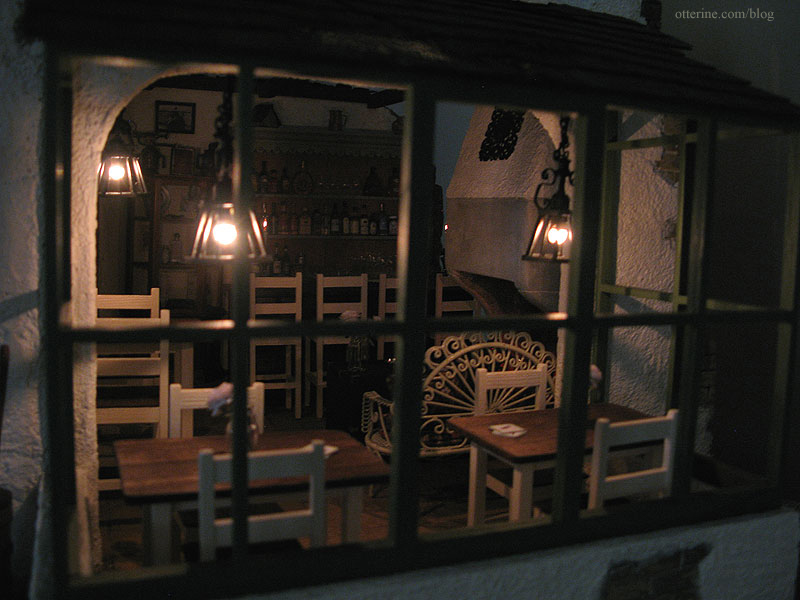
For the interior, I used all WWI photographs found online and built matchstick frames for each and every one of them. There's even one of Snoopy in WWI France from It's the Great Pumpkin, Charlie Brown. I've also included a recruiting poster, an aircraft warning poster, a war bonds poster with the RAF insignia, and a flyer reminding you to eat more eggs and milk...to save the meat for the soldiers.
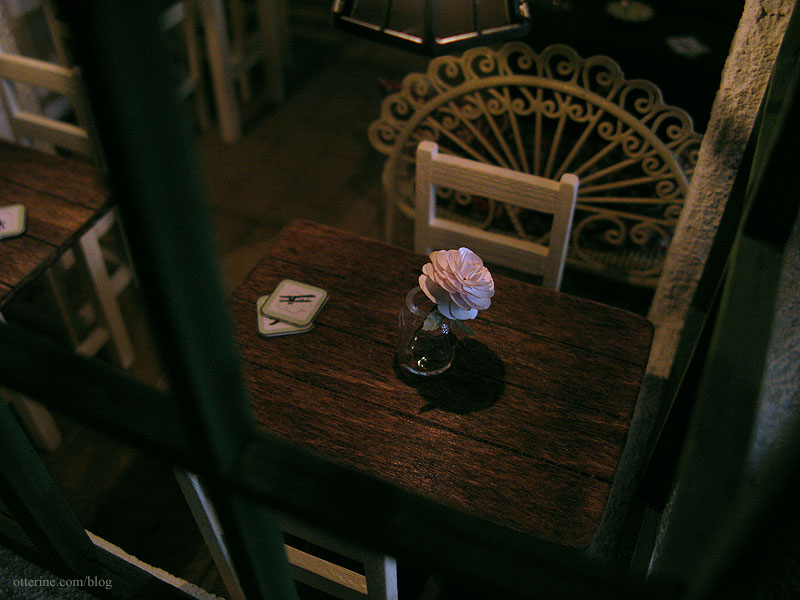
The tables and chairs are made from patterns in the book Finishing Touches by Jane Harrop, though I modified the measurements for the pub chairs. The metal settee was painted and upholstered. The trunk is a kit by Catland, though I didn't use the artwork included. I also added brass hinges and brad detailing.
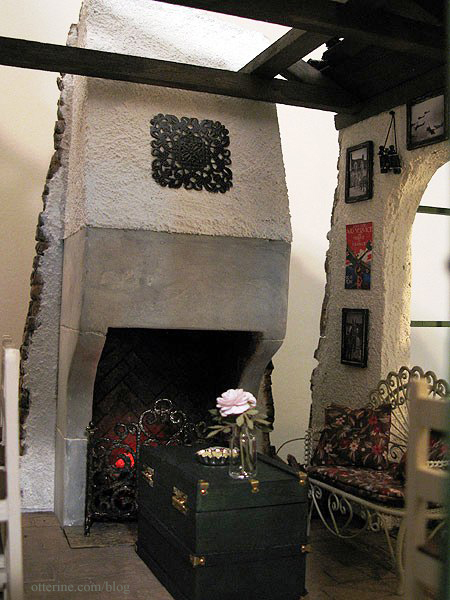
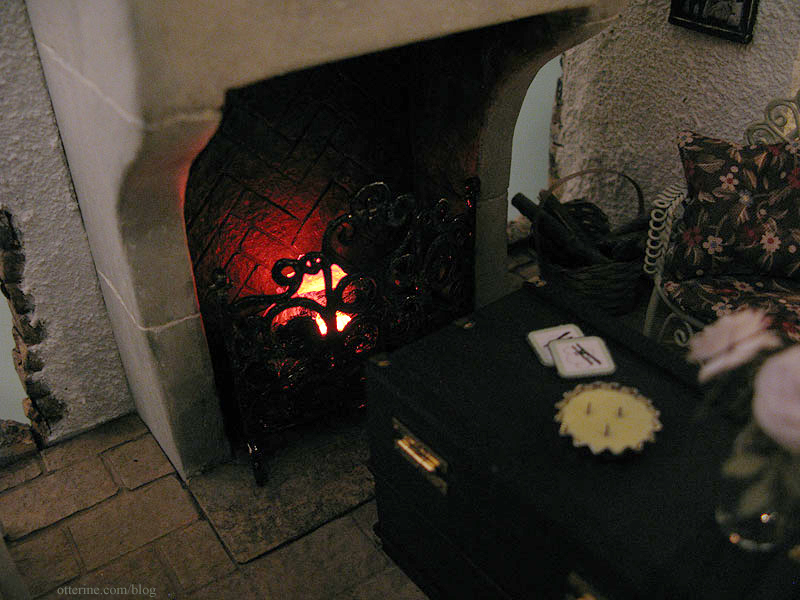
After all the sneak peeks of the fireplace, it's not that easily seen in the final layout.
But, I love it and think it adds so much, and yes, it's removable. :D
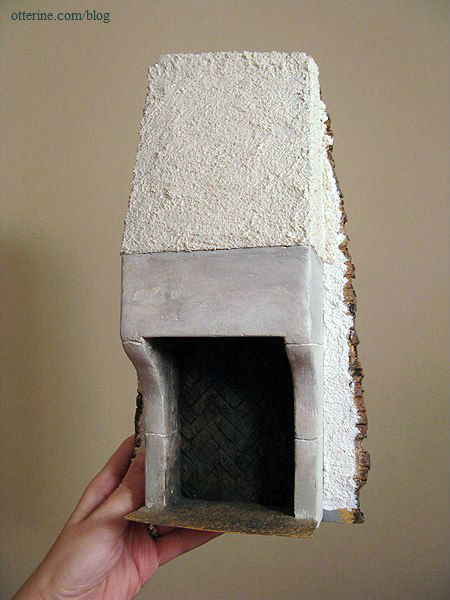
I made the fireplace holder in the floor look like steps for when the fireplace is removed. The wiring for the fire logs has a recess to curl out of sight as well.
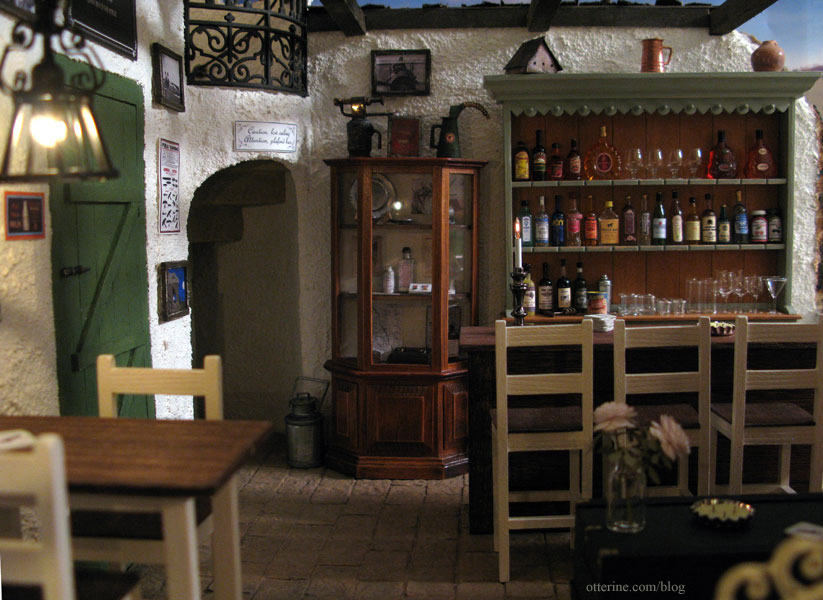
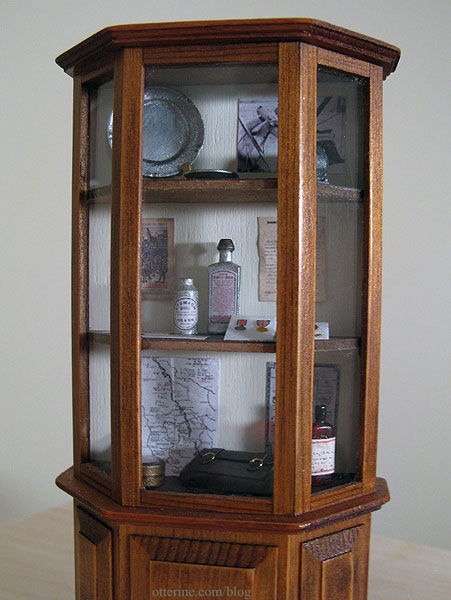
The vintage display case I bought has all WWI and aviation memorabilia. The metal, plastic and leather goods were purchased, though I added labels to the metal bottles and aged the plastic compass.
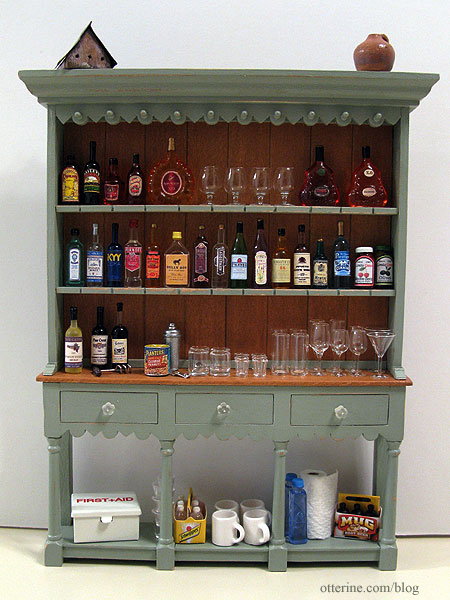
The reproduction farmhouse hutch I made is now part of the bar! :D Did you see that coming?
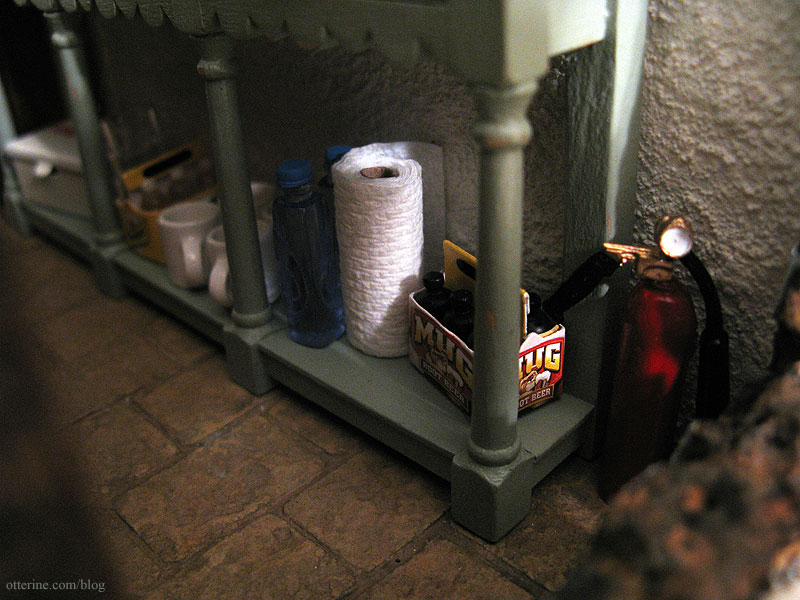
I purchased some of the bottles, and Keli sent me some. I made a number of the labels myself from images found online. The glassware is all from The Little Dollhouse Company and is by far the priciest part of the build but looks so realistic. I have to point out the fab paper towels from Lyssa!
The bar itself is also a scratch build using leftover wood from Baxter Pointe Villa.
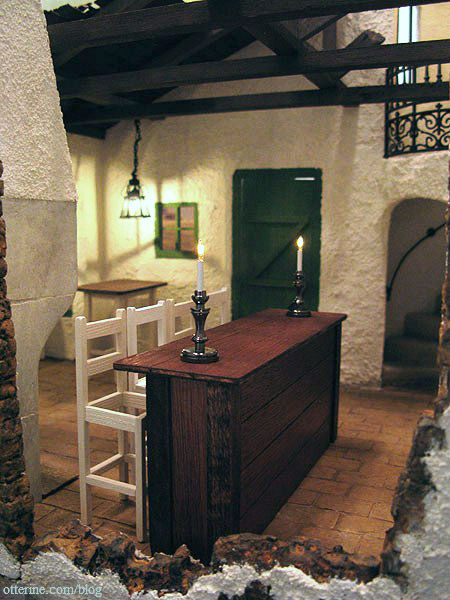
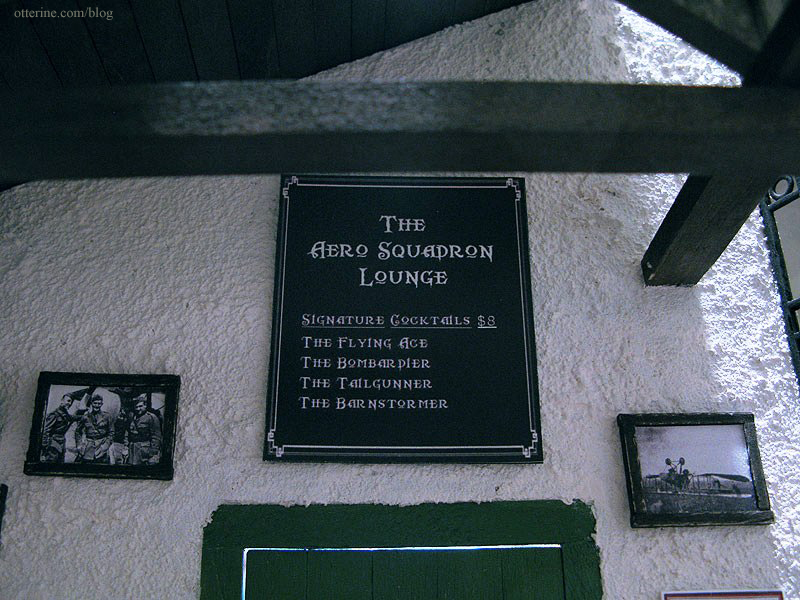
There's a menu board above the front door listing the signature cocktails, though our bartenders can make a lot of different drinks.
View in through the windows. :D The greenhouse addition is actually an area for café tables.
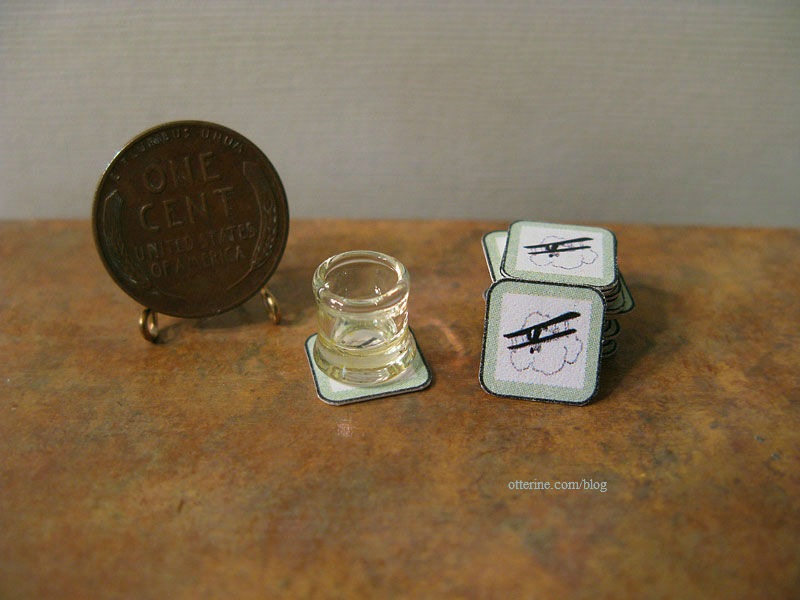
Many of the interior details are lost in the overview shots, like these coasters. These were made in Word from a biplane image from The Graphics Fairy. They were printed on Avery labels, stuck to cardstock and then cut out with scissors.
Whew! A lot more individual details to share, but I'll leave it here for now. It's almost closing time besides. Check back for more posts on the details and how-to posts!
In the meantime, I have a lot of people to thank. First, a huge thanks to mom, Lyssa, Jeannette and Erica for all their support, opinions and help along the way.
Thank you to Kathie B, Norma Jeane, April and Dave for seeing the Lounge in person and keeping it under wraps! ;D
Thank you to Carole for helping me avoid nonsense in French translation. It is thanks to her that we are aware of the low ceiling and not taking a good long look at our heads. :O
Thank you to Fran for her expertise on dogwood trees, to Teddi for her help with the selection of appropriate French hens and to Keli for all the booze...er...um, yeah. ;]
And, a huge thank you to everyone who has commented and encouraged me throughout this build; there are too many to list! I hope the suspense was worth it...
I really enjoyed this build. Cheers! :]
------
For those of you in the U.S. who'd like to see one of these theme restaurants in real life, there are still a number of 94th Aero Squadron Restaurants in operation, namely in San Diego, Van Nuys, Miami and Columbus. The one near me in Wheeling, Illinois has since closed, which is a real shame. I spent a few birthdays there and even one New Year's Eve. It was an interesting restaurant and lounge with good food and wonderful artifacts and planes. Had it still been there, I would have taken some photos of my model in front of it. :D